Customerlabs CDP Documentation
Configuring Success Scenarios
A “Success Scenario” in No-Code Event Tracker denotes the success message/page displayed after a particular process is completed in your website. For example, A thank you page is shown when someone submits a form. Here, the thank you page is the success scenario of that particular event.

Setting up a success scenario for your events is optional, however, specifying a success scenario will ensure that your event is tracked properly. You can also track multiple success scenarios if you redirect to different pages. (This will come in handy if you have a multilingual website). Here’s an example event to demonstrate how you can set up a success scenario.
Static Text
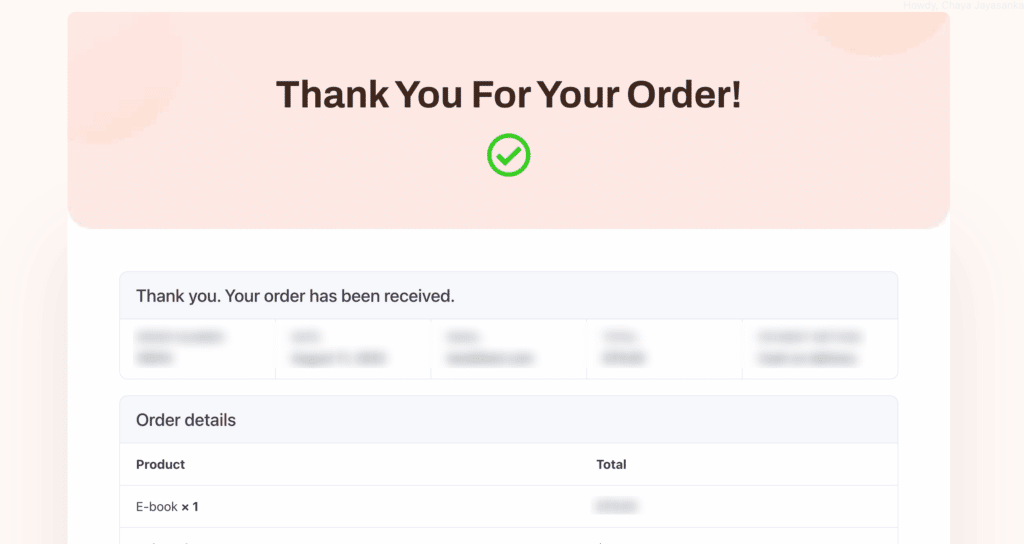
1. Select static text, choose the picker & go to the website success page (since we are considering a checkout event, here the success page is a “Thank You for your order” confirmation message)
2. Select the message as shown below,

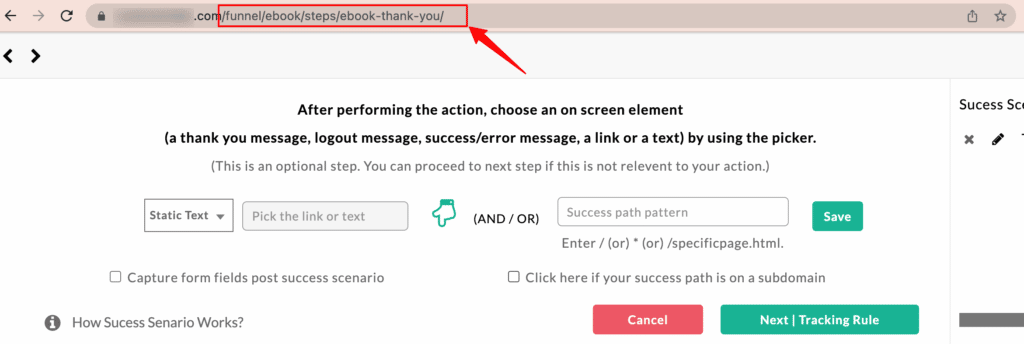
3. For the next field, you will have to copy the link of your success page and paste it there. You can leave your domain and copy the link of the page as shown below,

4. Your information will be updated as shown below,

5. Click “Save”
6. You can view your saved success scenario on the right.

Dynamic Text
Dynamic texts can be used in success scenarios when the success messages in certain cases differ. An instance where dynamic texts can come in handy is explained below.

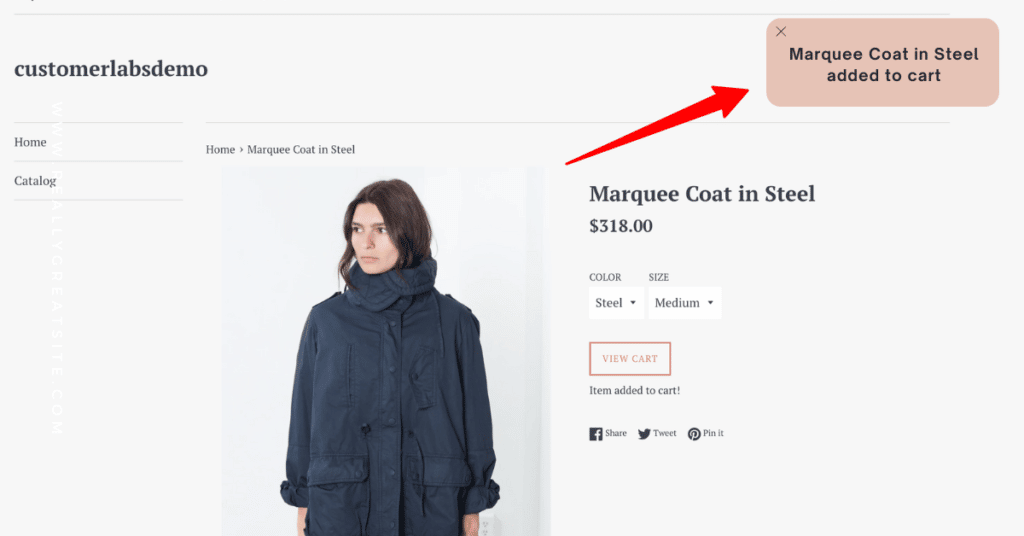
1. Your store might show a notification that a product has been added to cart as shown below,

2. This success message differs for each and every product. To track this success scenario choose “Dynamic Text”
3. After selecting “Dynamic Text”, enter the following information in the field in the exact format – |*your product*| *text that remains constant*
4. Click “Save” and then save your event
If you’re still facing issues, get in touch with our team by clicking on the chat icon on the lower right corner. We will set up all your events for free 🙂


