Setting up Conversions API for Clickfunnels properly is tedious, and most marketers using Clickfunnels know the pain. Some are not aware if their existing Clickfunnels integration with Meta Conversions API is the best way and if it is working efficiently. Plus, deduplication is an issue with Clickfunnels as some of the events are deleted by Meta considering them duplicates even when they are not.
Note: Clickfunnels direct Conversions API integration does not have the option to check all the data that is sent to Meta’s server, leaving the marketers blindsided.
For better ad performance on Facebook for your Clickfunnels, you need to implement Conversions API accurately to avoid audience signal loss.
The Need For Conversions API
The data privacy laws and updates, especially the iOS14.5+ have caused gaps in the signals that Meta collects. The entire conversion tracking and event tracking took a hit after the data privacy updates kicked in (iOS14.5, third-party browser cookies deprecated). GDPR also impacted Meta’s way of collecting and storing the data.
As Meta was unable to collect the user event data from the website directly, it could not personalize the ad experience to the users. Marketers were unsure how to fix their retargeting efforts amidst these data privacy updates.
Meta’s Secret Sauce, CAPI
To mitigate the signal loss caused by the data privacy updates, Meta launched Conversions API (CAPI). CAPI is a powerful tool that allows marketers to send their first-party data directly from the server side.
With Conversions API, you can send all the events from your Clickfunnels website to Meta without signal loss and send your funnel data directly to Meta. The third-party cookie crumble did not affect the ad personalization when Clickfunnel owners used Conversions API.
In these lines, Clickfunnels has released a direct integration with Meta for setting up Conversions API. But there are a certain problems with the direct integration of Clickfunnels with Meta.
Problems with Clickfunnels Conversions API for Meta
Even though Clickfunnels launched its own direct Conversions API, there are multiple issues with that. These issues are causing frustration among marketers. Plus, the setup is complex, and marketers are unsure what data is sent to Meta through the CAPI setup by Clickfunnels.
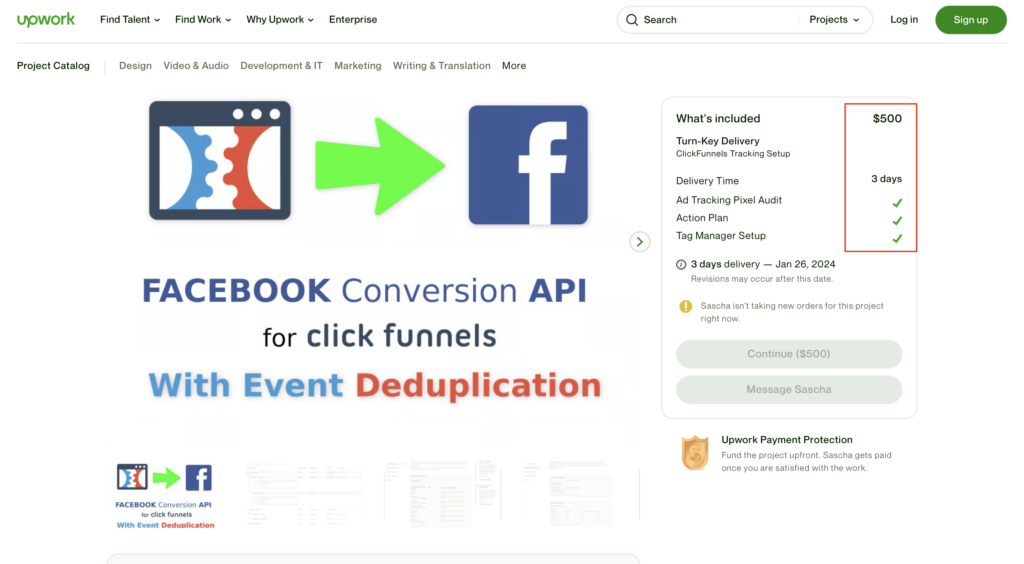
The below UpWork post is proof of how desperate Clickfunnel owners will be to set up their Conversions API.

Event Tracking Issues
Clickfunnels does not offer tracking of all the events in your funnel. It offers event tracking only for
- Lead
- Purchase
- Page view
- Add to cart
- Initiate checkout
- Complete registration
- Customize product
- Submit application
Now, if you want to track a certain event, it will be nearly impossible to track using the direct Conversions API of Clickfunnels. But not to worry, there is a solution that helps you track any custom event in your Clickfunnels.
Deduplication, Bane For Clickfunnels CAPI
Meta deduplicates the redundant events sent through Conversions API and Pixel. How it works? – Meta assigns every event a particular ID. When the same event is sent through pixel and CAPI, it identifies using that ID and deletes the event sent through Conversions API. Meta retains the browser pixel-collected event. This entire process is deduplication. Deduplication is done to not count the same event twice.
However, this causes a problem with Clickfunnels. It deletes even the unique event thinking it to be a duplicate event as it deduplicates by using fbp or external ID.
For example, if one of your existing customers purchased an OTO (one-time-offer) that has the same or different price or an upsell/cross-sell. When you send this data to Meta through CAPI and Pixel, Meta considers it as a copy of the main purchase and deletes the event.
Problem With Pixel Setup
The major problem every marketer faces while setting up Clickfunnels is the domain. You cannot use your Clickfunnels subdomains to set up pixel tracking across your website. Plus, you cannot add multiple pixels to your domain even if you use a custom domain.
To overcome the above problems, you need to find a tool like CustomerLabs 1PD Ops that helps you track all your events and conversions on Clickfunnel with just a few clicks and sends the data to Meta through Conversions API without any data loss.
Alternative way to setup Conversions API for Clickfunnels
Hiring a developer on UpWork or elsewhere might help you setup Conversions API for Clickfunnels. However, the time taken and the price might seem too high for small businesses to afford. With CustomerLabs 1PD Ops, you not only get Conversions API setup with a few clicks, but also improve your data quality by setting up CAPI in no more than a few hours!
Below is the post I found on UpWork which says they charge $500 for 3 conversion events and take upto 3 days.


Want to pay $500 just for 3 conversions? Or do you want to set up Conversions API for your Clickfunnels with just a few clicks all by yourself?
Why pay $500 when you can easily set up Conversions API for Clickfunnels with just a few clicks?
How to implement CAPI for Clickfunnels using CustomerLabs 1PD Ops
Setting up Conversions API is very easy with CustomerLabs. CustomerLabs 1PD Ops is the official Meta-recognized partner for setting up Conversions API. So, do not worry. Once you sign up for CustomerLabs, navigate to destinations, click on Facebook, authenticate your Facebook Ads account, follow a few steps, and tada. Your CAPI is set up.
With a simple toggle on and off you can control how you send the data – on the server-side or the browser side. You can send the audience data and set the parameters for Advantage+ Shopping Campaigns directly in CustomerLabs. You can refer to the full documentation here.
Now, how do you set up event tracking in your Clickfunnels?
Funnel Tracking in Clickfunnels
You can track all the events in your Clickfunnels using CustomerLabs 1PD Ops. Track your complete funnel without any gap in the data and stitch the entire user journey throughout the funnel.
Click on sources in CustomerLabs App > choose Custom Source > Name your source as Clickfunnels

Next, copy the Workflow URL shown and paste it into your Clickfunnels.
In your Clickfunnels, go to the funnel you want to track > settings > scroll to find webhooks > click Manage Your Funnel Webhooks.
Click the new webhook and paste the URL you copied from CustomerLabs. Ensure all the other default settings are intact as you need. Click Create funnel webhook.
Now, return to the CustomerLabs App, set up the workflow, and follow the steps to finish your funnel tracking setup.
That’s it. All your funnels are being tracked, and the data will be sent without loss and intact in a streamlined manner to CustomerLabs and from there to Meta.
You can segment your funnel audience in any manner you want and activate them by syncing them with a button to Meta.
To know more, talk to our experts who guide you and help you out without any consultation fee.


