In one of the developer documents dated July 2018, Facebook mentions that it released an automatic version of advanced matching for its pixel. The advanced matching feature is a very important feature that helps advertisers to enhance their ad campaign performance. Especially after the iOS14+ updates and the other data privacy regulations, it becomes difficult for Facebook to collect data efficiently.
Let’s delve to know everything about it, and how to maximize your ad campaign performance.
Advanced Matching For Facebook Pixel
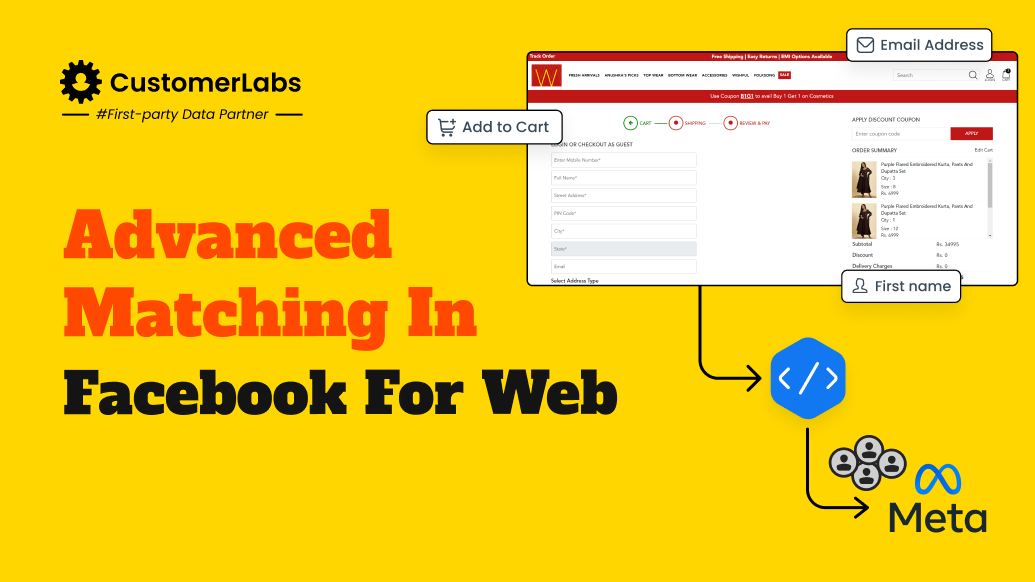
Advanced matching in Facebook finds the fields on the form and other places that collect name, email address, phone number, and other information, to send back to Meta’s server from the browser. This feature is a boon for marketers who are looking to increase their ad campaign performance.
Facebook’s advanced matching works only when the pixel is set up correctly. Pixel tracks all the user behavior across the website and syncs it with Meta’s ad platform. However, pixel tracking has its own limitations. When the user logs out or when the browser cookies are cleared or blocked, there is a loss in the signals that Meta’s pixel collects and sends to the Meta Ad platform.

Now that you understand the basics of advanced matching, let’s explore how it works behind the scenes to deliver better results.
How Does Advanced Matching Work?
Advanced Matching captures additional data from the interactions (or events) happening on your website and securely sends it to Facebook through a process called hashing, which encrypts the first-party data to protect user privacy.
Using this matched data, you can identify your ideal audience as well as potential customers who share similar traits. It also helps you reach out to people who visited your site but didn’t complete a purchase.
For instance:
- If some users browse your store but don’t buy anything, you can retarget them on Facebook with ads.
- You can analyse patterns like the age groups or locations of your most loyal customers and direct your campaigns to those demographics.
- Additionally, you can track whether your ads successfully convert viewers into buyers.
Hence, advanced matching bridges the data from your website with Facebook’s user base, helping you create better-optimised and more effective ad campaigns. It’s a powerful tool to ensure your efforts align with the behaviours and preferences of your audience.
Understanding how it works is just the start. Let’s explore how advanced matching translates into real-world improvements for your ad campaigns.
How Does Advanced Matching Help Increase Ad Campaign Performance?
Facebook’s pixel tracks all the user behavior and sends it to Meta along with the event details. For Facebook to match those events with the users, it becomes essential for the pixel to collect highly important details. Meta can match the users in the account center exactly using deterministic matching when it has certain parameters.
For higher event match quality, by matching the users in its account center, Meta needs a hashed email address (highest priority) followed by a hashed phone number and others.
Meta’s pixel does not collect the email address and phone number directly. Whereas, when you turn on automatic advanced matching, Meta’s pixel will automatically identify any fields and sources that contain email addresses, first names, and last names. This identified information is layered on the website visitor’s actions (events) and hashed in the user’s browser.
This information is used to identify the user accurately with the ad they clicked and the action they took. This helps not only with retargeting but also with attributing the results accurately.
Note: Advanced matching also assures users of their privacy as the hashed information is discarded after the user is identified within its servers.
So, when Meta is able to match the users accurately, it
- Increases the custom audience size,
- Better attribution for conversions
- Reduce cost per conversion

Now that we’ve seen the impact it can have, let’s break down the two main types of Advanced Matching and when to use each.
Types Of Advanced Matching
Meta offers two types of advanced matching:
- Automatic Advanced Matching
- Manual Advanced Matching
While the automatic way is just a toggle on, the manual one requires the help of a developer to modify the pixel code in the website.
Automatic Advanced Matching
Automatic way is easy to set up and get things started. All you have to do is turn on the toggle.

Before turning it on, here are certain prerequisites:
- Pixel code is present across all the web pages where people enter information
- iFrame is not used
- IMG pixel is not used
- Business is not on the restricted list
You cannot use automatic method if your business falls under any of the following verticals:
- Banking,
- Lending,
- Financial services,
- Insurance,
- Pharmaceuticals
- Health
How to set up automatic advanced matching?
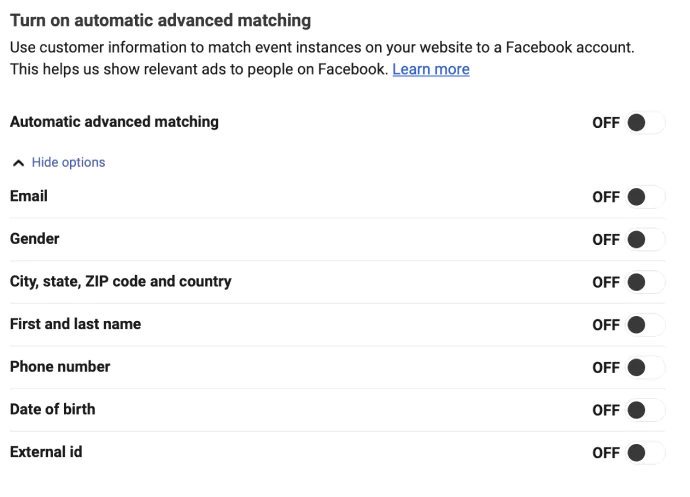
From the Ads Manager home, navigate to Event Manager> data sources > Choose the pixel for which you want to set up automatic method. Go to settings, scroll down to find ‘automatic advanced matching’, and toggle on. From the drop-down of ‘show customer information parameters’, choose the parameters you want Meta to collect.
Email and phone number are of the highest priority, and therefore, need to be toggled on.
Once the required parameters are toggled on, wait 48 hours to see the results in the events manager in the Meta Ads manager.
Manual Advanced Matching
To implement advanced matching manually, you need to have access to your website code. Ideally, to ensure things do not go the wrong way, you need a developer in place to set it up manually.
How to set up advanced matching manually?
You need to insert the pixel fbq function call as a parameter in your website code. Push the visitor data and the parameters as a JSON to Meta.
Just replace the Pixel ID with your Pixel ID in the below code.
fbq('init', 'Pixel ID', {
  em: '[email protected]',     //Values will be hashed automatically by the pixel using SHA-256
  fn: 'first_name',
  ln: 'last_name'
  ...
});
However, if you are already hashing the user information with SHA-256, you can use the IMG tag to pass these values to Meta. Below is the example of sending the user data hashed using the <img> tag
Just change the PIXEL ID to your pixel ID in the below code.
<img height="1" width="1" style="display:none"
src="https://www.facebook.com/tr/?id=PIXEL_ID&ev=Purchase
  &ud[em]=c14cd559b803e418c494bd2c45bfa2a4ec14e61109e9da36e9612513131bf51d
  &ud[fn]=cbd612009e454a648e8b3f0e55079e338e7a14cb1d960a23932d35a9ea9dd496
  &ud[ln]=6ddc5831fc6867d233a9770608c24632d2454a151a37fca3281ec33421eeea8a
  &cd[value]=500.00
  &cd[currency]=USD" />
To learn more about the manual setup of advanced matching, read this developers article on Facebook or simply contact our experts to know.
Now, let’s take a closer look at how the automatic version works behind the scenes to improve your results.
How to Set Up Automatic Advanced Matching in Meta Events Manager
If you want to enable advanced matching for your website or app but cannot edit the code, you can use the automatic advanced matching feature. Follow these step-by-step instructions based on your platform.
Before you begin, ensure the following before setting up automatic advanced matching:
- Your website includes form fields that collect data such as:
- Email address
- Phone number
- First name, surname
- Town/city, county/region, country, postcode
- Gender
- The Meta Pixel is placed on web pages where users are likely to enter this information.
- Your Pixel is not in an iframe.
- You are not using an IMG pixel.
- Your business is not categorised in a restricted vertical (e.g., banking, financial services, insurance, pharmaceuticals).
Note: Businesses in restricted verticals may see a message in Meta Events Manager indicating that they cannot use automatic advanced matching. Examples of restricted verticals include industries such as banking, financial services, insurance, pharmaceuticals, and health. These businesses must use manual advanced matching.
Steps to Set Up Automatic Advanced Matching
1. Access Events Manager
- Open Meta Events Manager.
- Click the Data sources icon on the left-hand side of the page.
2. Select Your Data Source
- Choose the data source by name and ID that you want to set up for advanced matching.
3. Configure Automatic Advanced Matching
- Go to the Settings tab.
- Scroll to the Automatic Advanced Matching section.
- Toggle the switch to ON.
4. Enable Customer Information Parameters
- Click on Show customer information parameters.
- Toggle ON the parameters you want to share, such as:
- Phone number
- Any other relevant fields for your business.
5. Complete the Setup
- Save your changes.
- Allow up to 48 hours for results to start appearing in Meta Events Manager.
Note:
- Sharing email and phone numbers is recommended for optimal performance.
- If automatic advanced matching is unavailable for your setup (e.g., due to restricted vertical categorisation or technical limitations), consider using manual advanced matching as an alternative.
By following these steps, you can successfully set up automatic advanced matching to enhance your ad targeting and audience insights.
Looking to optimize your Advanced Matching setup in Facebook for the web? CustomerLabs makes it easy to collect, unify, and activate your customer data seamlessly, so you can enhance targeting and drive better ad results.
Setting it up is one thing, but making sure it’s done right is another. Here are some best practices to help you get the most out of Advanced Matching.
Best Practices For Advanced Matching On Facebook
If you cannot afford developer support, it is better to directly choose automatic advanced matching. However, using the Conversions API of CustomerLabs 1PD Ops, you can eliminate the hassle of setting up event tracking across your website without signal loss.
Pixel Across All Pages
Ensure to have the Meta pixel installed across all the web pages, especially those where the visitors enter their personal details such as first name, last name, email address, phone number, city, country, ZIP codes, or gender.
For Restricted Business Verticals
If your business is one of the restricted businesses, automatic advanced matching does not work. To mitigate signal loss when your business is in a restricted vertical, the ideal way would be Conversions API + Manual Advanced Matching + Automatic Advanced Matching.
For iFrame
Automatic method does not work for iframe. If your pixel is set up in an iframe, manual set up is the best.
For IMG Pixel
If you are using an IMG pixel <img>, automatic advanced matching will not work. Therefore, you have to set it up manually to send all the parameters to Meta.
Manual Advanced Matching + Automatic Advanced Matching + Conversions API
Facebook reported, using automatic method coupled with manual is a better setup. Both manual and automatic advanced matching on Facebook work differently and therefore, the combo helps you drive maximum performance.
The best setup, according to Meta’s Signals playbook, is
Conversions API + Manual Advanced Matching + Automatic Advanced Matching
Optimising Automatic Advanced Matching
- Ensure your website has form fields where visitors can provide relevant details like email, phone number, or address.
- Place the Meta Pixel on web pages where people are most likely to enter these details, such as checkout pages or signup forms.
Conversions API set up using CustomerLabs 1PD Ops sends the data on the server-side to Meta without signal loss. The manual advanced matching will send all the details from the page where the pixel is set up. The automatic advanced matching will automatically identify the fields on the website where first name, last name, and email address are present.
Conclusion
Facebook’s advanced matching for its pixel is a valuable tool for marketers, especially after the iOS14+ and the other data privacy updates. It is a treasure that helps Meta match the users with the event information it receives through its pixel. The advanced matching, in no doubt, results in better custom audience match rate, reduced cost per conversion and better attribution.
The personal information is collected in a privacy-centric way to offer personalized retargeting to the users. This is one of the best ways to preserve user’s privacy while offering personalized ad experience.
Conversions API, automatic and manual advanced matching together are the best way a business can tackle the issue of user data privacy while collecting data for retargeting and analytics, better attribution and maximized ad campaign performance.


