As third-party cookies are blocked by ad blockers, marketers are faced with a daunting challenge: tracking and measuring their campaign success accurately.
And that’s where server-side tracking comes into play.
In this blog, we will explore how server-side tracking can breathe new life into your WooCommerce store’s Google Ad campaigns.
Understanding Server-side Tracking
As a marketer, you know for sure that event tracking is very much essential to understanding your customer behavior.
You have two ways to track the user data – 1. Client-side & 2. Server-side
With the iOS14+ update, GDPR, CCPA, etc., third-party cookie tracking was affected, leading to your ad campaign performance dropping below normal.
Now, to tackle this, you should shift to server-side tracking for your WooCommerce store.
Now what is server-side tracking?
Server-side tracking refers to the process of collecting and processing user interactions and events directly from your server, rather than relying on the user’s browser. By leveraging your own server, you can bypass many of the limitations imposed by browsers, ensuring more accurate and reliable first-party data collection
Comparison Between Client-Side and Server-Side Tracking
| Client-side tracking | Server-side tracking | |
| Data | Ad blockers and browser privacy settings can block tracking scripts, leading to incomplete data. | Data is collected directly from your server, reducing the risk of data loss due to ad blockers or browser restrictions. |
| Performance | Client-side tracking can slow down page load times, as scripts need to be loaded and executed. | Since tracking occurs on the server, it does not affect page load times, resulting in a better user experience. |
| Control | Marketers have less control over data collection, as it depends on the user’s browser environment. | Marketers have full control over data collection and processing, enabling more accurate and consistent data. |
Benefits of Server-Side Tracking Over Traditional Client-Side Methods
Adopting server-side tracking in WooCommerce can provide numerous benefits, including:
- Enhanced Data Accuracy: By bypassing browser-based limitations, server-side tracking ensures to accurately track and send, leading to better insights.
- Improved Privacy Compliance: Server-side tracking allows for better control over data handling and storage, helping businesses comply with privacy regulations such as GDPR and CCPA.
- Greater Flexibility: Server-side tracking can be customized to meet specific business needs, which provides more flexibility in how data is collected and used.
- Reduced Impact of Ad Blockers: Since the tracking occurs on the server, it is less likely to be blocked by ad blockers, ensuring to track more user interactions.
- Better Integration with Marketing Platforms: Server-side tracking facilitates seamless integration with various analytics and advertising platforms, enabling more effective ad campaign management and optimization.
Setting Up Server-side Tracking in WooCommerce
Implementing server-side tracking in your WooCommerce store involves several crucial steps. This process ensures accurate first-party data collection and enhances the overall performance of your Google Ad campaigns.
Follow these steps to set up server-side 1P domain tracking in WooCommerce seamlessly through CustomerLabs:
Step 1: Subscribe to the 1P Domain Tracking Add-on
Start by subscribing to the 1P domain tracking add-on in the CustomerLabs app. This add-on is essential for enabling server-side tracking for your domain.
Step 2: Navigate to Settings
Once you have subscribed, navigate to the settings within the CustomerLabs. Here, you will find the necessary options to configure your 1P domain tracking.
Step 3: Add Your Domain
In the settings, locate the 1P domain tracking section and click on “Add Domain.”
Enter your naked domain, which means the domain name without any prefixes like HTTP, HTTPS, or www.
For example, you can enter “yourwebsite.com.”
Step 4: Specify a Subdomain
After adding your naked domain, you need to specify a subdomain.
Even a “www” prefix can be a valid subdomain. Choose a subdomain that suits your setup.
Step 5: Choose the Setup Method
You have two options for setting up the domain tracking:
- Managed Service: This is a recommended option for a smoother setup as it simplifies the process.
- Own Cloudflare Account: Alternatively, you can use your own Cloudflare account if you prefer more control.
Step 6: Migrate DNS Provider
Proceed with the migration process of your DNS provider in Cloudflare. This step is crucial for directing traffic through Cloudflare’s infrastructure.
Step 7: Verify DNS
Click on Verify DNS. You will receive an email with instructions. Follow these instructions to ensure your domain starts generating first-party cookies automatically.
Step 8: Map Nameservers
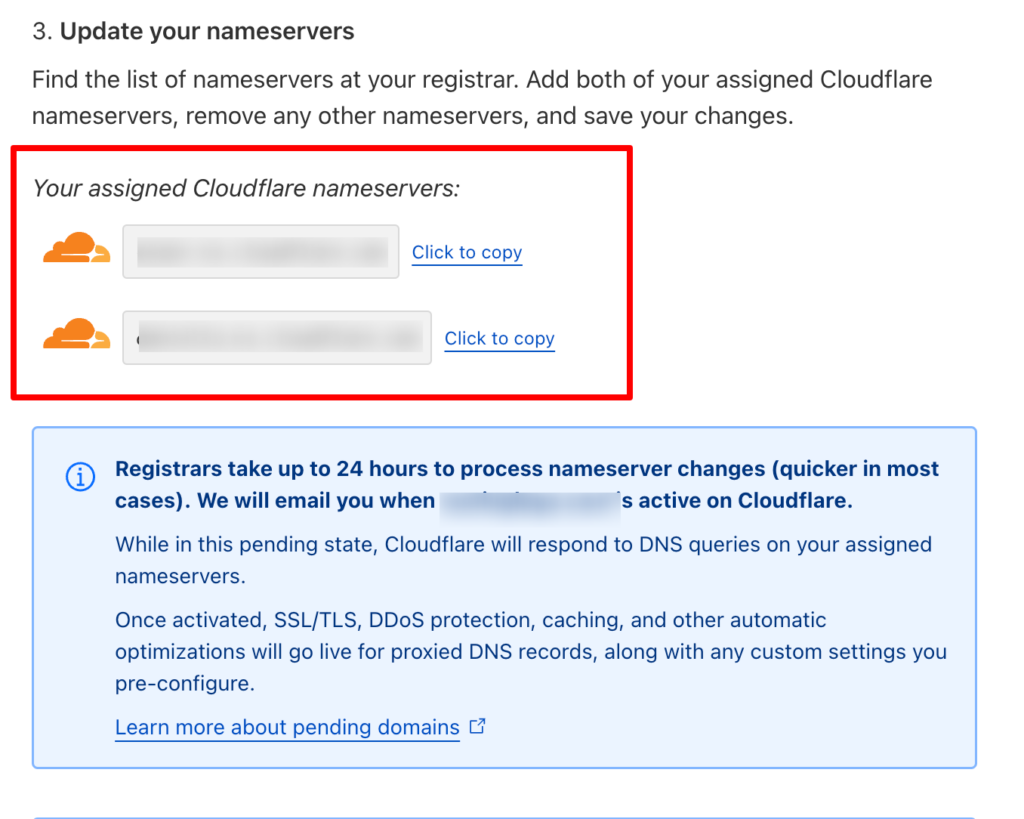
After verification, go back to the CustomerLabs dashboard. Map the nameservers assigned by Cloudflare to your domain. This ensures that your DNS settings are correctly configured.
Step 9: Install the Tracking Code
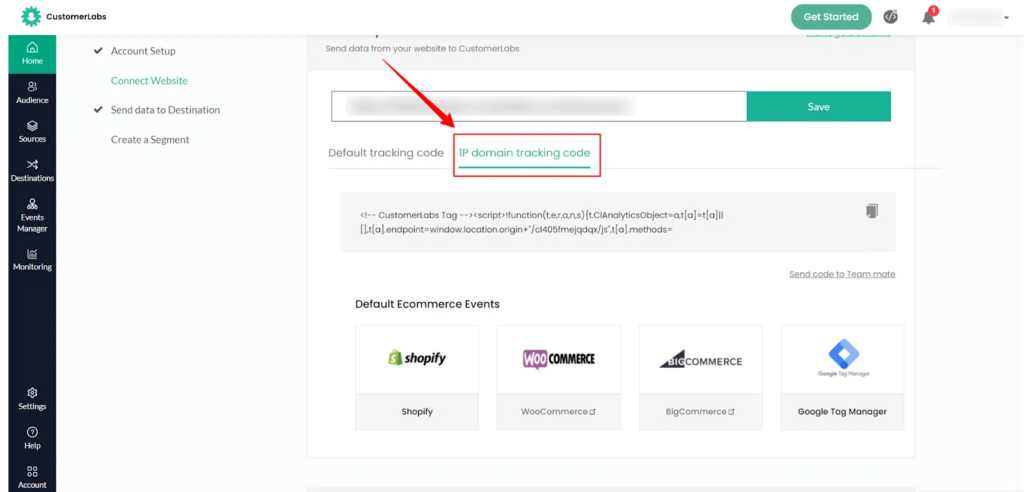
Return to the CustomerLabs dashboard and copy the 1P domain tracking code provided. Install this code on your WooCommerce store to activate server-side tracking.
Step 10: Configure WooCommerce Conversion Tracking
Ensure that the WooCommerce conversion tracking plugin is installed correctly on your store. Select all the default events you wish to track to ensure comprehensive data collection.
Verifying Server-side Tracking Setup
Ensuring to set up your server-side 1P domain tracking is crucial for accurate first-party data tracking and attribution. Here’s how to verify your setup:
Step 1: Verify in CustomerLabs
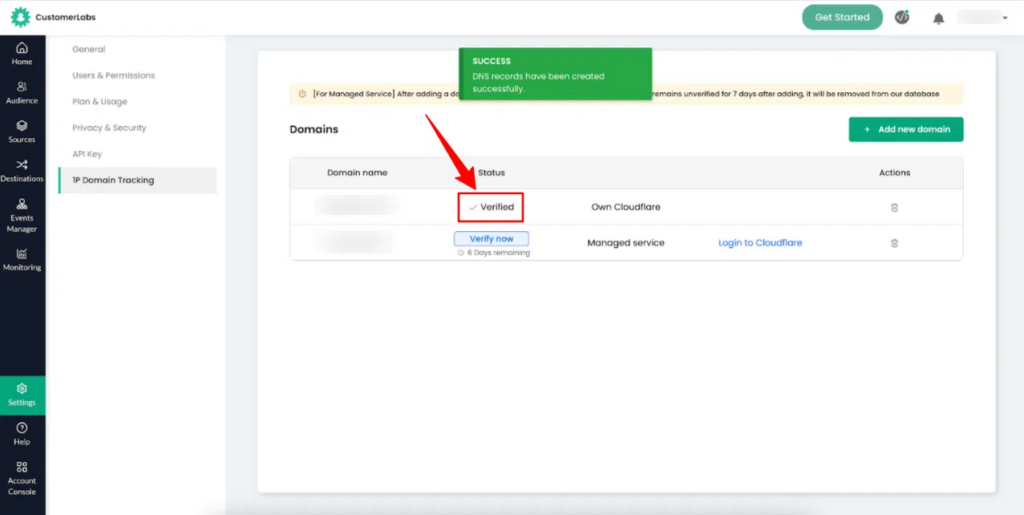
After setting up 1P domain tracking in CustomerLabs, navigate to the 1P domain tracking dashboard and click on Verify DNS. A status message indicating “Verified” confirms that your records have been correctly verified.
Step 2: Verify Using Cloudflare Account
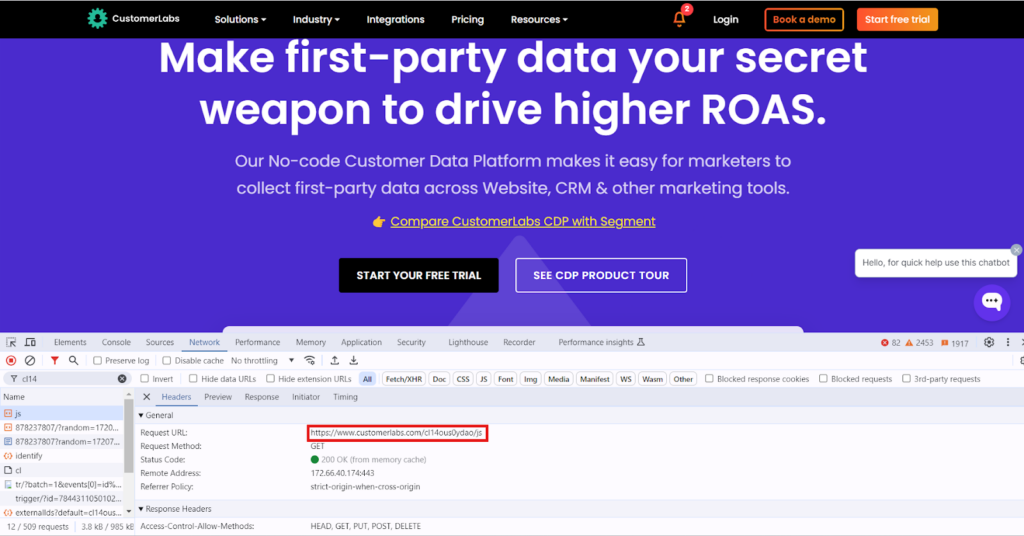
If you’re using a Cloudflare account, you can verify as follows:
– Open a new browser or use a different browser than the one you used for setup.
– Enter your website URL.
– Right-click on the page and select “Inspect.”
– Go to “Network” and enter your CustomerLabs ID.
– Check whether your own domain appears in the “Request URL.”
This confirms that the cookies are being generated by your server, indicating that the server-side 1P domain tracking is active.
By following these steps, you’ll have successfully connected your WooCommerce store with CustomerLabs for server-side 1P domain tracking, ensuring improved data accuracy and campaign performance.
Integrating Server-side Tracking with Google Ads
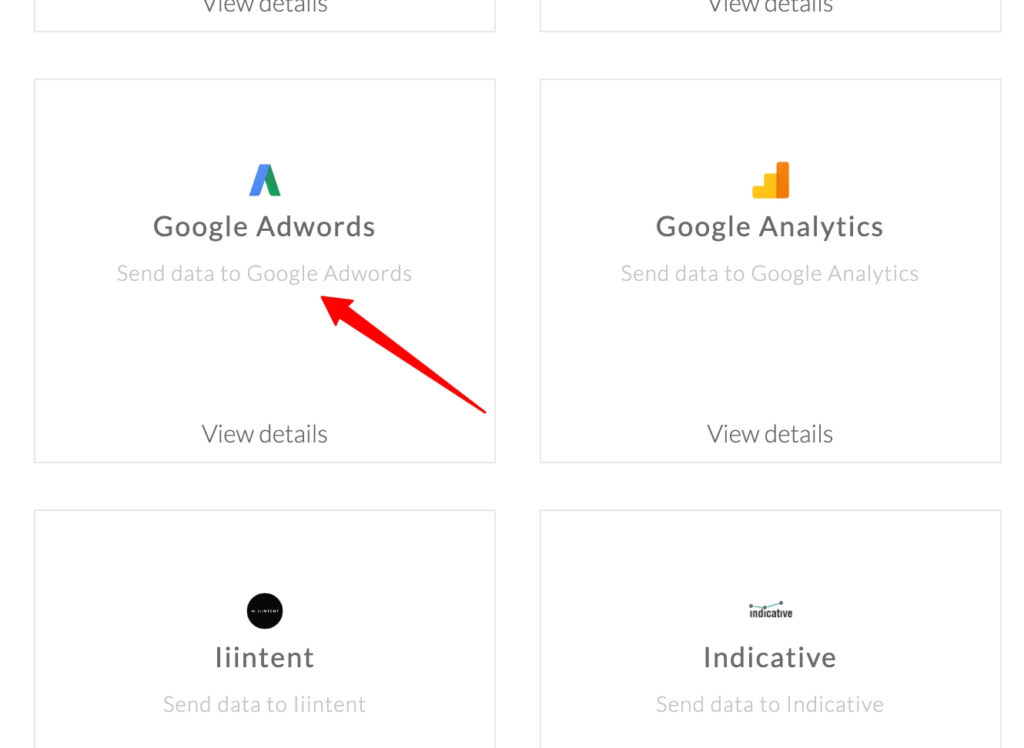
– In CustomerLabs, navigate to “Destinations” and enable Google Ads.
– Authenticate your Google Ads account and configure the settings.
– Set up your WooCommerce store conversions in Google Ads and map them to the conversions tracked by CustomerLabs.
Boost Google Ads Campaigns with Server-side Tracking for WooCommerce
Implementing server-side tracking in your WooCommerce store offers numerous advantages, particularly for your Google Ads campaigns.
Here are the key benefits:
Improved Data Accuracy and Reduced Data Loss
Server-side tracking ensures collecting the first-party data directly from your server, bypassing many of the issues associated with client-side tracking. Ad blockers, browser privacy settings, and network limitations often result in data loss or inaccuracies when using client-side tracking. With server-side tracking:
- Increased Reliability: Data is less likely to be blocked or lost, providing a more complete and accurate picture of user interactions.
- Consistent Data Flow: Tracking events are consistently recorded, ensuring that all relevant data is captured and transmitted to your analytics and advertising platforms.
Enhanced Conversion Tracking and Attribution
Accurate conversion tracking is critical for assessing the performance of your Google Ads campaigns. Server-side tracking enhances this by providing:
- Precision in Conversion Data: By capturing every user interaction reliably, server-side tracking ensures accurate tracking of events. This leads to a better understanding of which ad campaigns are driving conversions.
- Improved Attribution Models: Server-side tracking supports more sophisticated attribution models, allowing you to allocate credit to various touchpoints in the customer journey more accurately. This helps in understanding the true impact of your marketing efforts across different channels.
Better Audience Targeting and Remarketing Capabilities
Effective audience targeting and remarketing rely on accurate and comprehensive first-party data. Server-side tracking improves these capabilities by:
- Enhanced User Profiling: With more accurate data, you can create detailed user profiles through CustomerLabs based on their interactions with your WooCommerce store. This allows for better segmentation and targeting of your ads.
- Effective Remarketing: Server-side tracking ensures consistent tracking of user data, enabling more precise remarketing efforts. You can target users who have shown interest in your products with tailored ads, increasing the likelihood of conversions.
- Compliance with Privacy Regulations: Server-side tracking helps in maintaining compliance with data privacy regulations, ensuring that user data is handled securely and ethically. This builds trust with your audience and avoids potential legal issues.
To sum it all up…
We’ve explored the fundamental aspects of server-side tracking, from understanding its definition and setting it up in your WooCommerce store, to recognizing its numerous benefits for Google Ads campaigns, such as improved data accuracy, enhanced conversion tracking, and better audience targeting.
By adopting server-side tracking through CustomerLabs, you can overcome the limitations of traditional client-side methods, ensuring more reliable data collection and compliance with privacy regulations.
Implement server-side tracking to unlock these advantages, optimize your marketing efforts, and ultimately boost your Google Ad campaign performance in an increasingly privacy-conscious digital landscape.

