It is already evident that to truly activate your CRM data, you need to send it back to Google Ads. And to do that, you need a proper HubSpot Google Ads integration setup that can effectively track your offline conversions in real-time. That’s exactly what we’re simplifying in this guide. We’ll walk you through the step-by-step process of connecting your HubSpot CRM to Google Ads using CustomerLabs, without writing a single line of code.
Let’s get started.
Integrating HubSpot with Google Ads for Offline Conversions Tracking (The easy way)
You can track offline conversions from HubSpot to Google Ads with just two steps:
1. You need to bring in the data from HubSpot to CustomerLabs
2. Then you need to send this data from CustomerLabs to Google Ads.
With CustomerLabs’ 1PD Ops, any performance marketer—regardless of their technical background—can easily set up Google Ads Offline Conversion Tracking without touching a single line of code.
So now, let’s walk through how you can bring in the CRM data to CustomerLabs
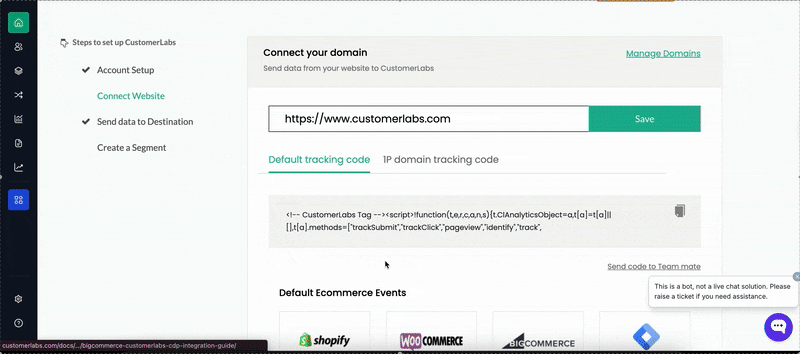
Follow the below steps to connect CustomerLabs with HubSpot.
Step 1:
Go to the “Sources” section in your CustomerLabs dashboard, click on Connect Source,” select HubSpot from the list, and begin the authentication process.
Step 2:
You’ll be redirected to your HubSpot account. From there, choose the HubSpot account you want to link with CustomerLabs and grant access.
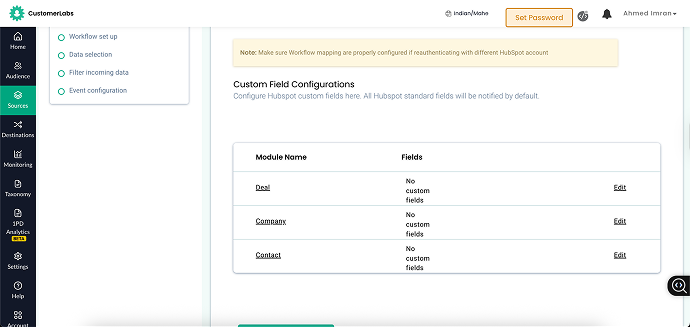
Step 3 (Optional):
If you want to track additional data points, you can head over to the Custom Field Configuration section and manually add any custom fields you need. This step is optional because standard fields are captured by default.
With that, your integration is complete—it really doesn’t get much easier than this. If you want to manage and filter incoming data based on your own business needs, you need to build custom workflows within CustomerLabs. And setting up workflow in CustomerLabs is also an easy process.
Setting up workflows in CustomerLabs
Setting up a workflow in CustomerLabs is essential—especially when you’re working with platforms like HubSpot CRM, where data will constantly get updated.
For example, HubSpot records like contacts, companies, and deals are updated in real time. By creating a workflow in CustomerLabs, you can capture those changes as they happen and send the updated data in real time—all without writing a single line of code.
Workflows also allow you to:
- Filter incoming CRM data based on your business needs.
- Map the data to existing user profiles in CustomerLabs.
- Identify and connect user data across platforms using various identifiers like Google Analytics Client ID, Facebook ID, website ID, and more.
In the next section of this blog, we’ll walk you through 2 key workflow setups that you can implement:
- Send data to CustomerLabs when a new contact is created in HubSpot.
- Send data to CustomerLabs when a new deal is created/updated in HubSpot.
We’ll break down each workflow with detailed steps to help you get started smoothly.
Note: Workflows are not limited to these two alone; you can set up any number of workflows based on your needs. So you don’t need to come to a conclusion that there are only these workflows you can implement; there’s no particular limit.
With that said, we will get started with the first workflow.
Workflow #1 – Send data to CustomerLabs when a new contact is created in HubSpot.
You can map and filter incoming contact information from HubSpot to CustomerLabs by following the below steps.
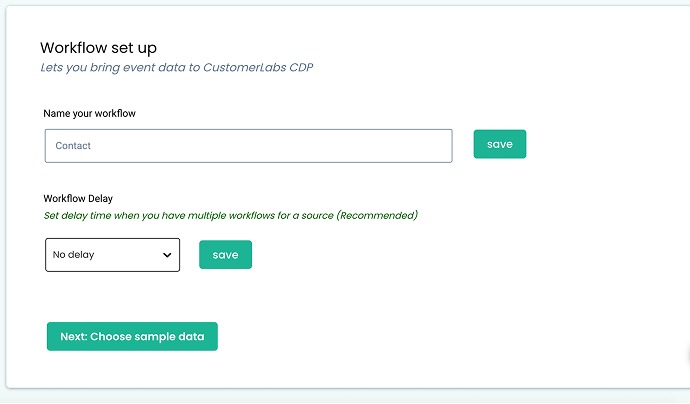
Create a New Workflow
- Click on Create Workflow.
Name the Workflow and Fetch Sample Data
- Give your workflow a relevant name.
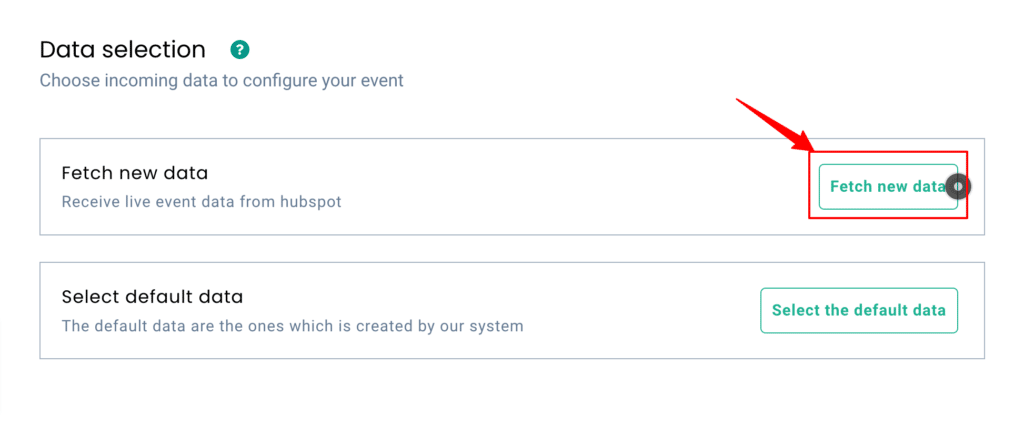
- To get sample data, create a contact in your HubSpot account.
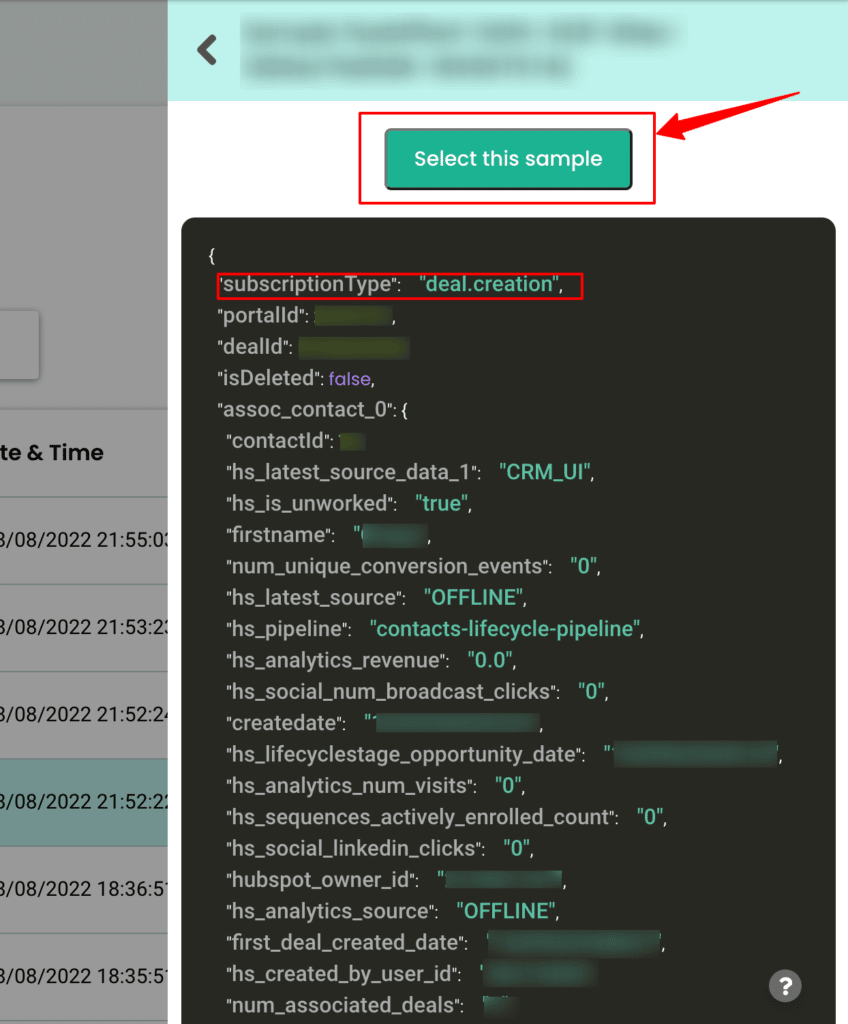
- Once the contact is created, click on Choose Sample Data.
- Then select Fetch New Data.
View Contact Field Samples
- From the results, click View Details
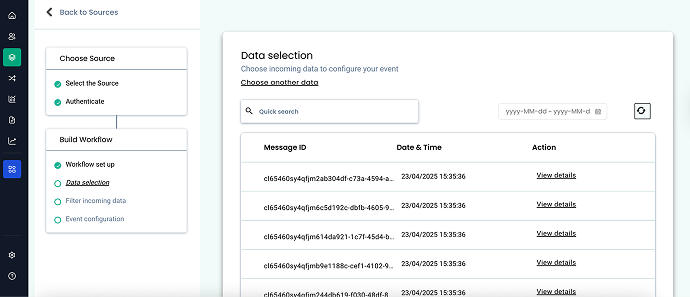
- After clicking on View Details, click on Select Sample Data.
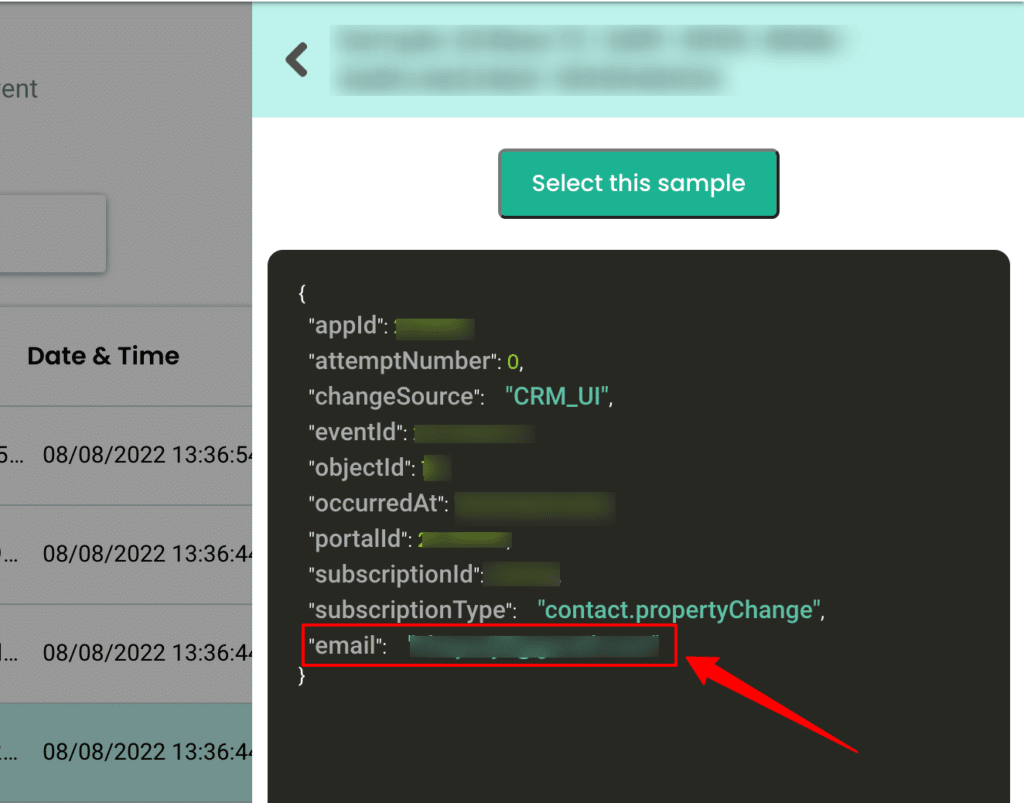
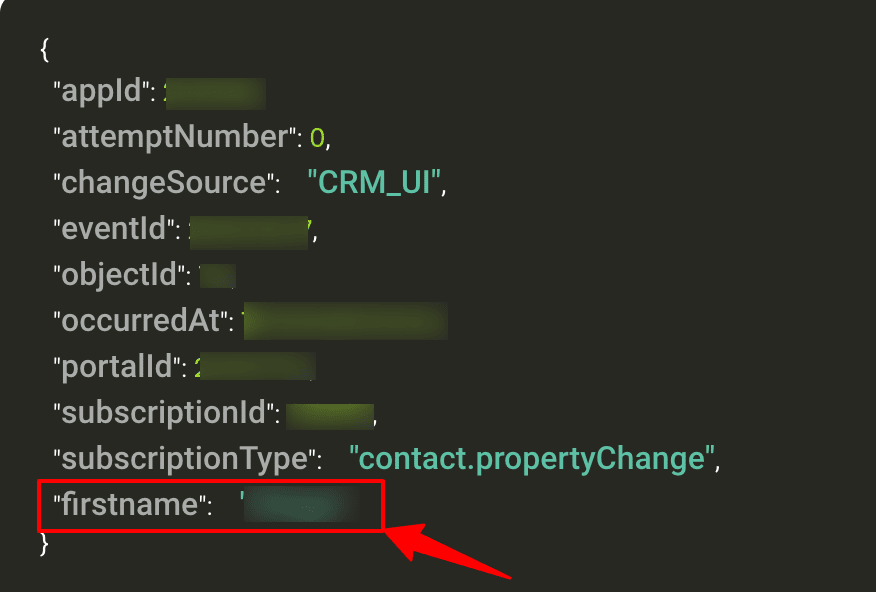
Note: In HubSpot, each contact field is sent as a separate sample. For example, you may only see the contact email in one sample.
Understand Common Parameters
- The common user ID parameter is the HubSpot Object ID.
- Other fields like first name, last name, and lifecycle stage will be sent as separate event samples.
Filter the Right Event Sample
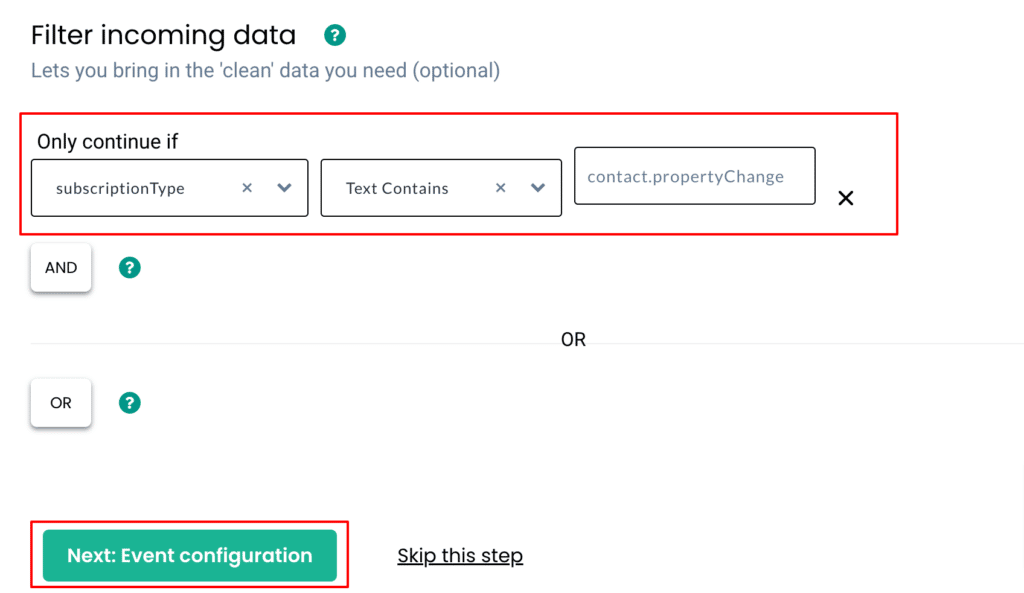
- Choose any contact-related event sample and click Filter Incoming Data.
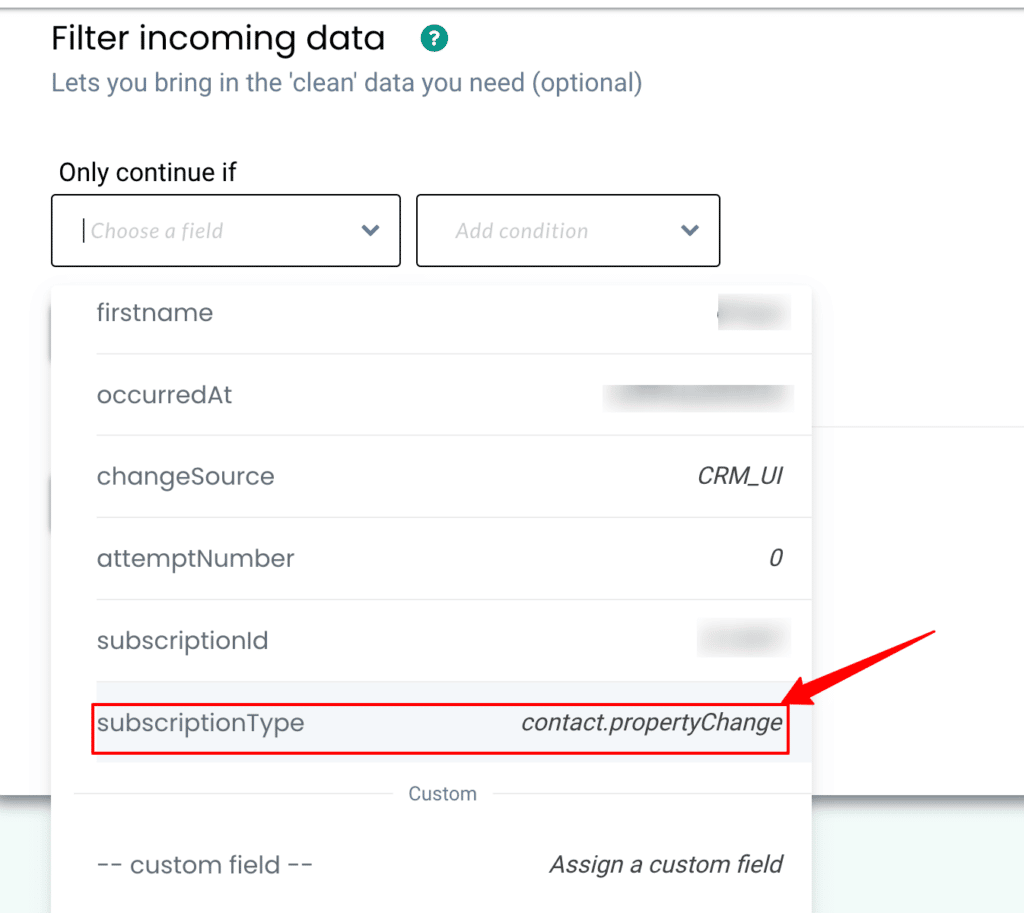
Set Filter Criteria
- Click on Create Filter Criteria to define conditions.
- This step ensures that only the “contact.propertyChange” event enters the workflow.
- Then, choose the event type from the dropdown list.
Configure the Event
- Add a condition, enter the event name, and click on Event Configuration.
Now, assign a name to the incoming event.
- You can either choose a standard event name or define a custom name based on your preference.

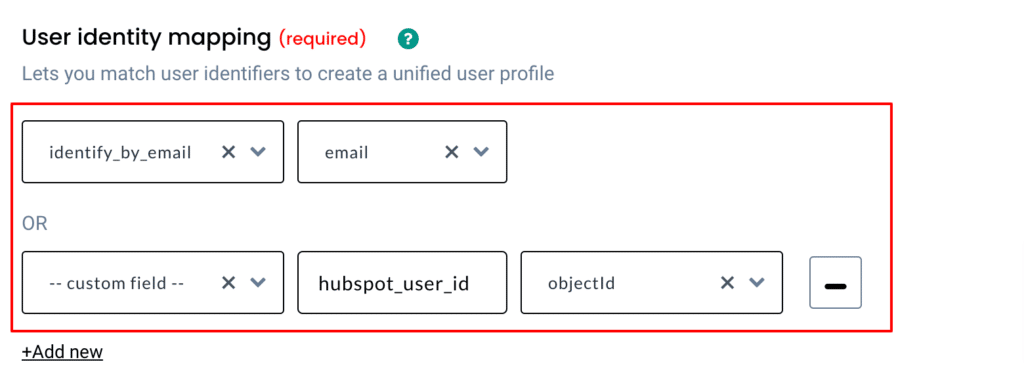
Map User Identity
- Once the event is configured, proceed to User Identity Mapping.
- This step combines all related events under one user.
- By default, the incoming contact will have:
- An email address
- A unique HubSpot Object ID
- An email address
- Use the dropdown menu to assign values to both identifiers.
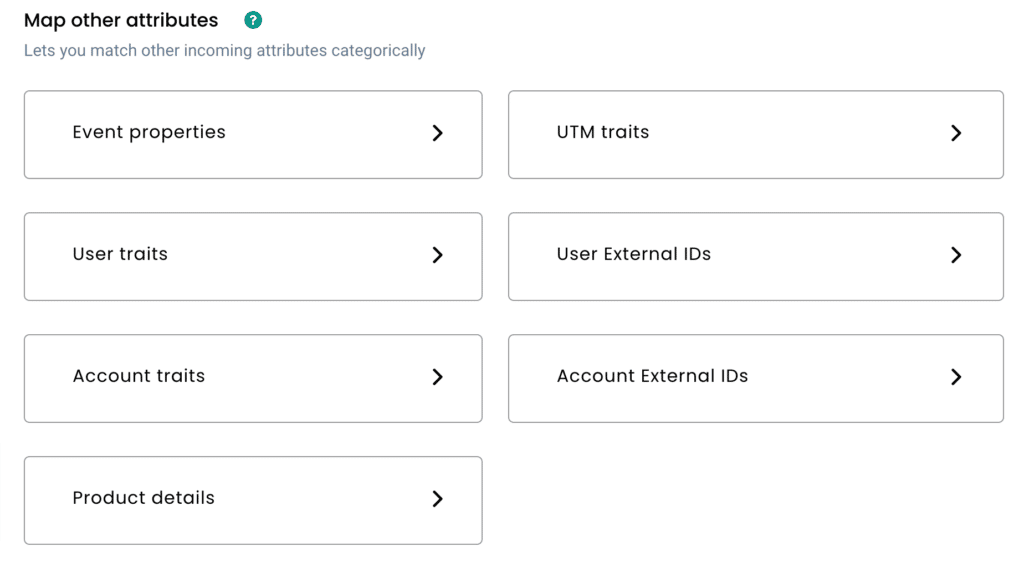
Map Additional Fields
- If there are additional contact details, you can categorically map them into buckets as shown in the interface.
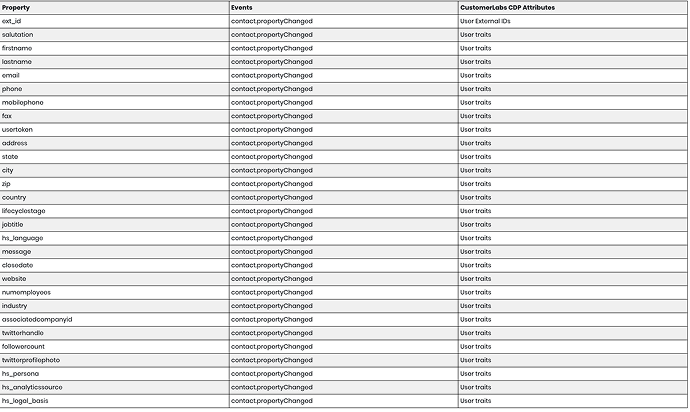
Here is the list of contact subscriptions that will be sent when a contact is created in HubSpot to CustomerLabs.
Workflow 2: send data to CustomerLabs when a new deal is created/updated in HubSpot
We can further divide this workflow into 3 scenarios:
- Mapping incoming deal information when both company and contacts are assigned.
- Mapping incoming deal information when only a company is assigned.
- Mapping incoming deal information when only contacts are assigned.
First Scenario:
Start the Workflow
- Name the workflow.
- Create a test deal in HubSpot to generate sample data.
- If there are delays in data fetching, select the default data option; if not, click on the fetch new data option.
Alright, by now you would have chosen the data sample; now you have to filter the incoming data as we did in the other workflows.
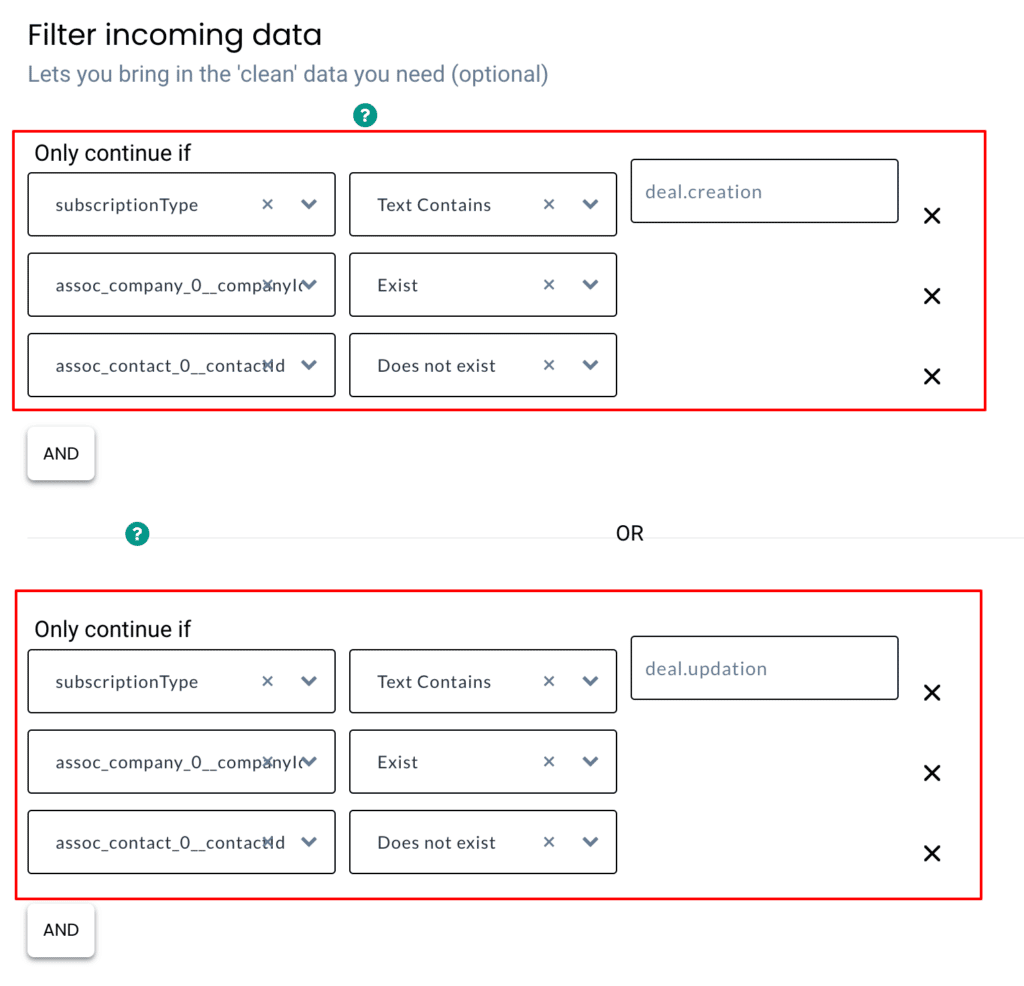
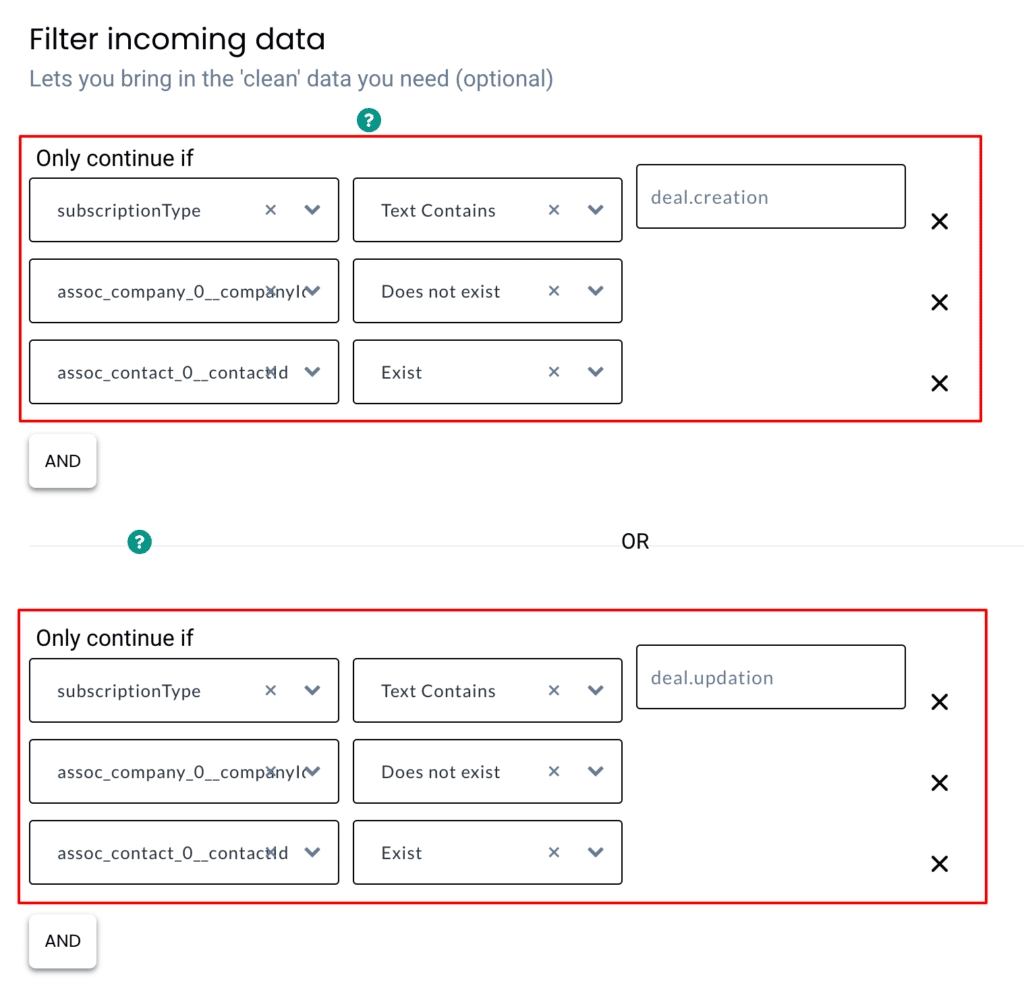
Filter Incoming Data
- You must create multiple filters, as shown in the below image:
- Filter 1: Event name is deal.creation and contains both:
- assoc_company__0_companyId (company)
- assoc_contact__0_contactId (contact)
- assoc_company__0_companyId (company)
- Filter 2: Event name is deal.updation and contains both company and contact info (use OR condition).
- Filter 1: Event name is deal.creation and contains both:
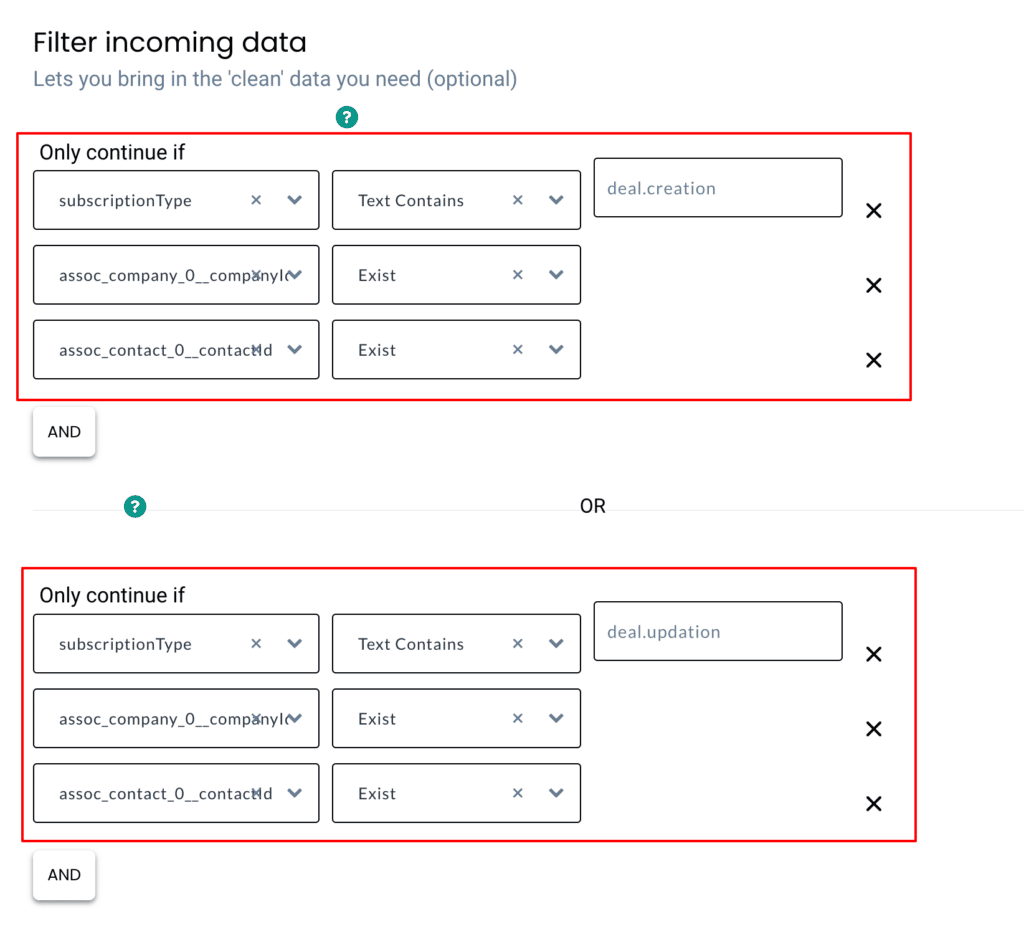
Now, after doing this, you will only receive event data in CustomerLabs when the deal created or updated has both company and contact information.
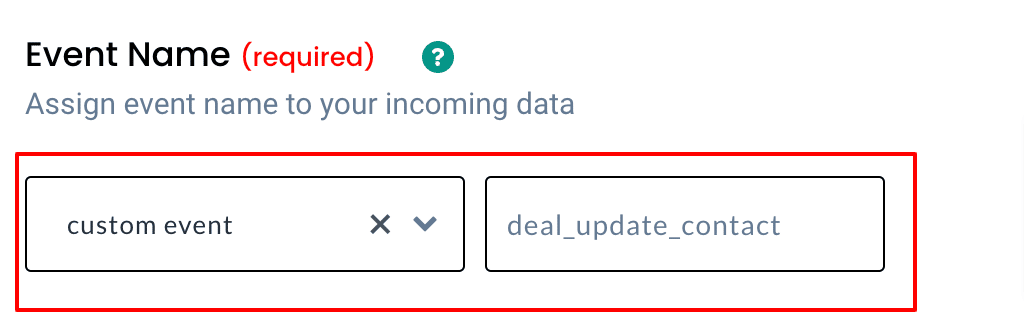
Configure Event
- Set the event name using the “Dynamic Event” option from the dropdown.
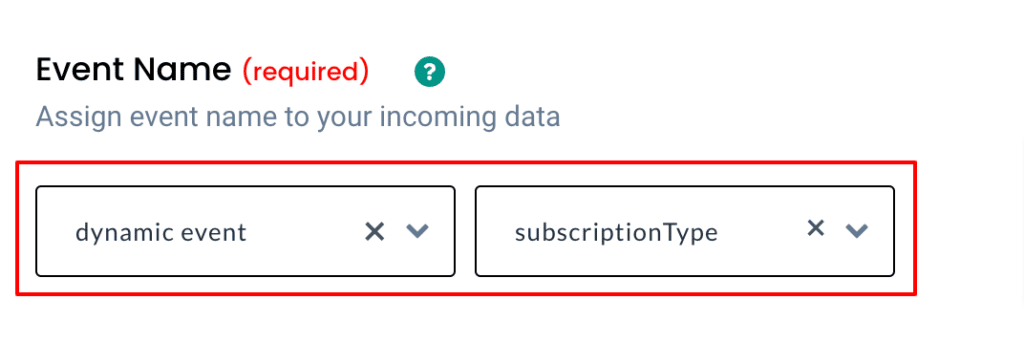
When you select dynamic event, you will enable customer labs to automatically pick up the name of the event based on the incoming information.
For example, when a deal stage has been updated, CustomerLabs will automatically pick up the name of the event based on the incoming data; that’s how simple it is.
You don’t need to code or have to go through hectic steps; you can just select dynamic event and let CustomerLabs do the heavy work.
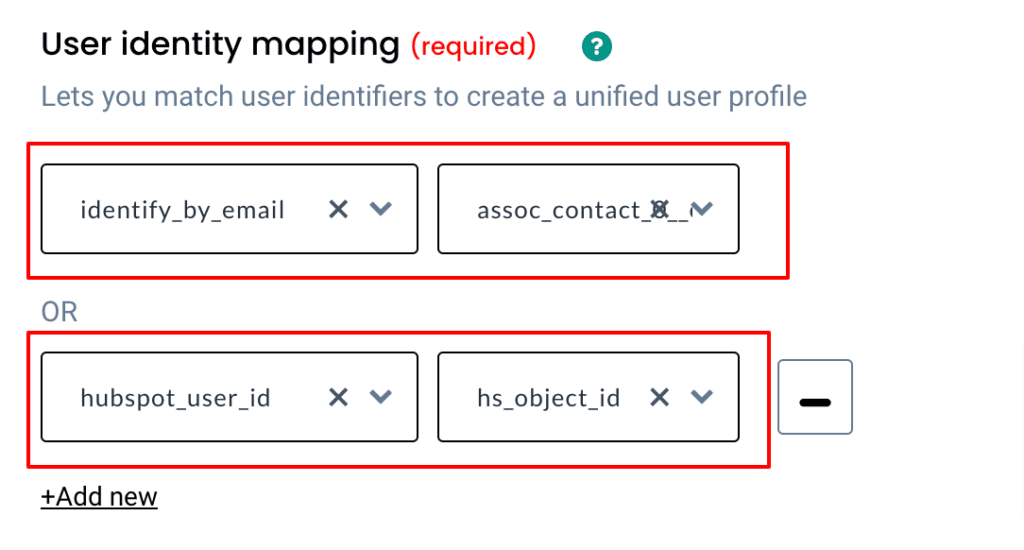
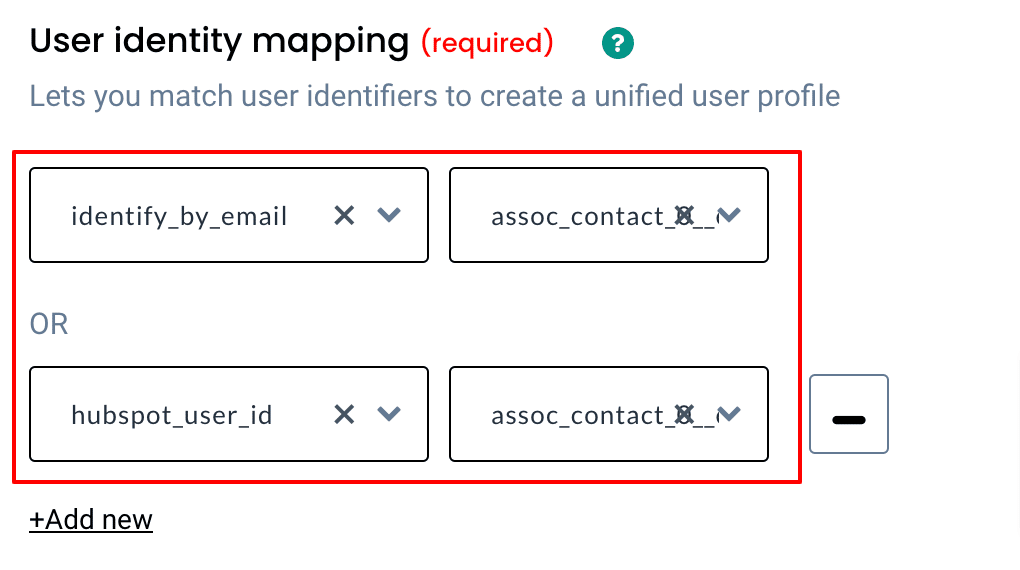
Choose how CustomerLabs should identify the incoming contact data
- By email: assoc_contact__0__email + identify_by_email
- By object ID: assoc_contact__0__contactId + HubSpot_user_id
Refer to the below image:
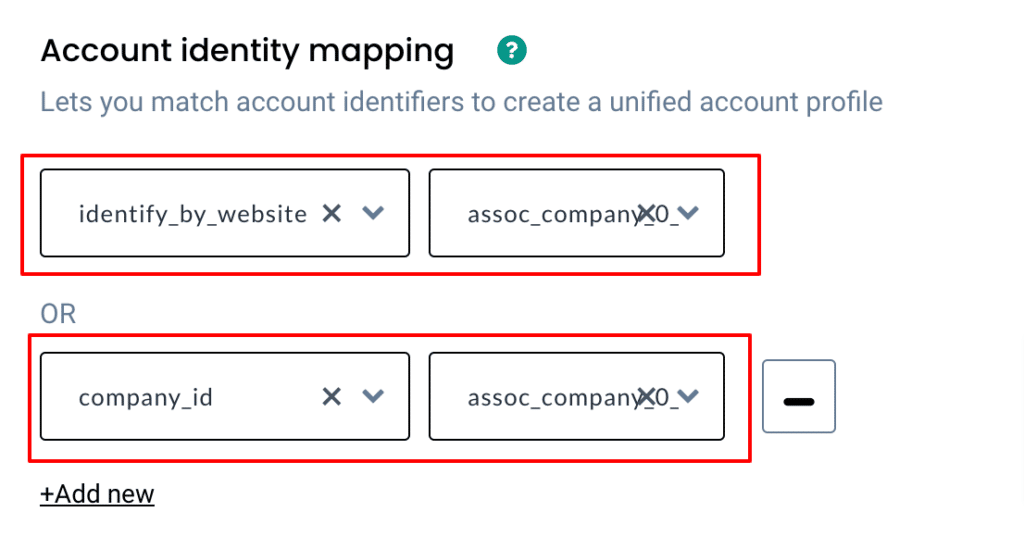
Next, you need to select how your incoming company data will be identified by CustomerLabs by selecting the right account identifiers.
Mapping Company Identity
- Select how CustomerLabs identifies the incoming company data:
- Website: assoc_company__0__website + identify_by_website
- Company ID: assoc_company__0__companyId + company_id
- Website: assoc_company__0__website + identify_by_website
.
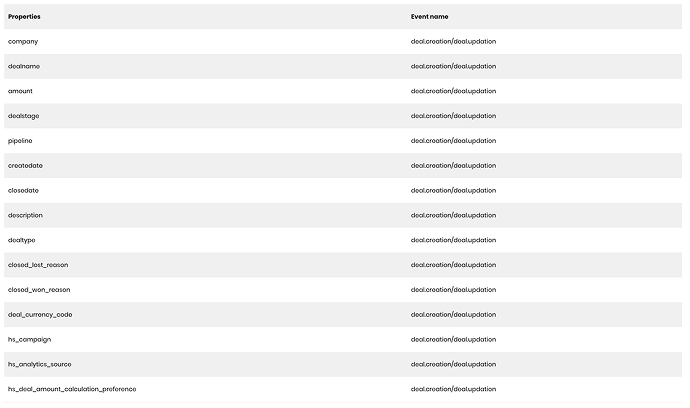
Below you can find the list of deal-related data that will be sent to CustomerLabs.
Account Traits Mapping
- Map all incoming deal information into appropriate account traits from the Map other attributes section as shown below, and click Save.

- Click on Account External IDs from the Map other attributes section and click on Save.
- Add the Deal ID from HubSpot as an Account External ID to tie the deal to the correct company and contacts.

After doing this, you will enable CustomerLabs to associate all deal-based information with a company as well as their contacts.
Second scenario:
Create the Workflow
- Name the workflow and click Fetch New Data to select a relevant sample.
Filter the Data
- Create two filters:
- Filter 1: You create will bring in HubSpot data when the event name has “deal.creation.”
Note: this doesn’t contain any contact-related data; it only has company-related data (assoc_company__0_companyId). This also follows for the second filter.
- Filter 2: To create a OR condition to bring in HubSpot data when the event name has “deal.updation”
Configure the Event
- In the event name dropdown, choose “Create or Update Group.”
- CustomerLabs will use the identity mapping parameters for grouping.
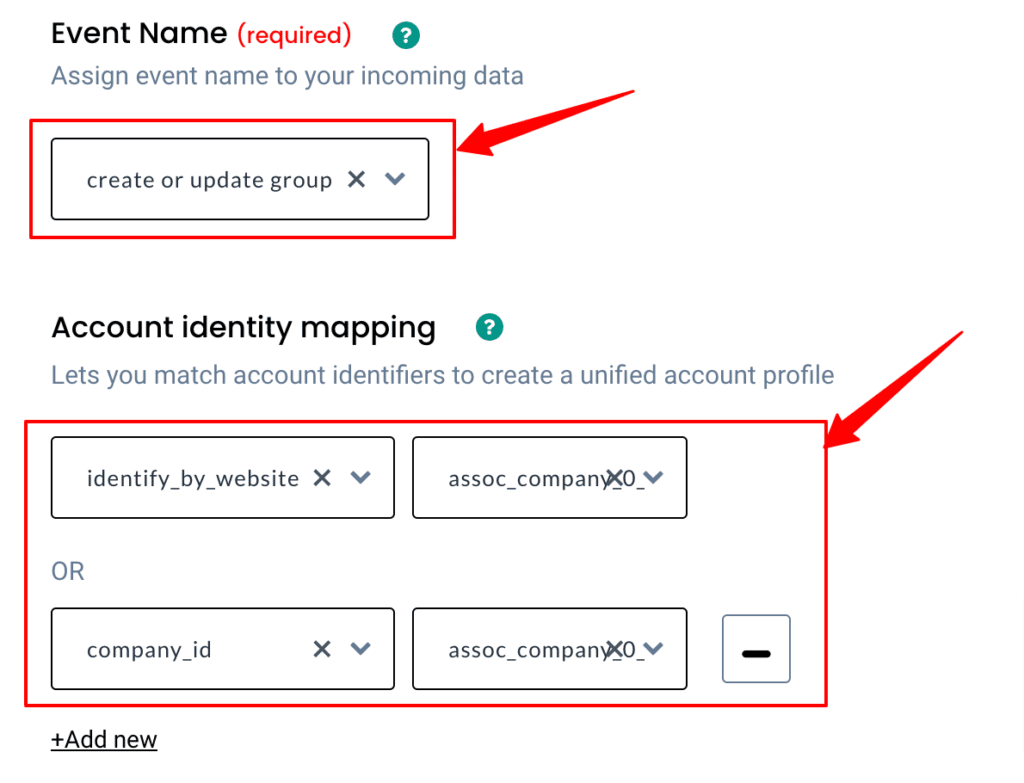
Map Company Identity
You can make CustomerLabs identify incoming company data by selecting account-identifying parameters like
- Website: assoc_company__0__website + identify_by_website
- Company ID: assoc_company__0__companyId + company_id
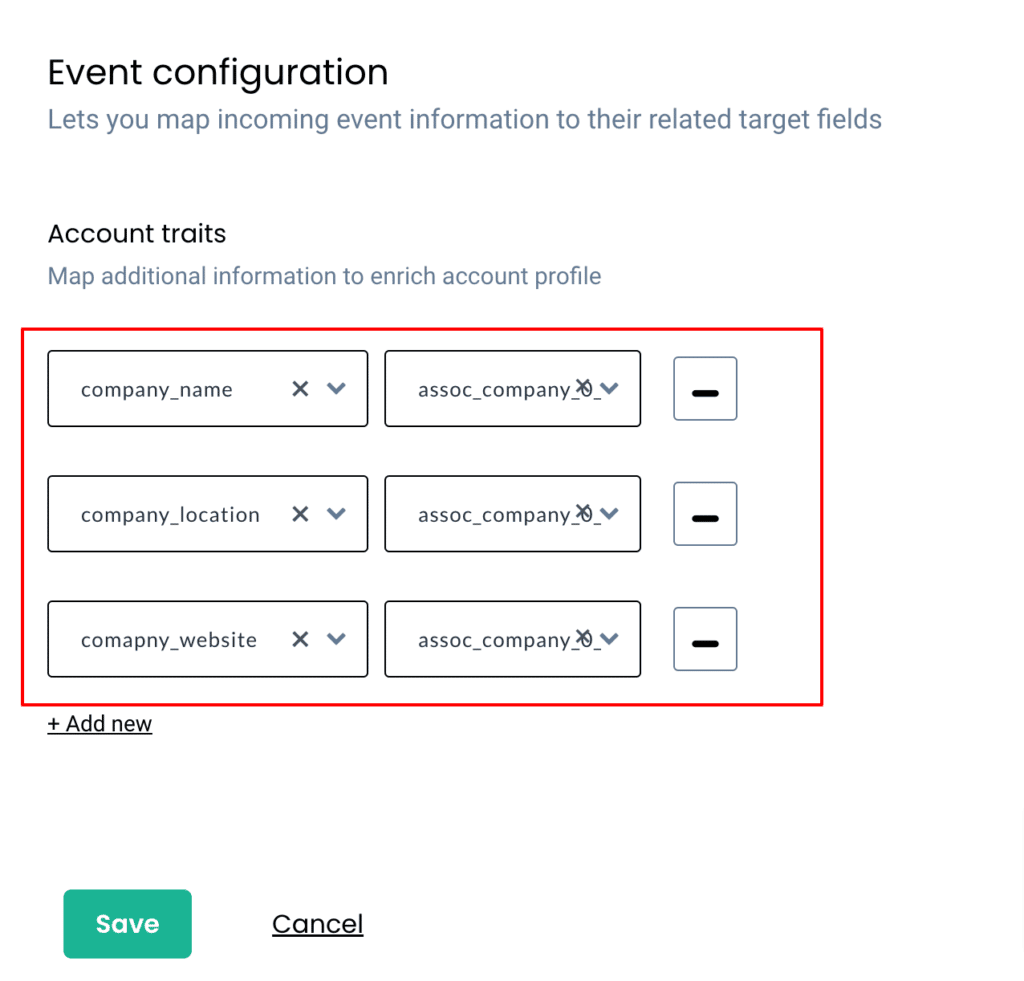
After completing identity mapping, you need to navigate to account traits and map all the incoming deal information as shown below.
Now add the deal ID from HubSpot as an account external ID.

You have successfully configured the second scenario.
Now the last and final scenario to complete the workflow integration process.
Third scenario:
Create the Workflow
- Name the workflow.
- Click Fetch New Data, select View Details, and select a sample that contains deal.creation.
Data Filtering
- Create two filters:
- First, you need to create a filter to bring in HubSpot data when the event name has “deal.creation.”
Note: This does not have information about company-related data and only has contact-related data, and the same applies to the second filter.
- Secondly, you need to create a filter to create an OR condition to bring in HubSpot data when the event name has “deal.updation.”
Event Configuration
- Go to the Event Name section and update the name as needed.
Now you need to define how your contact can be identified by CustomerLabs; you can do that by choosing the appropriate user identifiers.
Contact Identity
- Email: assoc_contact__0__email + identify_by_email
- Contact ID: assoc_contact__0__contactId + HubSpot_user_id
User Traits Mapping
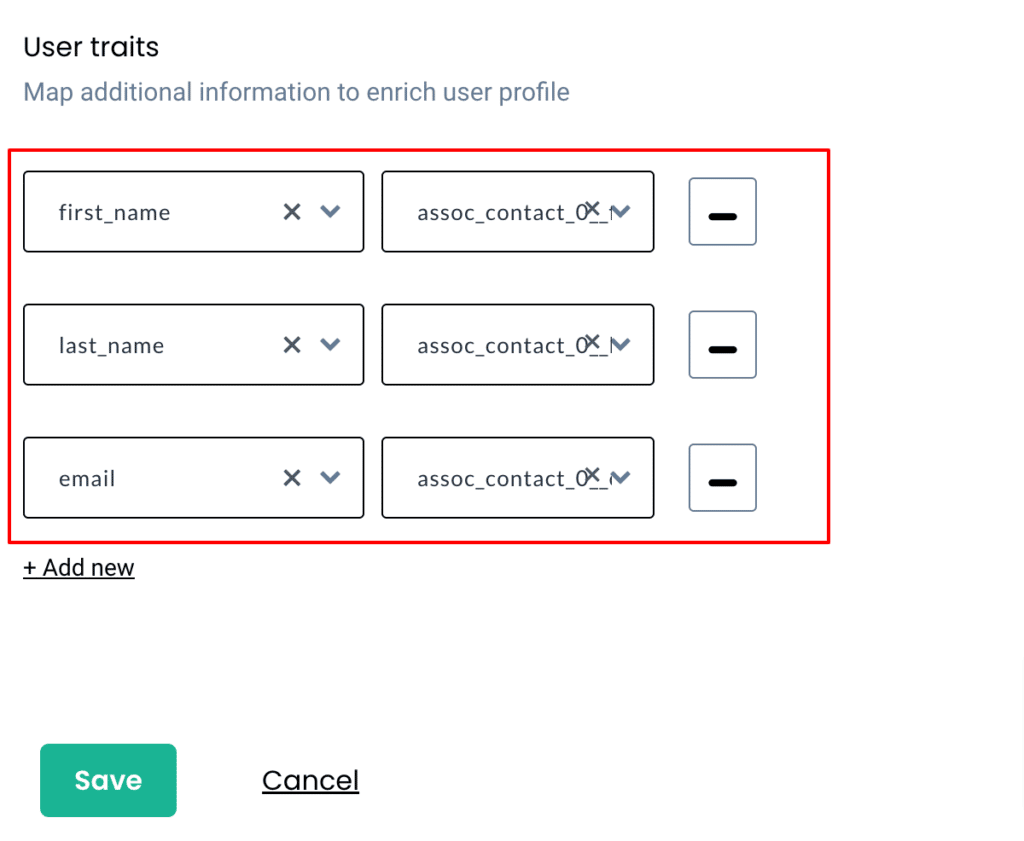
- Navigate to User Traits and map all incoming data fields.
Add the Deal ID from HubSpot as a User External ID.
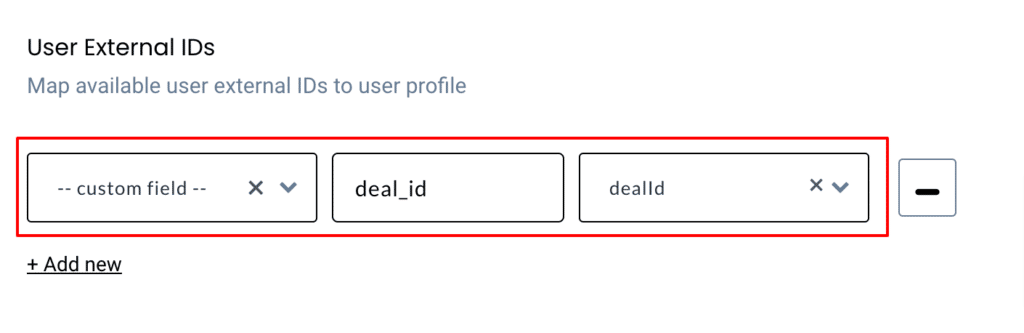
For your own reference, this is how you create a Contact in hubspot and link a Deal to it:
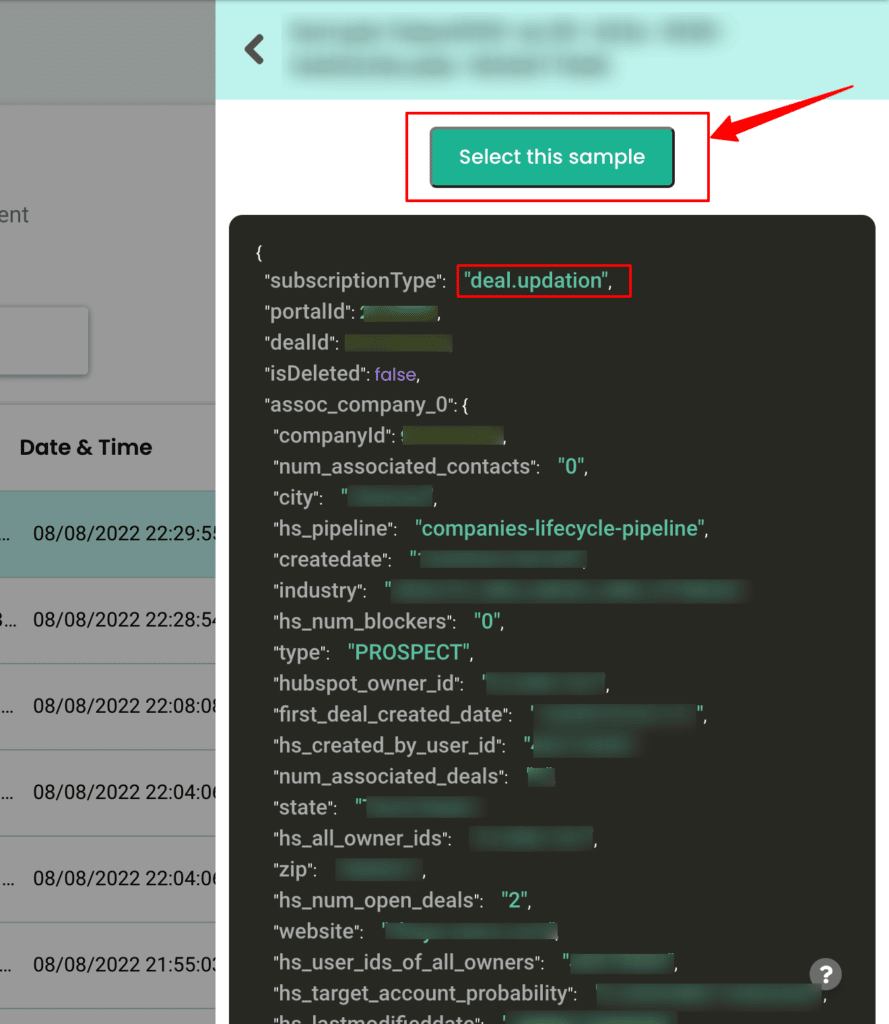
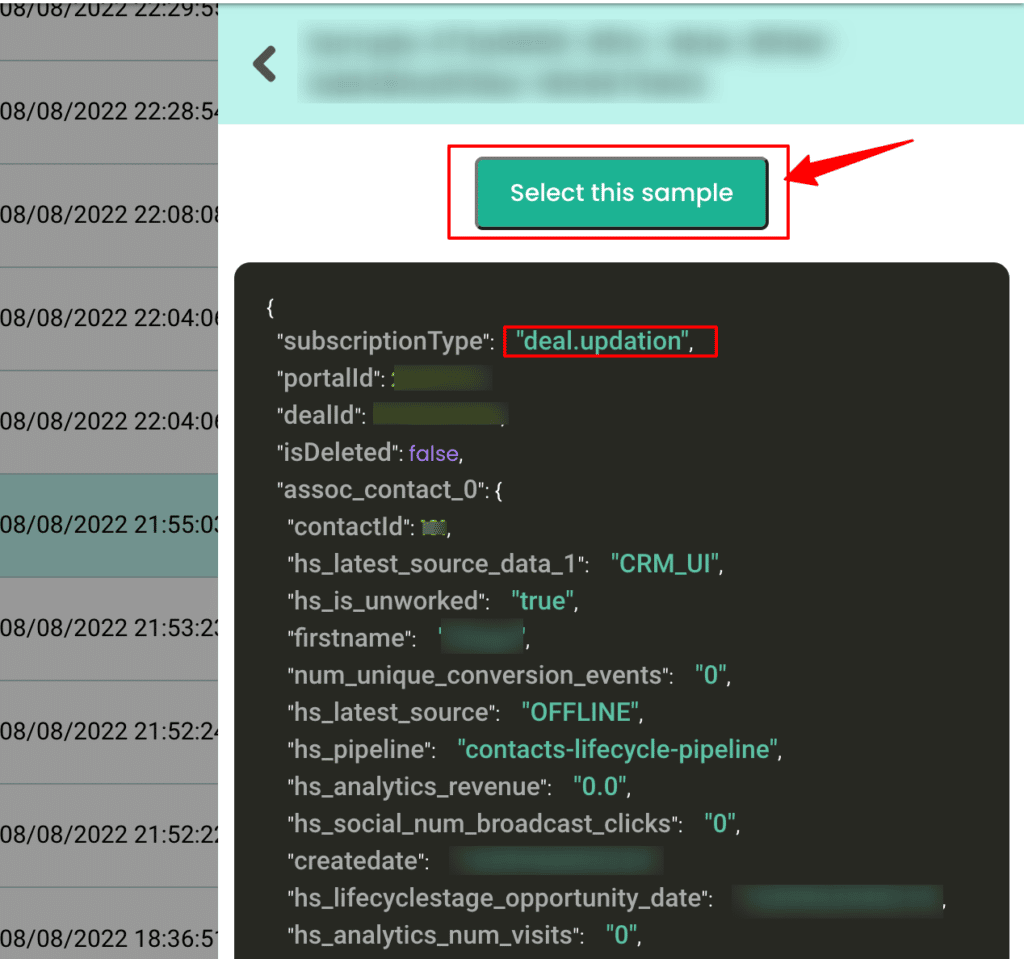
When a deal gets updated in HubSpot this is how you can view details in CustomerLabs:
Now that we have successfully set up all three workflows, the next step is to connect CustomerLabs with Google Ads and activate the collected data.
Step-by-step process to send offline data to Google Ads (through CustomerLabs):
To track offline conversions effectively, you need to map offline events captured in CustomerLabs to the corresponding conversion actions in Google Ads. Here’s a step-by-step guide to set this up:
Set Up Conversion Actions in Google Ads
- Log in to your Google Ads account and select the account where you want to set up offline conversion actions.
- From the left-hand side panel, click on Goals and then choose the Summary option.
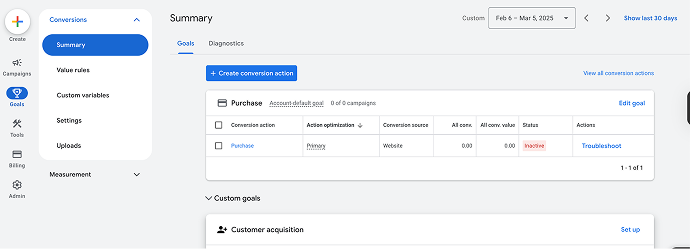
3. In the new panel, click on Create conversion action.
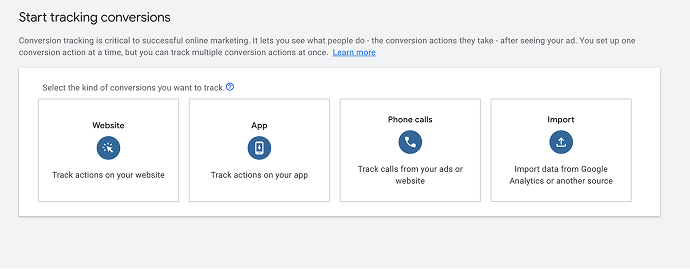
You’ll see four conversion source types:
- Website
- App
- Phone calls
- Import
Select the Import option.
4. Under Import, choose “CRMs, files, or other data sources.”
files,
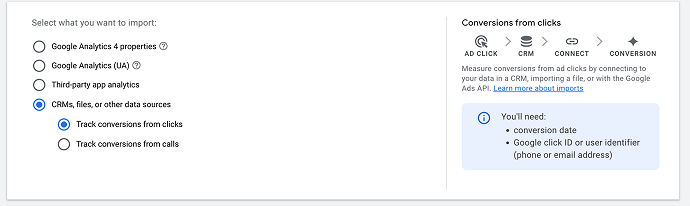
Then select “Track conversions from clicks” when prompted with the next two options.

5. You’ll now be asked to configure the conversion action:
- Enter the goal, conversion name, and other required details.
You can click here to learn more about how to complete the above process.
6. Once done, click Create and Continue.
7. If it’s your first time setting this up, you’ll be asked to choose a method for measuring conversions:
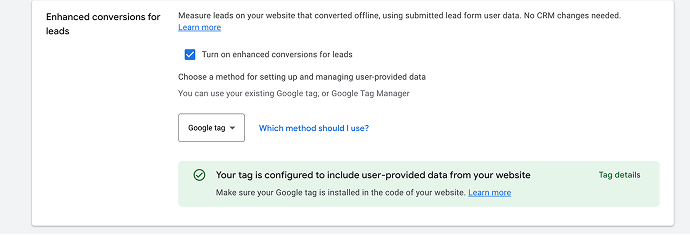
You can choose either Enhanced Conversion Parameters or Google Click Identifiers (GCLID).
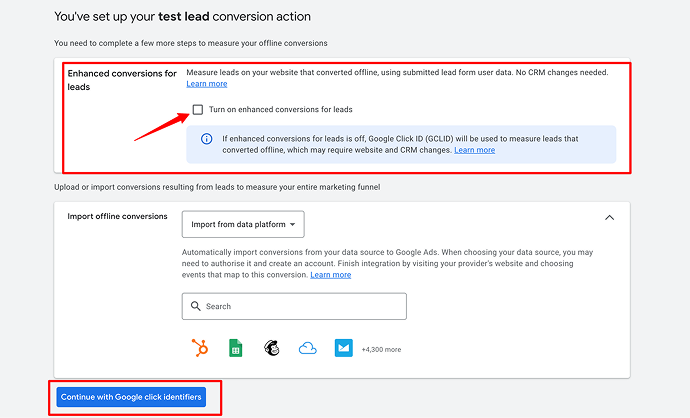
Click Done to save your setup.
Map Google Ads Conversion Actions in CustomerLabs
Now that your Google Ads conversion actions are ready, it’s time to map them in CustomerLabs:
Follow the below steps to easily map conversion actions in CustomerLabs:
1. In your CustomerLabs dashboard, go to the Destinations section and select Google Ads.
2. Click on Configuration Settings to start mapping conversion actions.
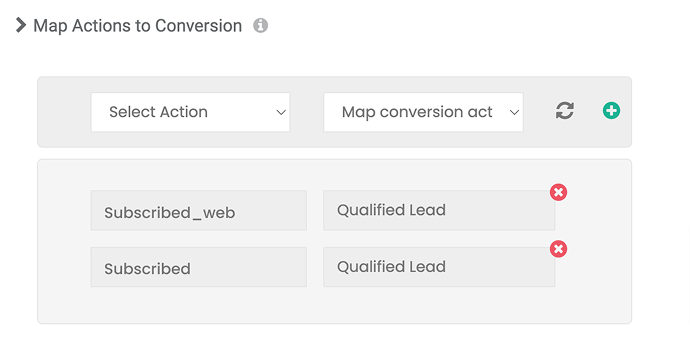
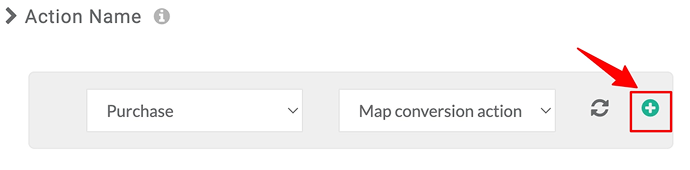
3. Map your Google Ads conversion actions with the relevant event names in CustomerLabs.
You can map both offline events and website events to your offline conversion actions.
Use the “+” icon to add and map additional events as needed.
Sync Events with Google Ads
Once your conversion actions are mapped, you need to enable syncing to send data to Google Ads.
Follow the below steps to sync events with Google Ads:
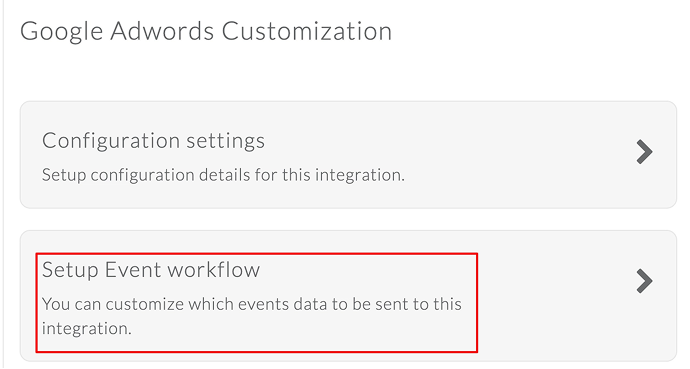
Go to the Google Ads Customization section in CustomerLabs by clicking on the Destinations option in the side panel.
Click on the “Setup Event Workflow” tile.
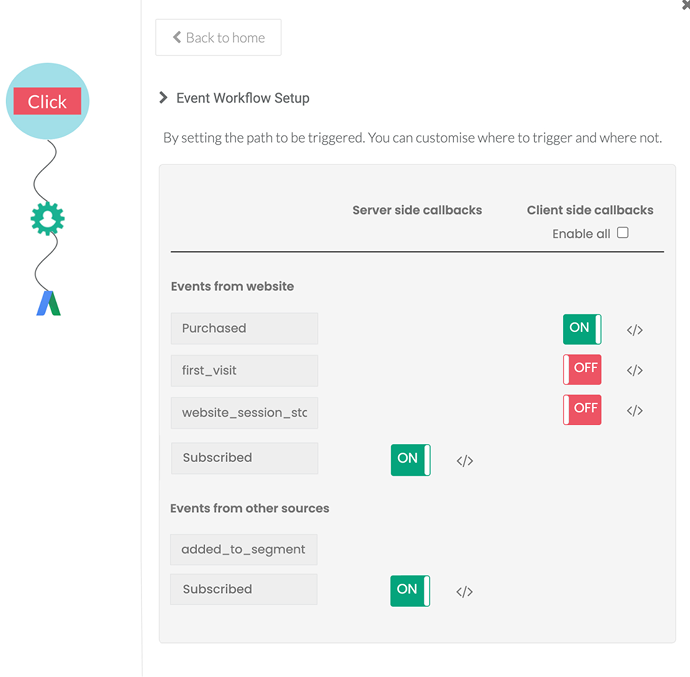
3. Toggle on the events (whether server-side or client-side) that you’ve mapped to Google Ads, then click Save.
Now that you have completed the whole setup process, you can now effectively send data from HubSpot to your CustomerLabs account, enrich the data, and send it back to Google Ads.
Conclusion
After setting up Google Ads Offline Conversion Tracking, you’ve made it possible to send offline conversion data from your CRM to Google Ads—without relying on complex code or technical setups. Whether it’s a new contact, a deal update, or a company record change, your CRM events can now be captured, enriched, and pushed back to Google Ads in real time. Instead of just tracking web conversions, you’re now equipping Google with the right signals to optimize for actual business outcomes. With this setup in place, your team can build smarter retargeting strategies, create high-value lookalike audiences, optimize ad algorithms with better signals, and make every ad dollar count by focusing on what truly drives results.