The aim of this article is to track people abandoned cart on your E-commerce store and send data to Facebook by setting up a group of custom audience and retargeting them by showing dynamic product remarketing Ads.
To track abandoned cart events in your E-commerce store, we are going to use Action Recorder by CustomerLabs
Why use Action Recorder?
Simple and easy to setup tracking for cart abandonment events within minutes. The best part is no coding knowledge required to use this.
Using Action Recorder to track Abandoned Cart
Follow this simple step-by-step instruction to track your E-commerce cat abandonment using Action Recorder (Action Recorder lets you set-up event tracking without knowing a single piece of code) and send data to Facebook with just click of a button. Sending data to ad platforms like Facebook helps you in setting up a group of a custom audience on Facebook for people abandoned cart on your store and retarget them by dynamic product ads.
Step 1: Setup Action Recorder
Getting started with Action Recorder easy, it just takes few seconds.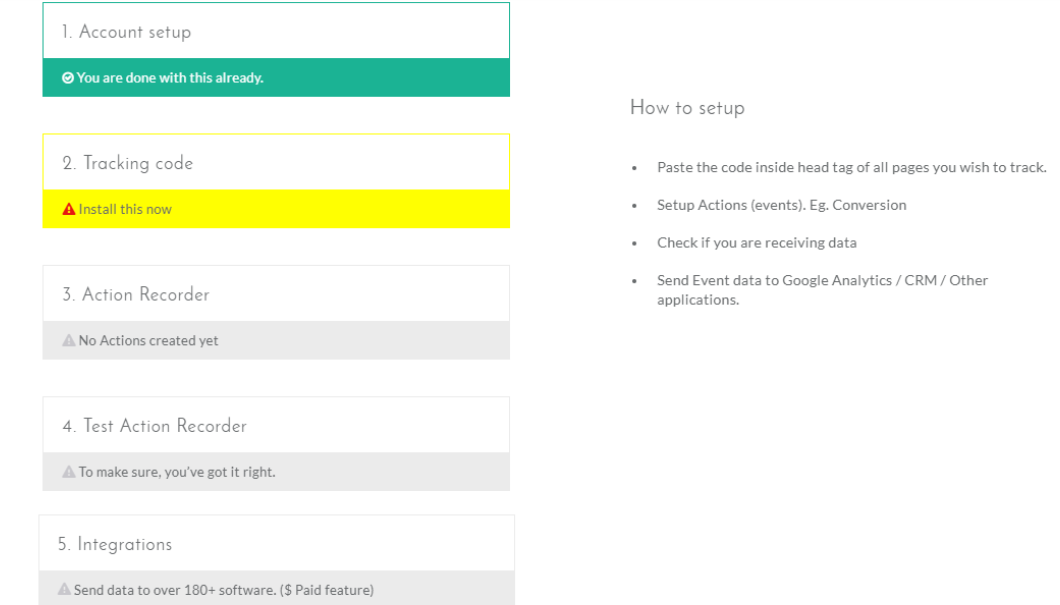
Step 2: Tracking code
The unique code gets displayed on clicking tracking code. All you need to do is to paste this javascript code into your own website.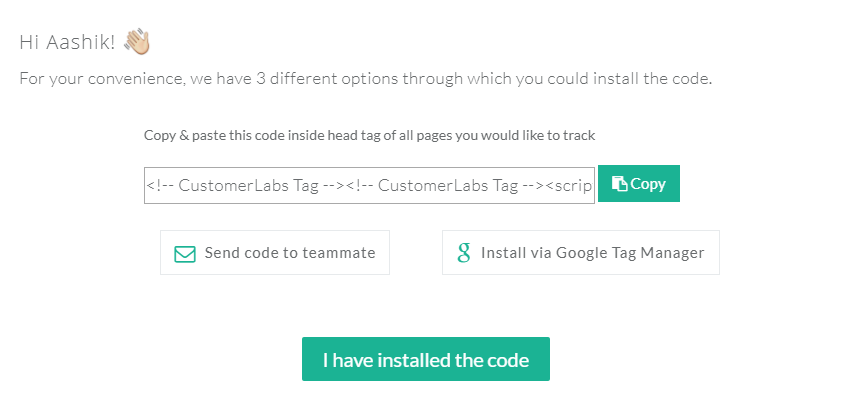

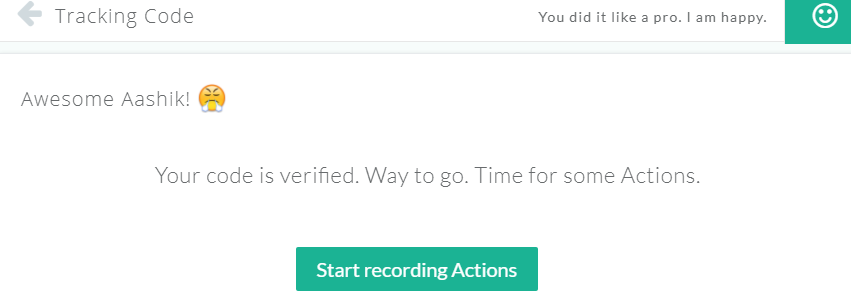
Your website code will look something like this, save your changes. Return back to Action Recorder and enter your E-commerce store URL and click on verify code.
Step 3: Track E-commerce Abandoned Cart
Tracking E-commerce events like Add to cart and checkout made using Action Recorder results in finding the products on your store which are left without completing the payment process.
A. E-commerce Tracking for Add to Cart
To track “Add to cart” events made on the E-commerce store, choose action name as added to cart and action type as on click.
Select “Add to Cart” button, by clicking on the pointing symbol manually.

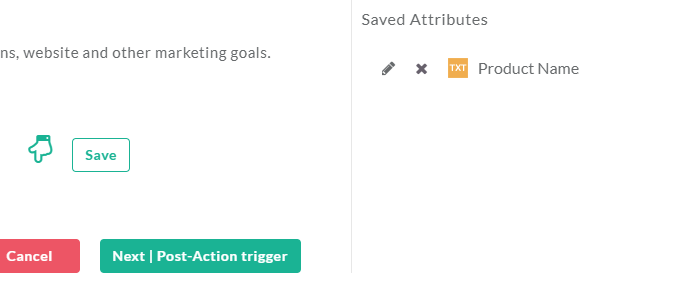
Now, it’s time to choose your attributes. The attributes are the data displayed with the product when someone clicks on the events which are set for tracking. For this below example, I need name and price of the product to be displayed as the attributes when added to cart button is clicked. Similarly, you can choose different attributes with the product as you like.
To set product name to be displayed as the attribute when someone clicks on add to cart button, select attribute as the product name.

Click on save option, once you are done.
To set product price to be displayed as the attribute when someone clicks on add to cart button, select attribute as the product price.

Click on save, once you are done with choosing attributes. Your saved attributes get displayed on the screen.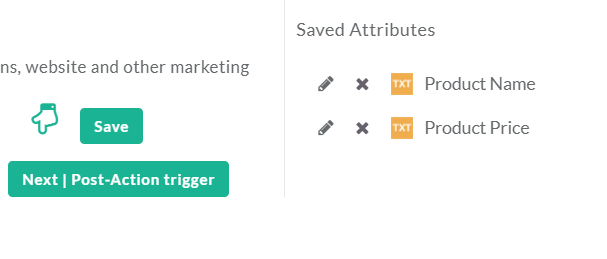

Click save action, once you are done. Your Action Recorder is all set in tracking add to cart product clicks on your E-commerce store.
B. E-commerce Tracking for Checkout made
To track “Checkout” events made on the E-commerce store, choose action name as “checkout made” and action type as on click.



Step 4: Test the events you’ve configured.
Get ready to test your Action Recorder, once you are done with tracking cart abandonment events in your store.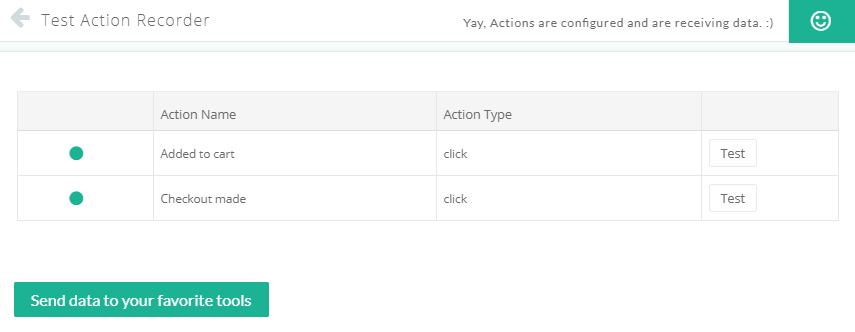
A. Test E-commerce Add To Cart
In your E-commerce store simply click on “Add to Cart” on your products.
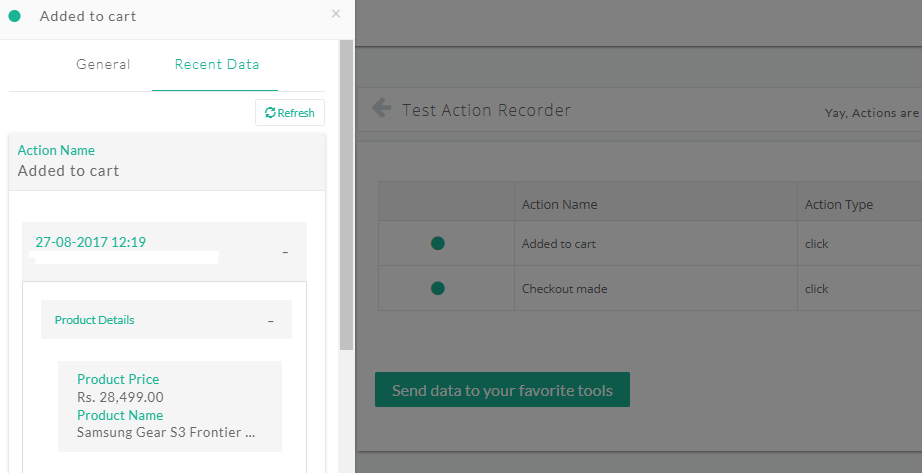
On returning back to Action Recorder click on test for Add to Cart action. The data of a specific product with its chosen attributes gets displayed on clicking recent data.
B. Test E-commerce Checkout made
In your E-commerce store simply click on “Checkout” on your products.
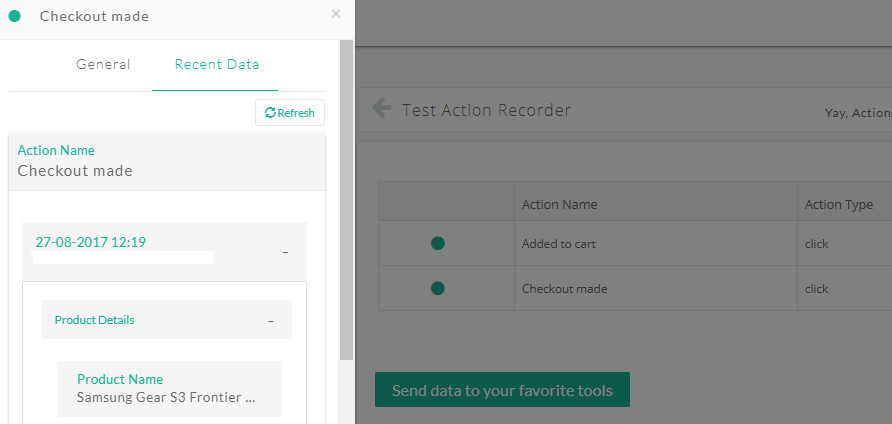
On returning back to Action Recorder click on test for Checkout made action. The data of a specific product with its chosen attributes gets displayed on clicking recent data.
Step 5. E-Commerce Facebook Integration for abandoned cart
By integrating your E-commerce with Facebook, you can send add to cart and checkout made product clicks to Facebook. Our ultimate goal here is to create a custom audience on Facebook and send them dynamic remarketing ads.
Let’s start with sending events to Facebook.
To connect Facebook with Action Recorder, all you need to do is to add your Facebook pixel ID. If you haven’t already got one, go to Facebook pixel tab in ads manager—> click create pixel—> name your pixel—> create a pixel.
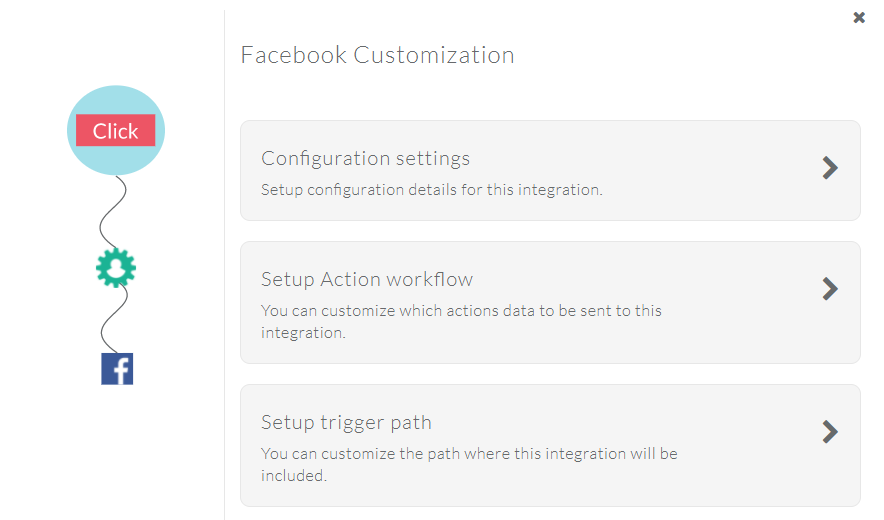
Follow these steps, to customize Facebook with Action Recorder.
Configuration settings: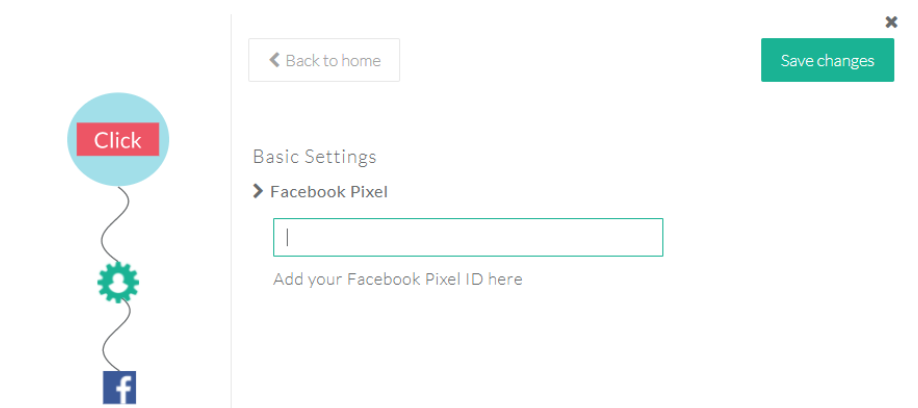
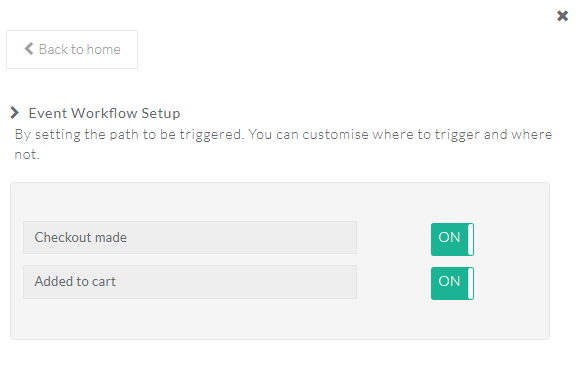
Upload Product feed on Facebook
To make your products to show up on Facebook, you need to upload your product catalog feed on Facebook.
Firstly you need to install your Facebook pixel on Shopify store.
To find your FB pixel ID, go to Facebook ads manager—> asset—>pixel. Copy your pixel ID, Return back to Shopify store. In admin panel of Shopify, visit Online Store—>preferences—>add your Facebook pixel ID and click on save. For this, you are going to need a free app called Facebook product feed. This application does all work for you.( The following example on generating product feed and inserting it on Facebook is going to be on Shopify ) However, this can be done using other platforms as well.
- Use Woocommerce product feed plugin by WebAppick to generate product feed for Woocommerce store.
- Use product feed by amasty to generate Magento product feed.
Go to Admin panel of your Shopify store—>apps—>on app store search for Facebook product feed (by flexify). This app helps you to setup Facebook dynamic product ads feed.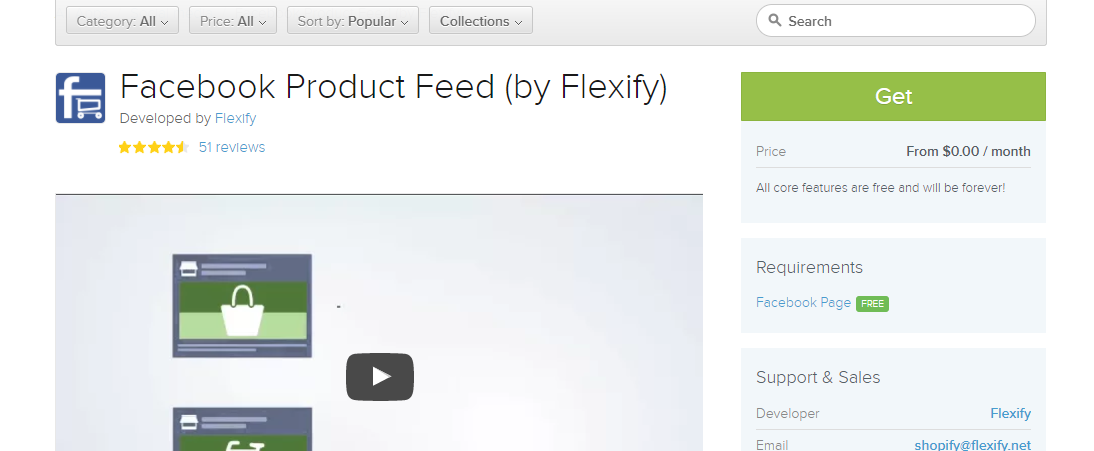
Click on get, the app gets installed. You can find this application on the admin panel of your Shopify store by clicking on apps.
Next step is setting up your application. Open your app, under setting section choose the option as format feed for the native Shopify pixel settings and choose the collections for the feed as all products and copy your Facebook RSS feed URL, you need to paste this into the Facebook Catalogue. 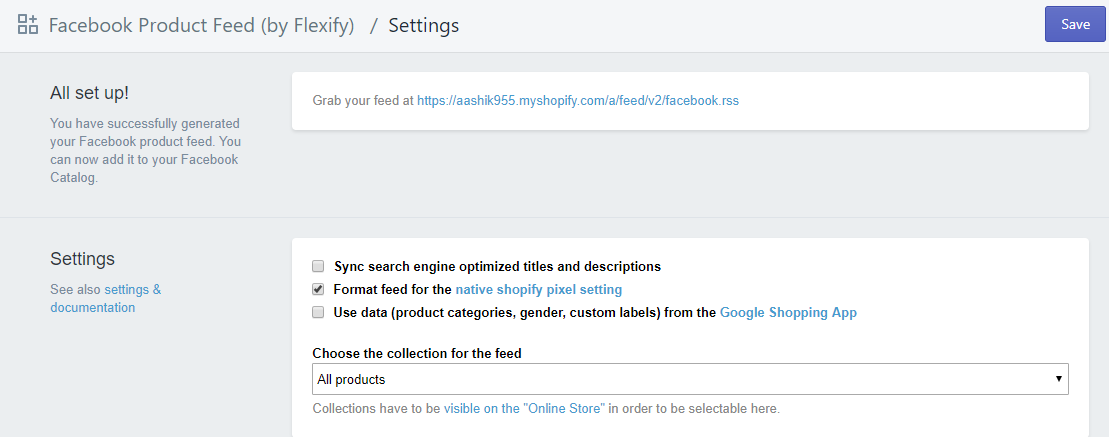
Before you paste this code. It is advisable to arrange your Shopify store by adding relevant product type for each product.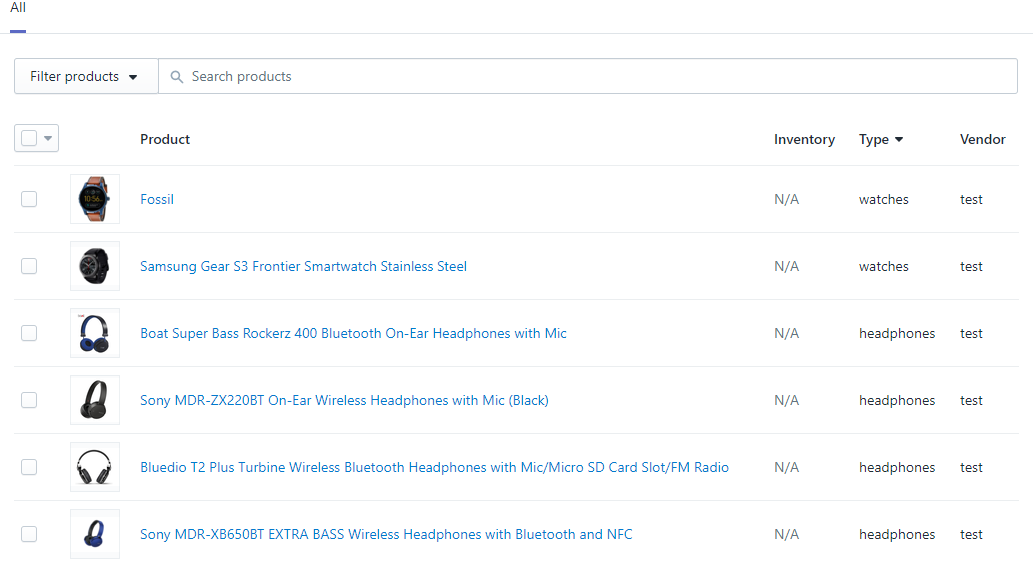
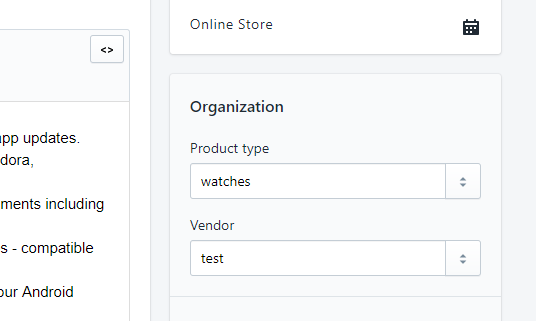
Setup your Product feed on Facebook
In advert manager Facebook, go to product catalog under the assets section. Click on add product feed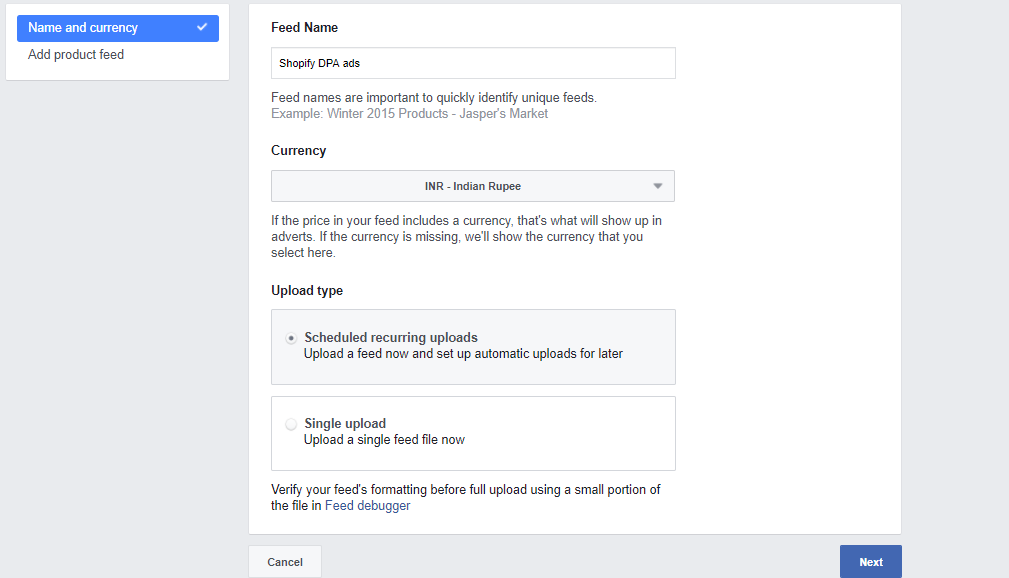
Give a name for your feed. Add your preferred currency, choose your upload type and click on next.
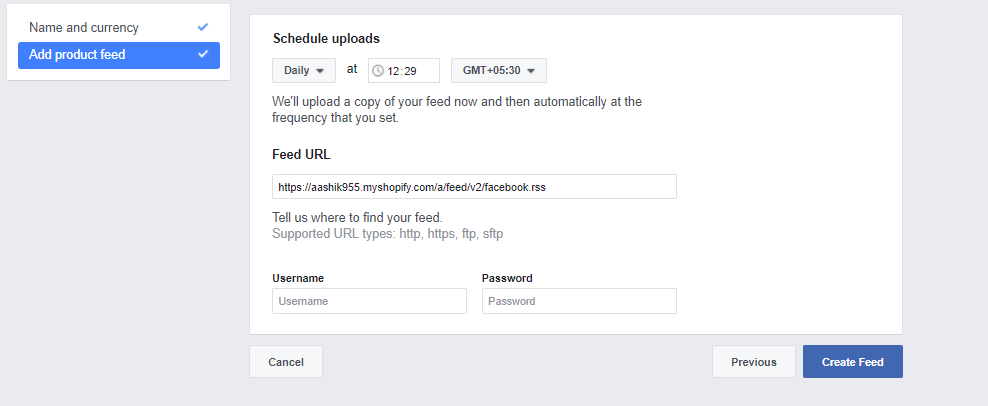
Under feed URL section, paste your Facebook RSS feed which is generated from the app on Shopify and click on create a feed. Your product feed gets displayed with a total number of items in your store.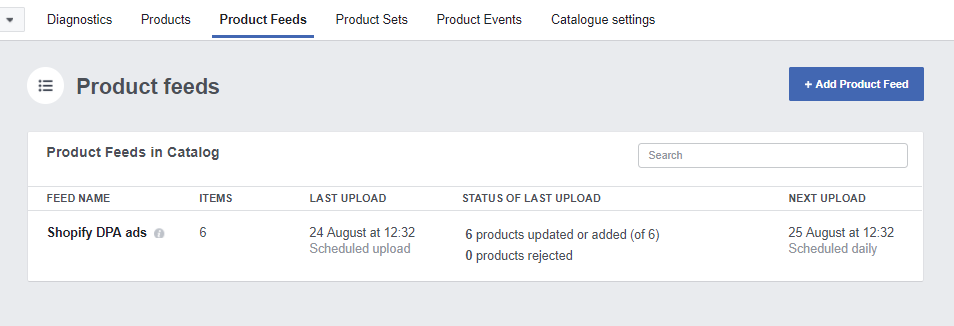
In this step, we going to split products based on its type. Go to product sets, give the desired name for the set and choose product type based on your niche.
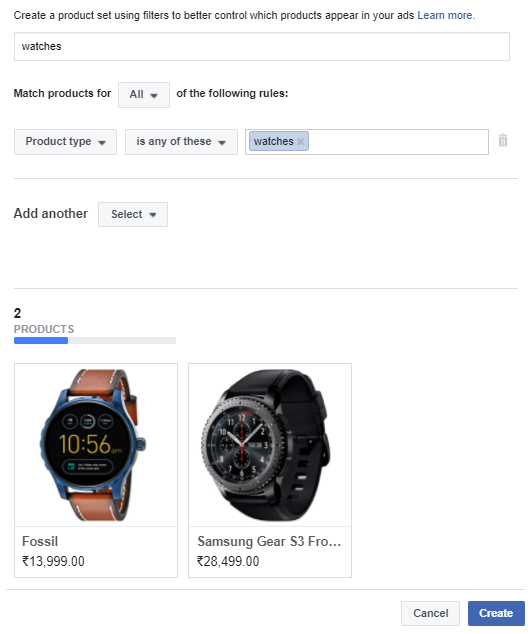
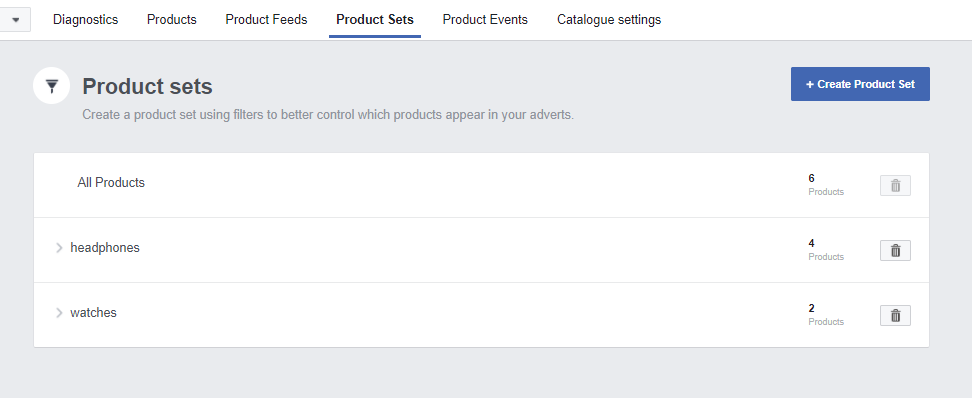
Click create once you are done. The product sets with a number of products get displayed on this section. To keep it simple, I’m adding products on only two different types, feel free to add as many as you like.
Custom Audience targeting – Facebook
Setting up a custom audience on Facebook is a great way, where you can connect with the people who have already shown interest in your products on your E-commerce store and send them targeted Facebook ads directly.
Here we are going to create a group for the audience who have added products to cart on your E-commerce store and abandoned cart before completing the payment process. This data helps in sending abandoned cart remarketing ads.
( The minimum size of custom audience on Facebook should at least be 20 )
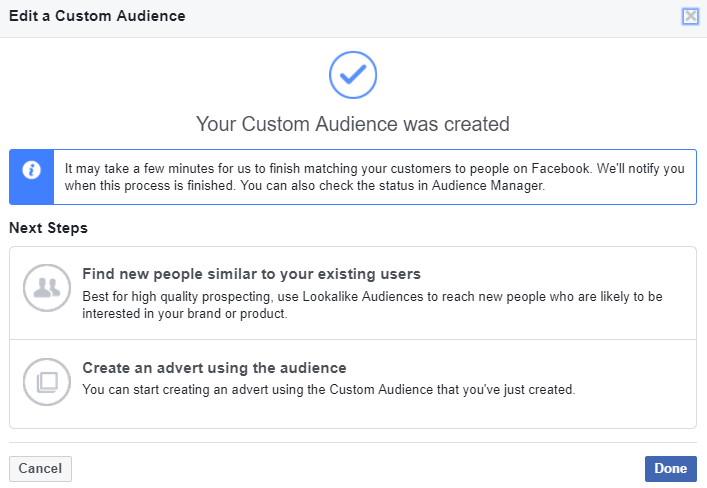
To create custom audiences, go to Facebook advert manager—>tools—>custom Audiences.
Create abandoned cart campaign
To create a custom audience for cart abandonment, include people clicked on add to cart on your products.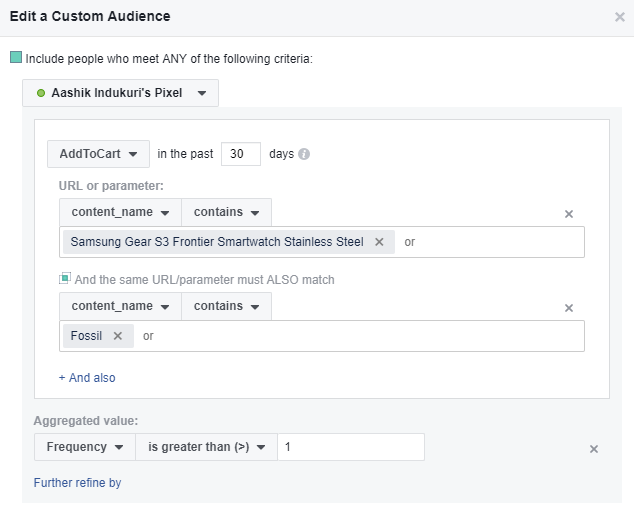
To find or target people without completing the checkout process on your products, add another option saying exclude people.
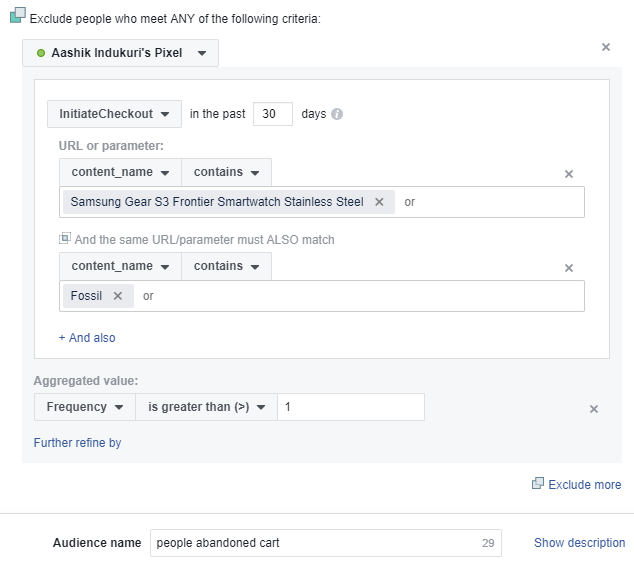
Add your products name on choosing a content name, set a aggregated value. Give a name for your audience.
For above example, I chose the content name as the parameters similarly you can choose content_type, content_ids, num_items based on your convenience. To find exact details of your products, just right click on your product page of your E-commerce store, select inspect option.
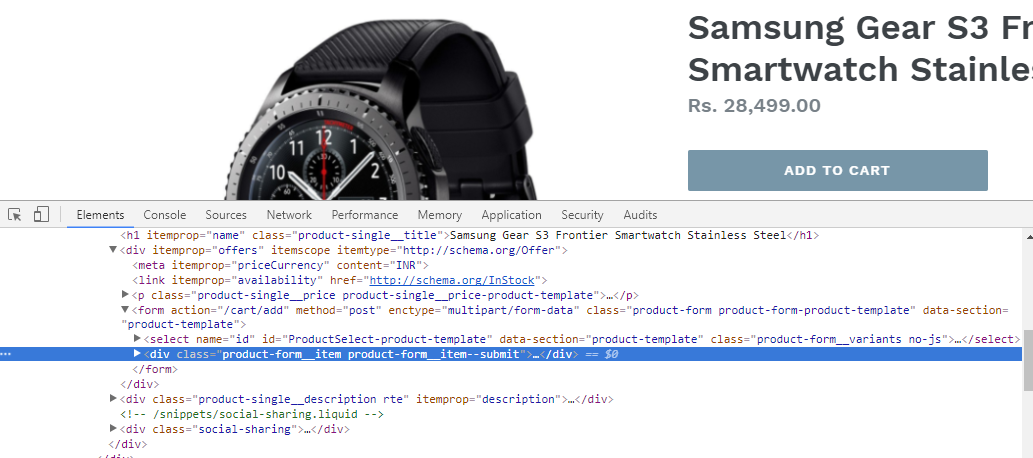
Select network and choose preserve log option and click on add to cart action button of your product.
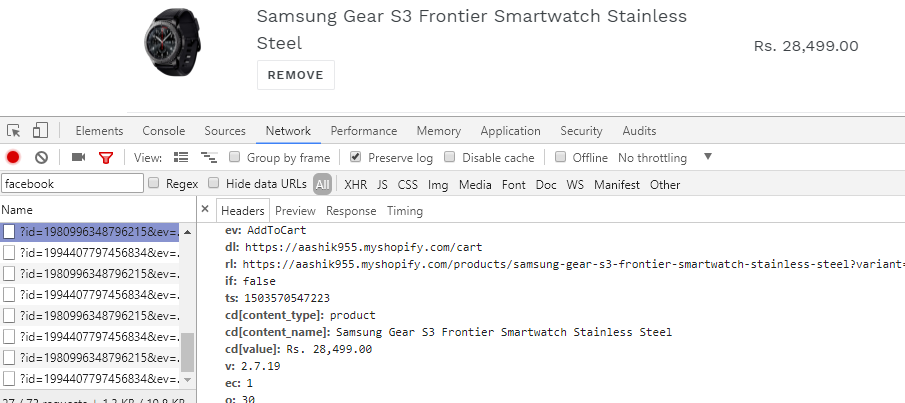
Search for Facebook, choose the product option. Scroll down to the bottom, exact details of the product get displayed. By this way can find your parameters for any particular products.
Create Dynamic Remarketing Ad with Facebook Custom Audience
On creating the group of custom audience who have abandoned cart on your E-commerce store, its time retarget them by setting by dynamic product ads.
What are dynamic ads ? what is so special about it ?
The dynamic product ads are usually referred to as the display ads on your products of E-commerce store which are viewed but didn’t complete the actions as per the marketer. By relating this to our example, our goal is to send targeted product ads to people added to cart on your products and left without making a payment. This helps you to hyper target with specific product ads to the people abandoned cart on products in your E-commerce store.
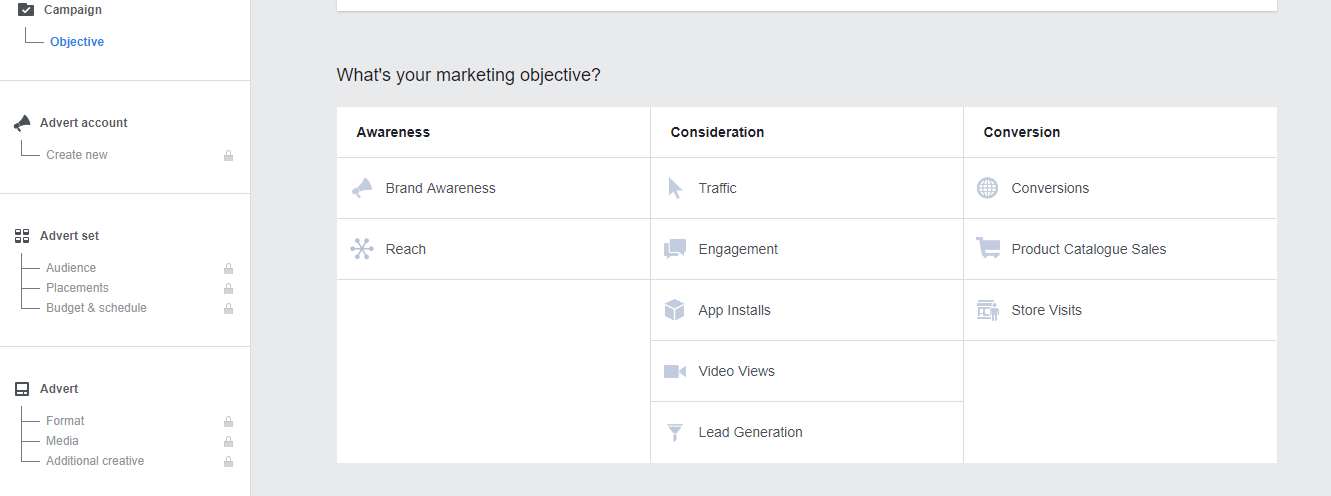
Campaign setup
Under conversion section click on product catalog sales.
Choose product catalogue, give a name for your audience and click on setup advert account.
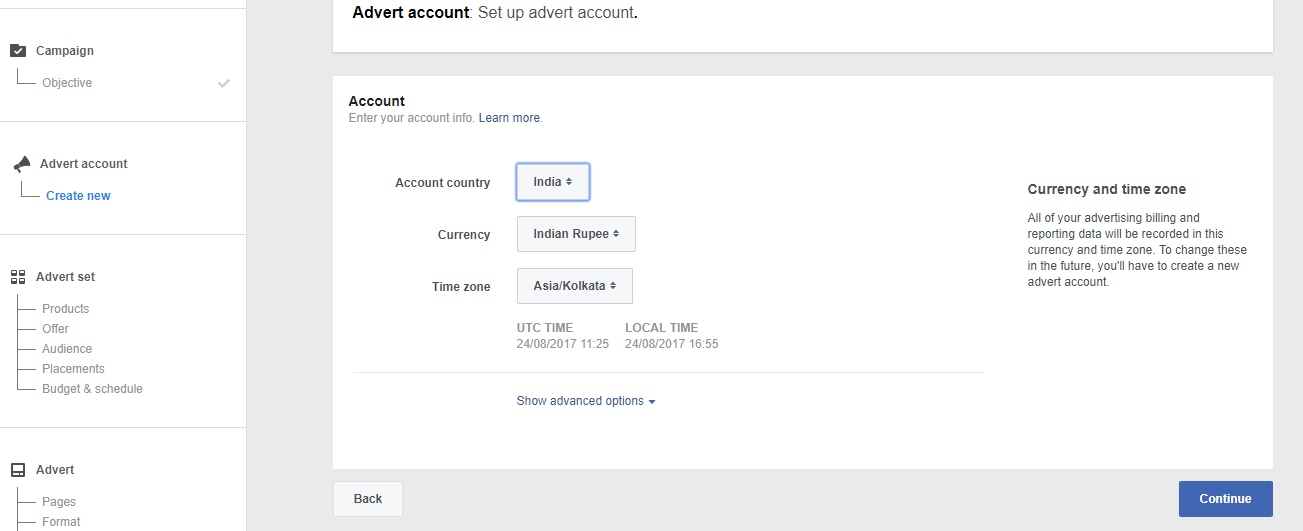
Setup Advert account
Choose a location of your audience, set a currency and click on continue.
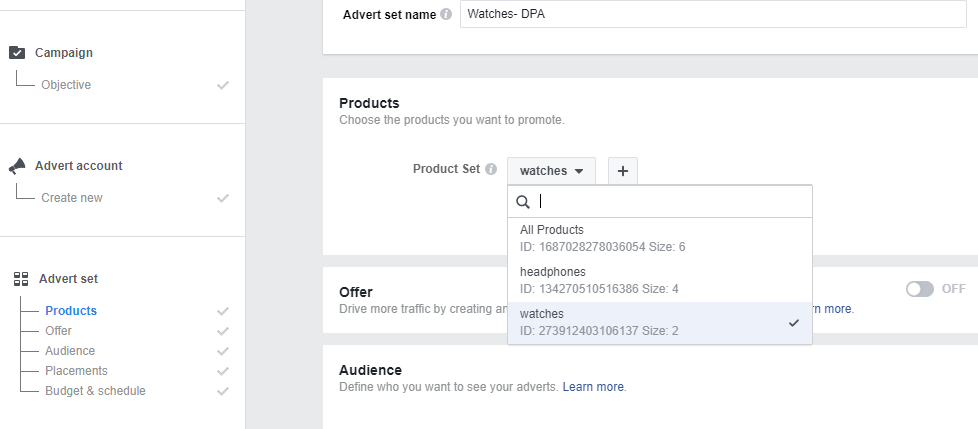
Give an Advert set name. For this example, I would like to show you the facebook dynamic product ads example for watches on my E-commerce store. Choose your preferred set of products for Dynamic display ads.
Select your custom audience and set a geographical location for your audience to target.
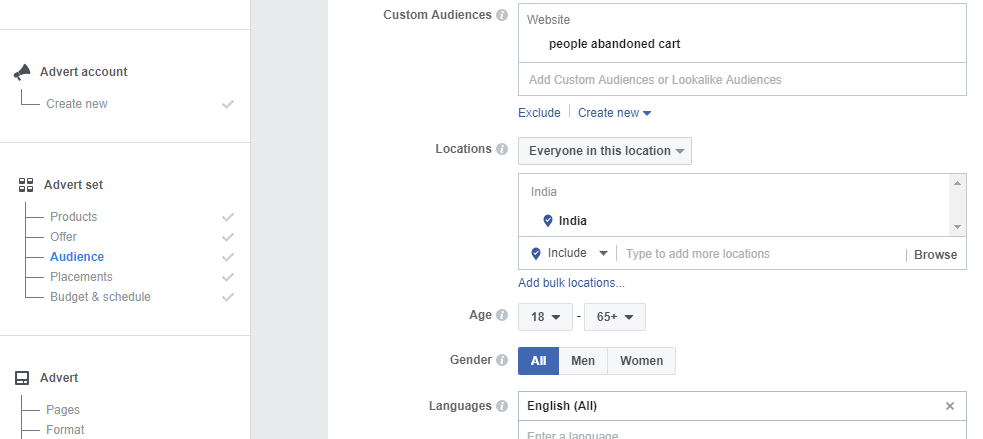
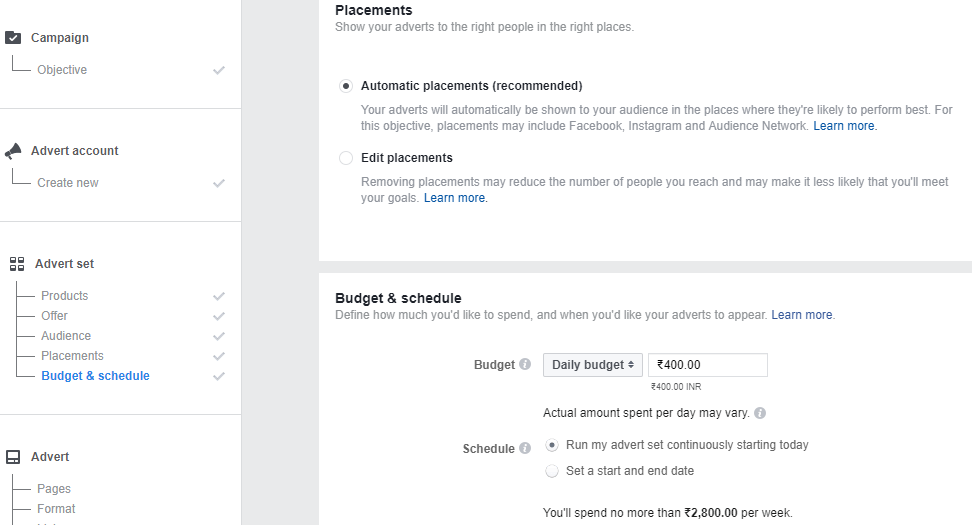
Choose your ads placement, give a daily budget and set up a schedule.
Create advert
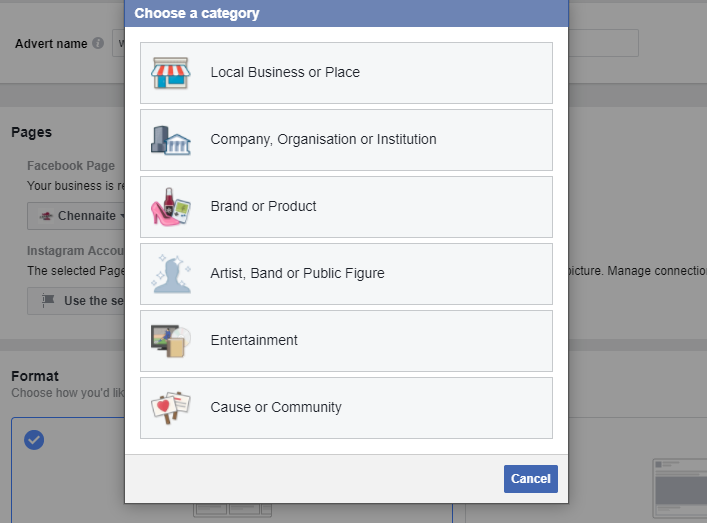
It is necessary to have a Facebook page to promote ads on Facebook. Create a relevant page of the products you are promoting, if you don’t have one already.
Choose a format for dynamic product remarketing ads.

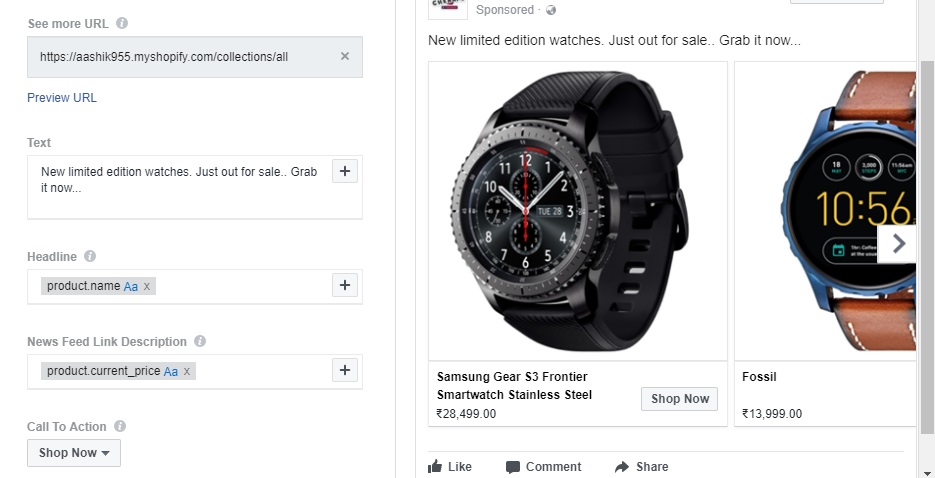
Well, that’s it.. bravo!!
Your very own dynamic product ads with the Facebook custom audience should be all set and ready by now.
What do you think?
Was it easy?
Action Recorder is specially made for Digital marketers like you, To increase your productivity.
Learn to set E-commerce event tracking for your entire store using Action Recorder.
To set cart abandonment campaigns in drip visit Blog
Please recommend us…
Try Action Recorder, if you need any help do let me know. Happy to help you.

