Every eCommerce marketer is struggling with tracking eCommerce conversions on their eCommerce store. Here I’ll try to explain to you in detail how you can set up event tracking for your eCommerce website using No-Code event tracker and use the direct integration for sending that data to GA4 and Meta (formerly Facebook).
When you collect your eCommerce store conversion event data, it serves as the first-party data for ad platforms and helps you achieve better retargeting ad campaigns.
eCommerce Store Event Tracking
Step 1: Setting up Account
Sign Up and get started with the No-Code Event Tracker with just few clicks.
Once you sign up, some of your details are filled-in by default.
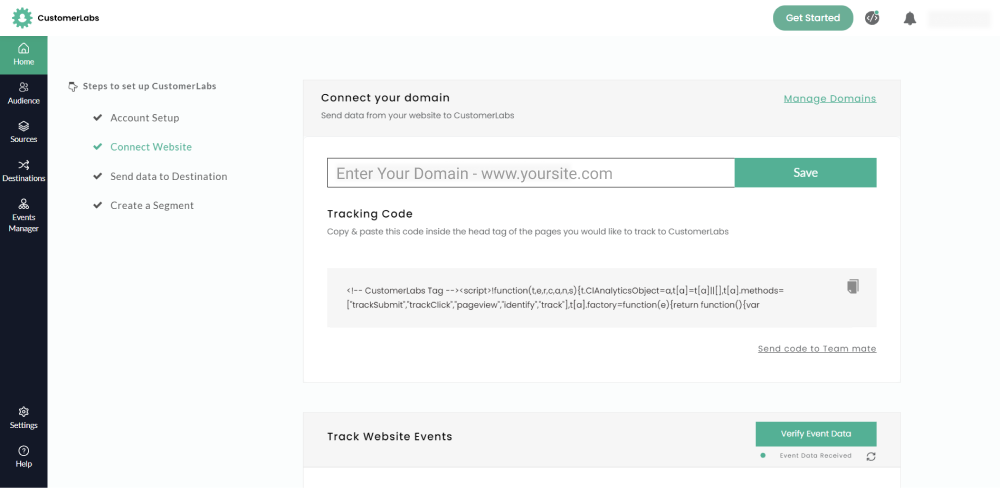
Step 2: Connecting Website
Save your domain. A unique code for your website will be generated. Copy the code you get in the Tracking code section using the copy button.
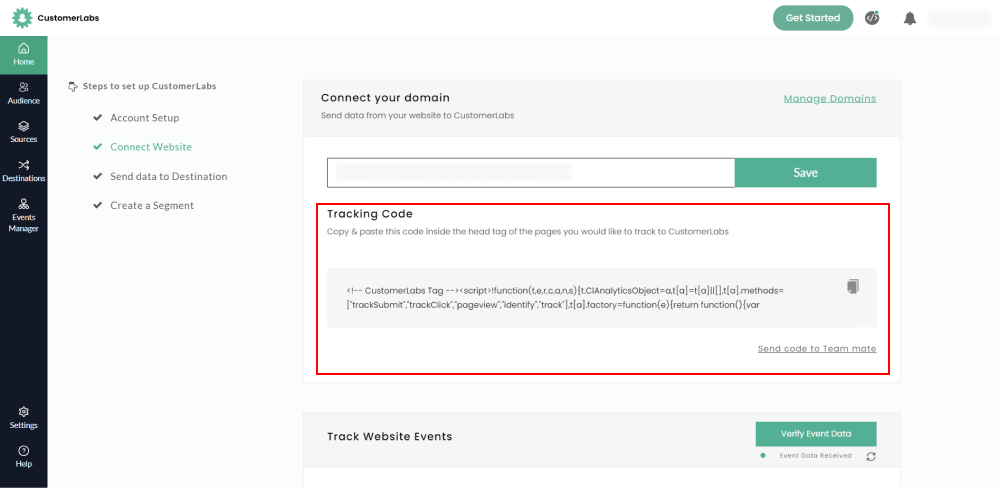
Paste this code into the <head> </head> section of your eCommerce website.
Save your code.
Now, your website is fully connected with CustomerLabs CDP.
If you are using shopify, bigcommerce, or woocommerce click the links below to check how to connect your website.
Shopify | BigCommerce | WooCommerce
Step 3: Track the Events
You can track every single action the user performs on your website. However, it is not advised to track all the events and save them. You should be careful to track and collect the user behavior data only for important events.
Some of the important events are: Add to Cart, Remove from Cart, Add to Wishlist, Search Made, Check out made, etc.
Let me show you how to track “add to cart” and you can in the same way track any user behavior that you want.
Firstly, launch the no-code event tracker from the dashboard.
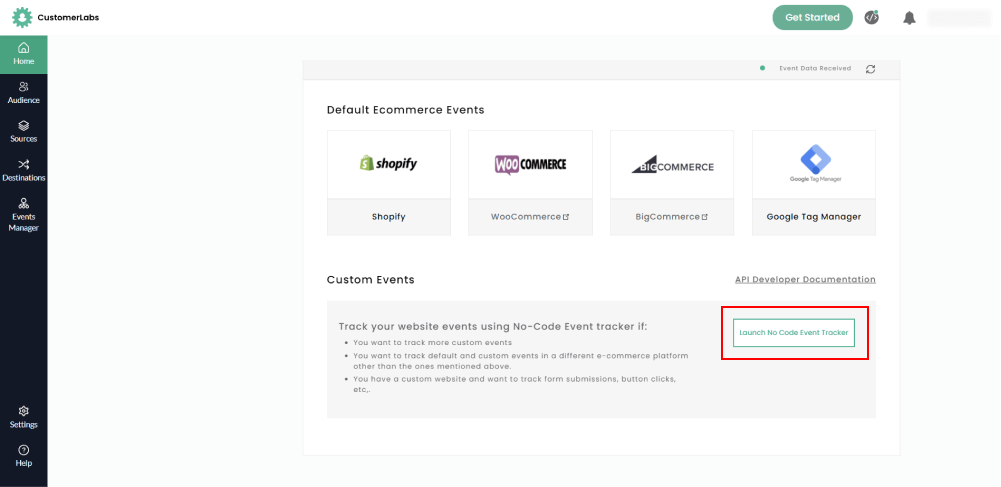
This will open your eCommerce store with the No-code event tracker.
You can track various user behavior including add to cart, add to wishlist, removed from cart, purchase made, checkout made, product viewed, product page viewed etc., actions on your eCommerce store for any number of times. For example, product viewed 5 times, added to cart but purchase not made, etc.
Below is a small demonstration of how you can use the no-code event tracker for the event, ‘add to cart’.
Record User behavior:
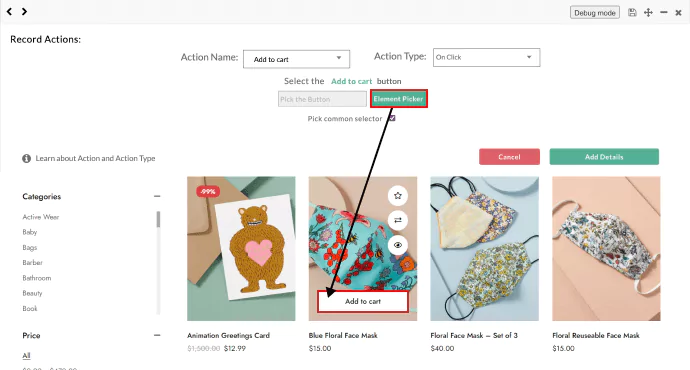
To track all the users who clicked on ‘add to cart’ you have to do the following:
Action Name: Added to Cart > Action type: On-Click > Click on the Element Picker > Pick the Add to Cart button
Element Picker:
Once you click on Element Picker, you have to click on the section of the website which you want to select. It can be any button including add to cart, add to wishlist etc, or it can be any attribute such as product name, price, etc.
Giving Attributes:
Once you click on the ‘Add Details’ button, the action recorder dialogue displays the attributes. You have to choose the attributes you want to collect such as product name, product price, product id, product quantity etc.
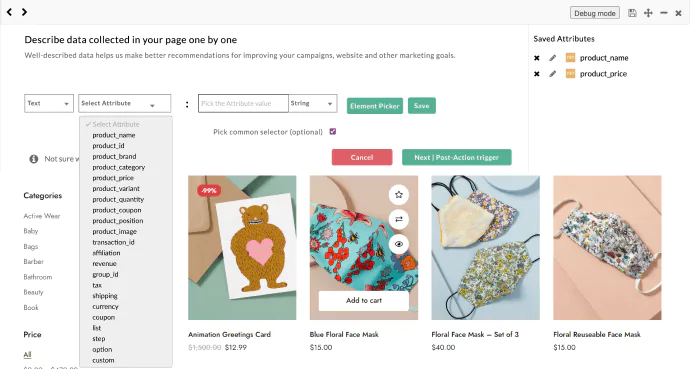
You’ve done a great job on adding all the attributes you need to understand the data collected. Now, simply click on the “Next” or “Post-trigger action” button to move forward.
You will be directed to the next step, where you have to choose if you want to track this behavior across all pages or only a specific page.
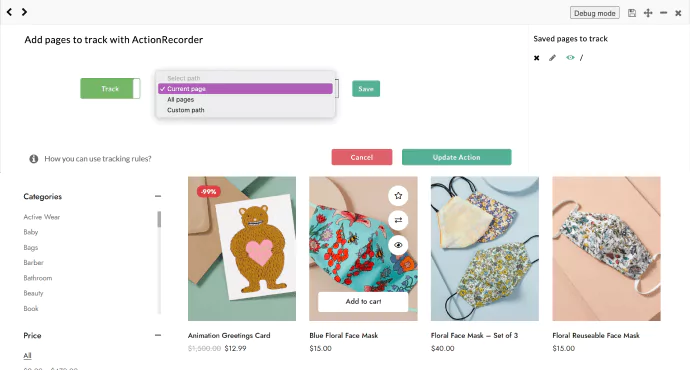
Finally, move ahead by clicking on update action and click the floppy icon on the top to save this action.
In the same way, we can track all the events that you wish to track. Be it added to wishlist, or removed from cart or viewed the product, viewed the product display page etc. You can track all the events.
Direct Integration of eCommerce conversion tracking with Meta
You can implement Meta Conversions API (formerly Facebook Conversions API) & Offline Conversions API using the direct integrations available. You need not write a single script or any code to implement your Meta Conversions API.
To do so, find Facebook on the destinations dashboard, click on it and click enable.
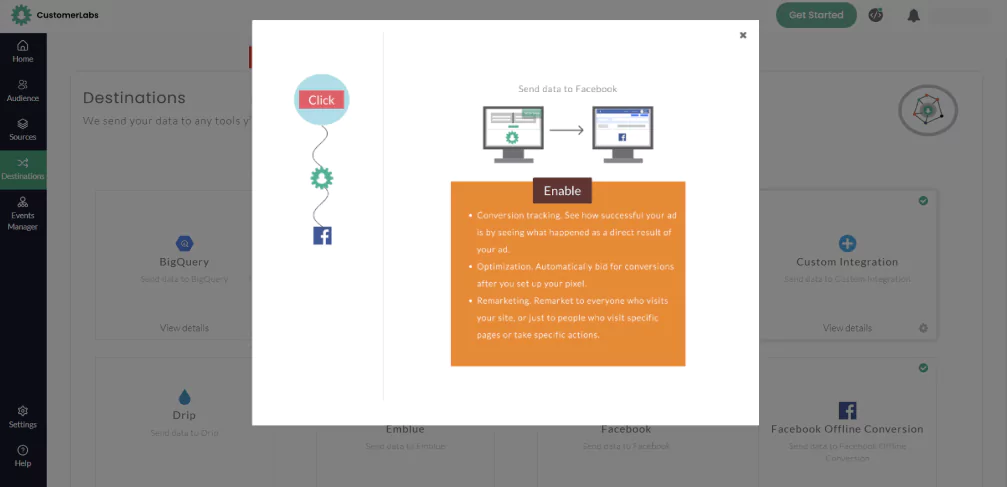
Once you click on Enable, the below screen will appear.
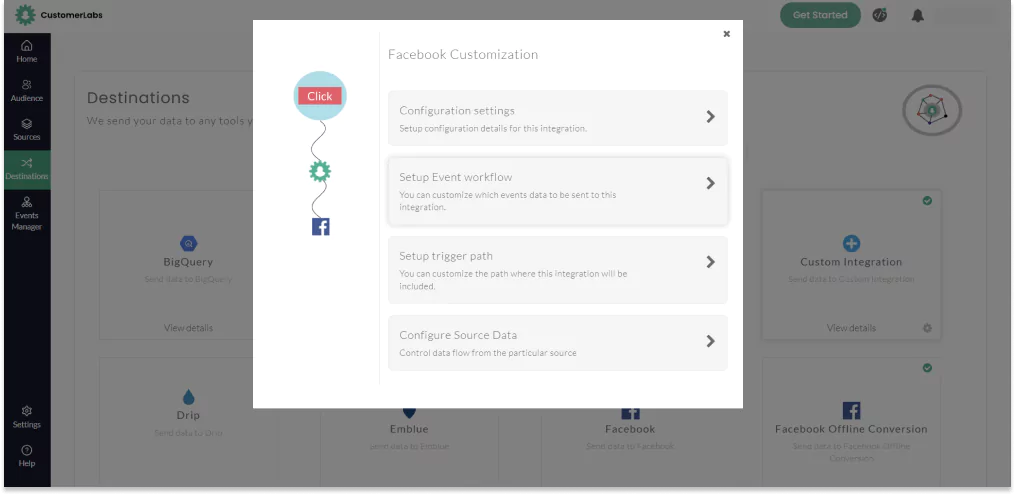
For your Shopify store to synchronize all the events you tracked using CustomerLabs CDP you have to finish configurations on your CustomerLabs Dashboard.
Click on Configuration settings
Click on the Authenticate Facebook account button.
Doing so will redirect you to Facebook.
Select the account you have admin access to and the one authorized to run ads.
After you select the account, it will prompt you to choose the page for which you want to run the ads.
Once you choose and move forward, it will automatically redirect you to the CustomerLabs dashboard and the below screen will appear.
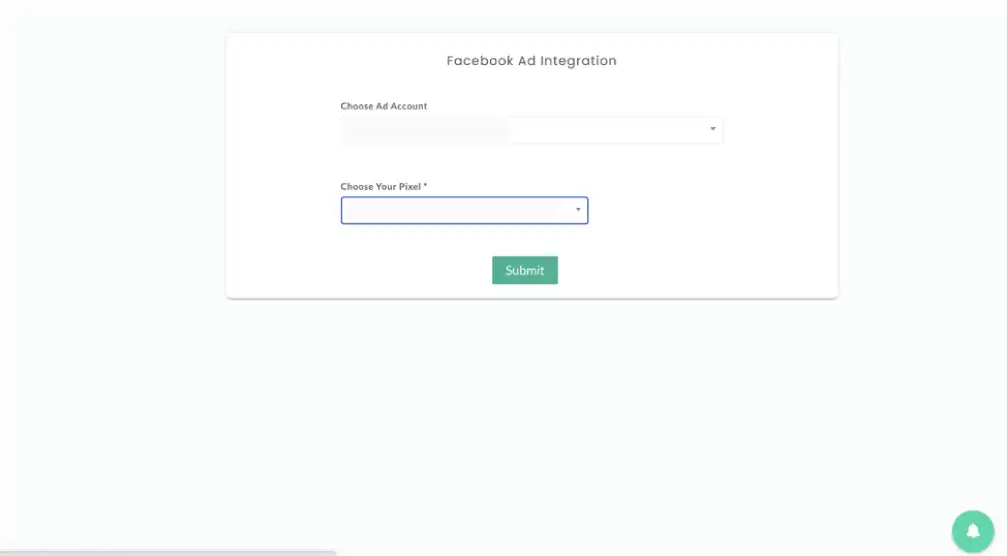
Next choose your Facebook Pixel from the above screen and submit.
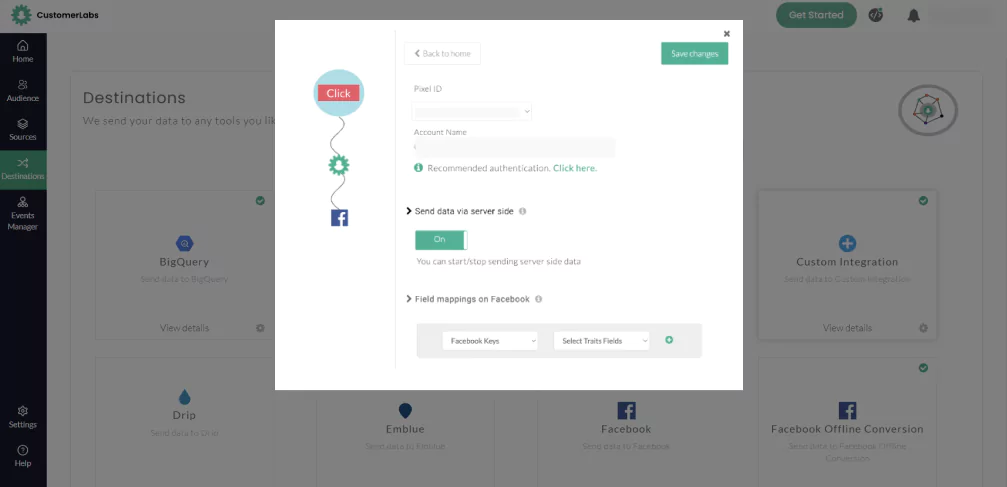
CustomerLabs Integration with Facebook Dashboard
On the above screen, toggle the send data via server-side ON.
Finally, click on Save Changes.
Now, you have chosen to send the data via server-side for your Shopify store.
Note: If you do not have a pixel created already, follow the below steps to create one.
Meta Business Manager > select your business > Data Sources > Pixels > Add (you will find this near search bar) > Enter Pixel name of your choice > insert website URL > Continue
Your Shopify Store is now fully integrated with Facebook and ready to send event data collected through CustomerLabs CDP.
To know in detail about Meta Conversions API – read the full documentation here – Read More
Directly Integrate Your eCommerce Store with GA4
You can connect your eCommerce store with your Google Analytics (GA4) with just a few clicks.
Note: If you did not migrate to GA4 yet, check out how to migrate to GA4 from Google Universal Analytics (GUA)
From the home page, navigate to destinations using the icon on the left-side menu.
From all the destinations available, choose Google Analytics Gtag for integration with GA4.
Click ‘Google Analytics gtag’
You will see the below pop-up
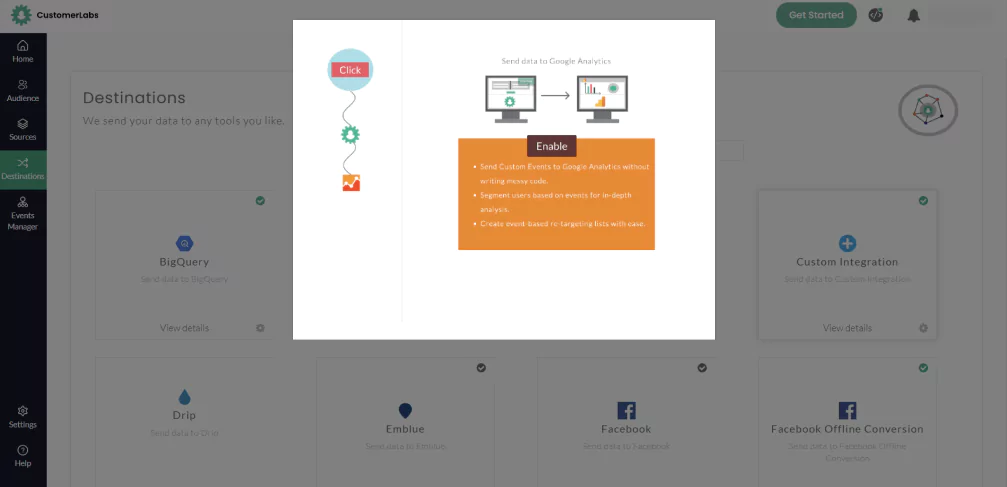
Once you click Enable, Google Analytics as your destination is activated..
With this, Google Analytics integration for your eCommerce store is enabled but you have to configure it to sync your data.
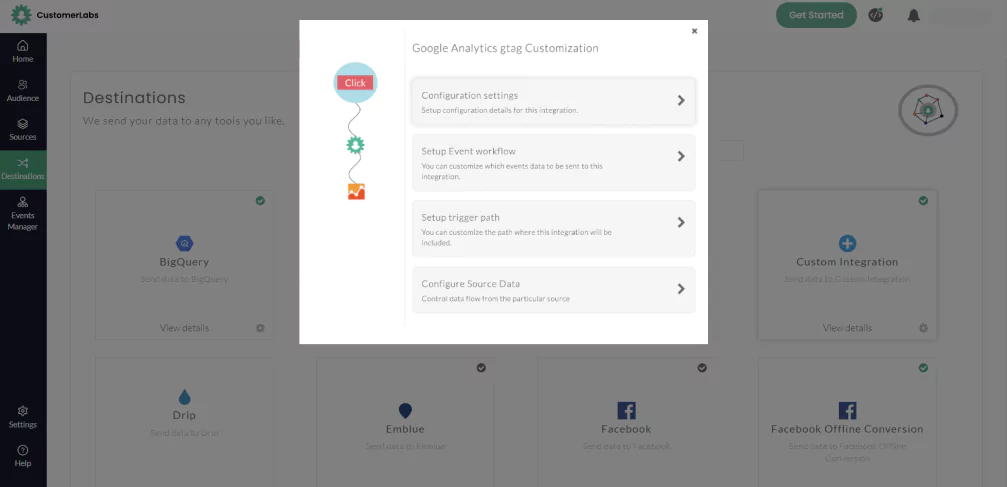
Click on Configuration settings.
Authentication:
You should provide authentication to CustomerLabs for your Google Analytics account to sync the data and to do that, follow the below steps.
Provide the measurement ID in the field inside the configuration settings where it is asked. To get the measurement ID, go to Admin Panel > Setting > Data Streams > Website > Measurement ID
Enter the measurement ID in the configuration settings.
Sign in with Google to integrate complete data collected with Google Analytics.
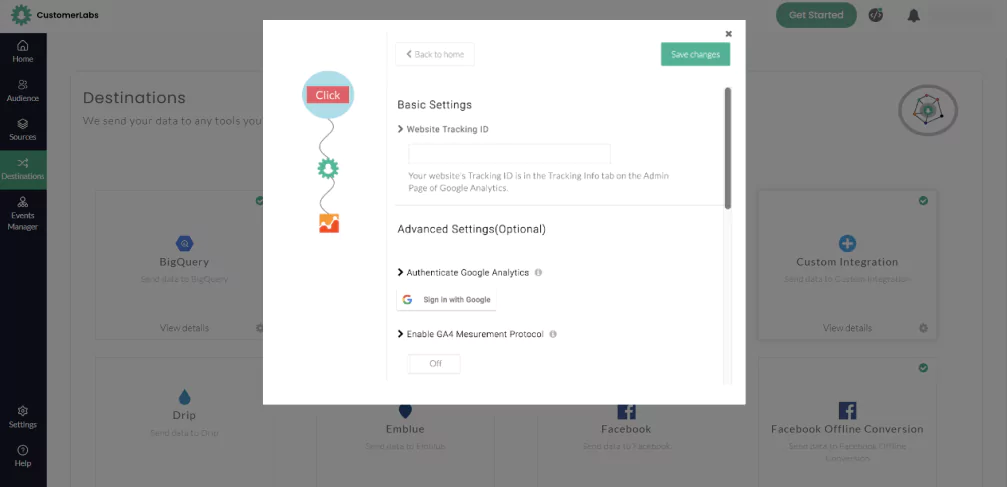
After successful authentication, you will see the below screen.
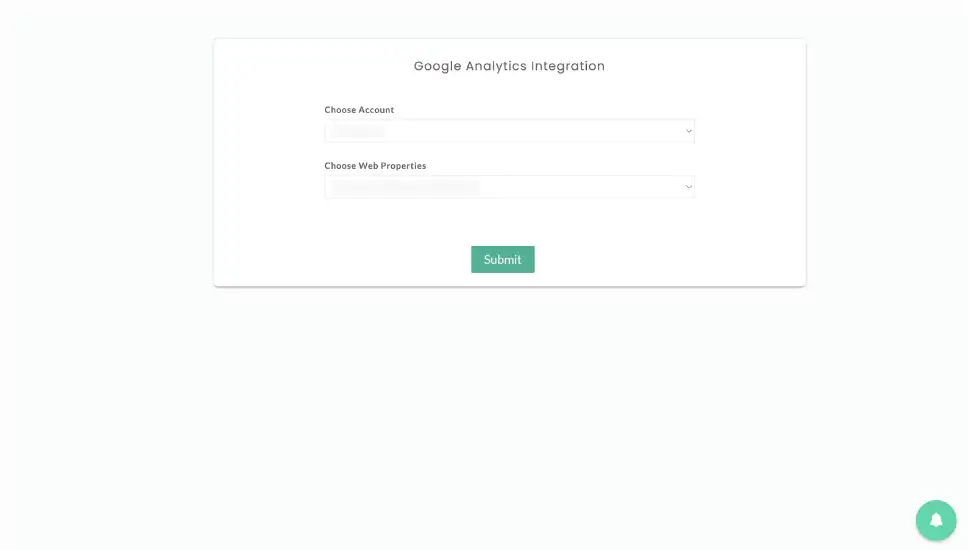
From the available accounts, choose the Analytics account with which you want to synchronize your eCommerce store’s event data.
Select the relevant web property and submit.
You will receive a quick notification right there mentioning the authentication being successful.
You will be redirected to the below screen. Enable the GA4 Measurement Protocol
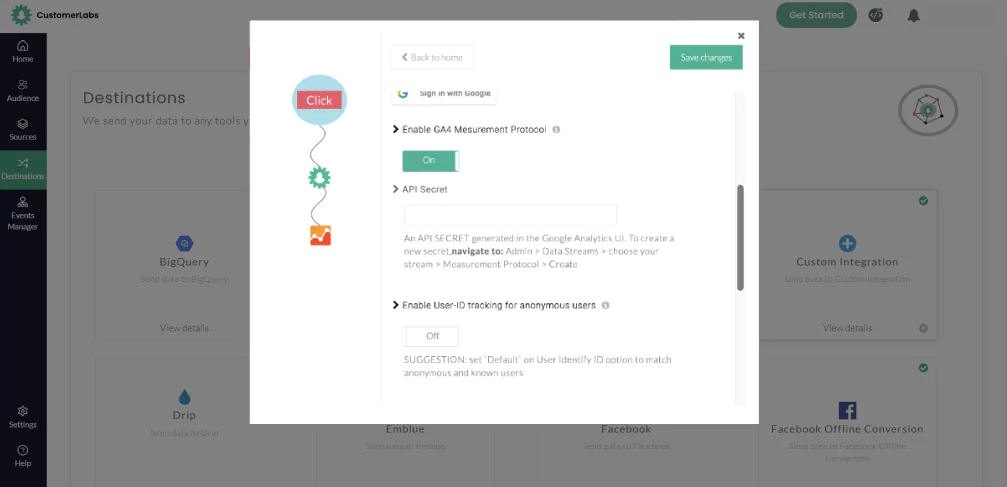
You will find the API Secret key in Admin > Data Streams > choose your stream > Measurement Protocol > Create
Once this is done, you have to ‘Enable User-ID tracking for anonymous users’.
Your eCommerce store can be benefitted by leveraging the option called enhanced eCommerce to get detailed comprehensive reports of your eCommerce events.
If you want to give any user traits, you can select them as well.
After the configuration is completely done, click on ‘Save changes’.
Your eCommerce store is now fully synced with Google Analytics to receive all the event data that you tracked using our No Code event tracker.
To know more, read the full documentation on Integrating Google Analytics.
Your custom-built eCommerce store is fully ready to track events and integrate the data directly to Meta & Google Analytics. You can track all your conversions and thus leverage its benefits by sending the data to other platforms as well.


