Google Ads has rolled out a brand-new user interface, aiming to enhance usability and streamline ad campaign management. But with every new update comes a learning curve. This UI change is pretty confusing for people, especially when setting up campaigns, managing audiences, and tracking conversions.

From this blog, you will learn to get your hands dirty with the new user interface in Google Ads. Let’s start setting up conversion actions in Google Ads. And walk through the new setup process and how CustomerLabs can streamline it further.
Step-by-Step Setup in the New Google Ads UI
How to create conversion action for Website
- Login to your Google Ads account

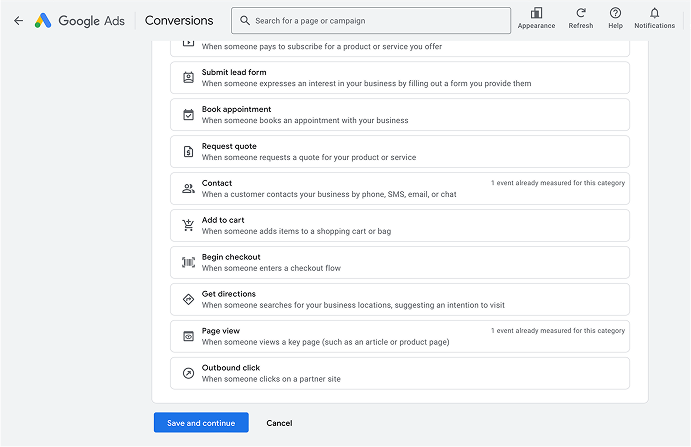
- Navigate to Goals > Conversions > Summary
- Then click on Create Conversions action
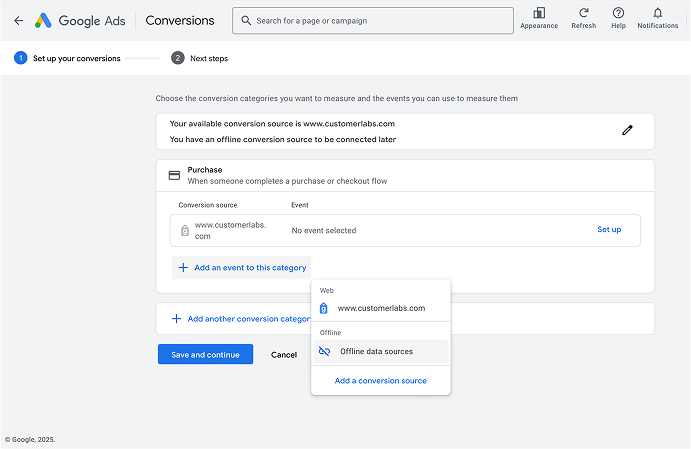
- Select Conversions on a Website.
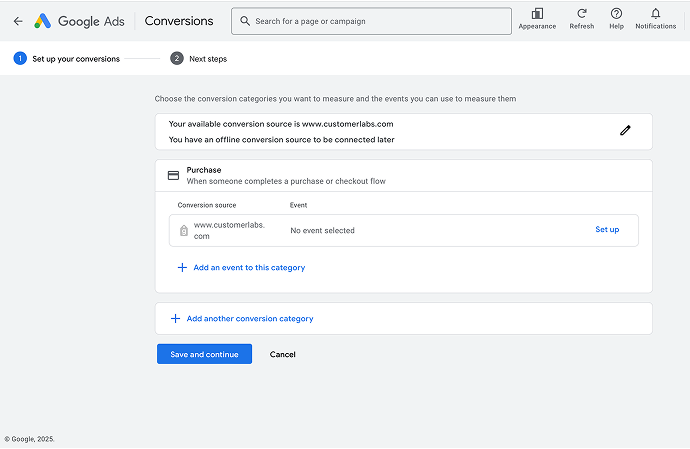
- Choose Purchase (or any other conversion action you want to track).

- Under Conversion Source, click Add an event to this category and select your website.
- Click Save and Continue.
To create a new event:
- Click Create a Manual Event.
- Give it a clear and meaningful name.
- Click Use Event.
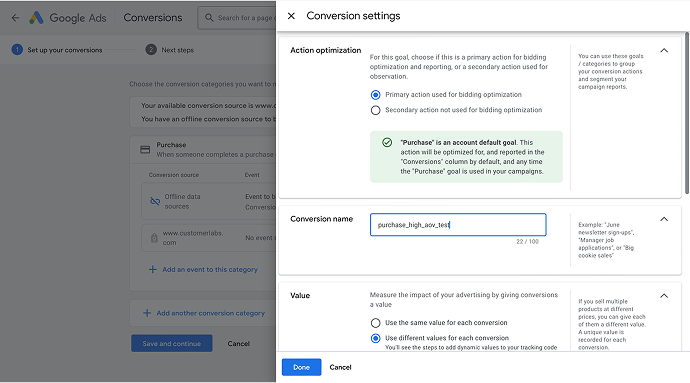
- Click on Settings (this section retains the previous UI).
- Engaged-view conversion window options available:
- Data-driven
- Last-click

- Scroll down to enable Enhanced conversions, and tick the check box to improve the attribution accuracy inside the ad campaigns
- And click on Done and Save and Continue
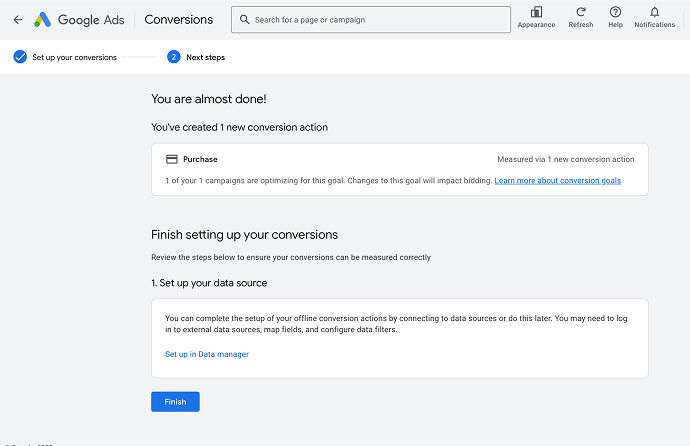
You have successfully created the conversion action for the website. For more clear understanding, check out this video
Also read on: Google’s First-Party Mode Tracking: A Complete Guide for Performance Marketers
How to setup Offline conversions
- Login to your Google Ads account
- Navigate to Goals > Conversions > Summary
- Then click on Create Conversions action
- And click on Conversions Offline > Add data source
- Click on skip this step and set up a data source later and Click on Done
- Then click on Purchase (any action that you want to measure)
- Click on Add an event to this category and click on offline data sources
- Then click on Settings and name the conversion event
- And then click on Save and Continue
Once you are done with the above-mentioned steps, let’s see how to streamline the conversion tracking with CustomerLabs, a robust 1PD Ops platform.
Also ready on: How to create a B2B Google Ads Strategy for Lead Generation
How CustomerLabs Simplifies Google Ads Setup
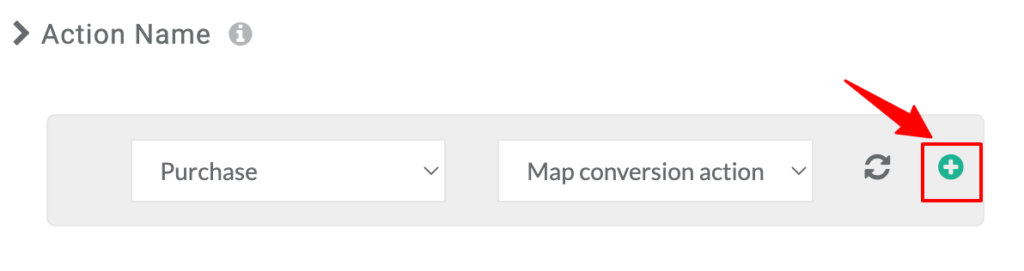
Map the conversion action in CustomerLabs
- Login to the CustomerLabs account and Authenticate Google Ads in the CustomerLabs
- Then click on Destination> Google Ads> Configuration Settings
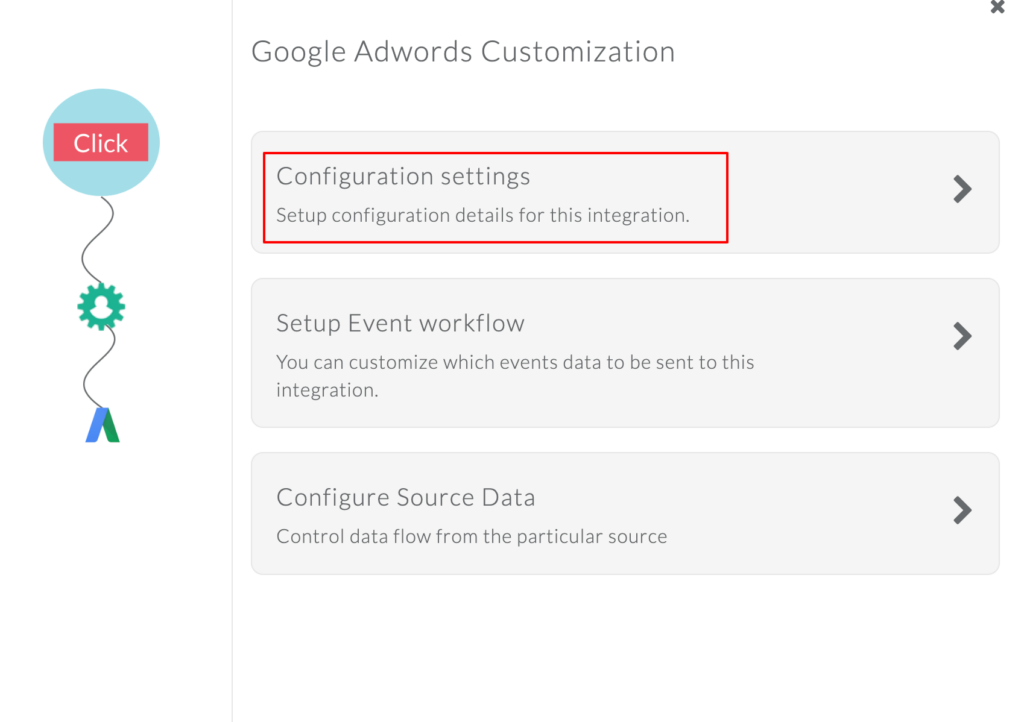
- Click on Map the conversion action
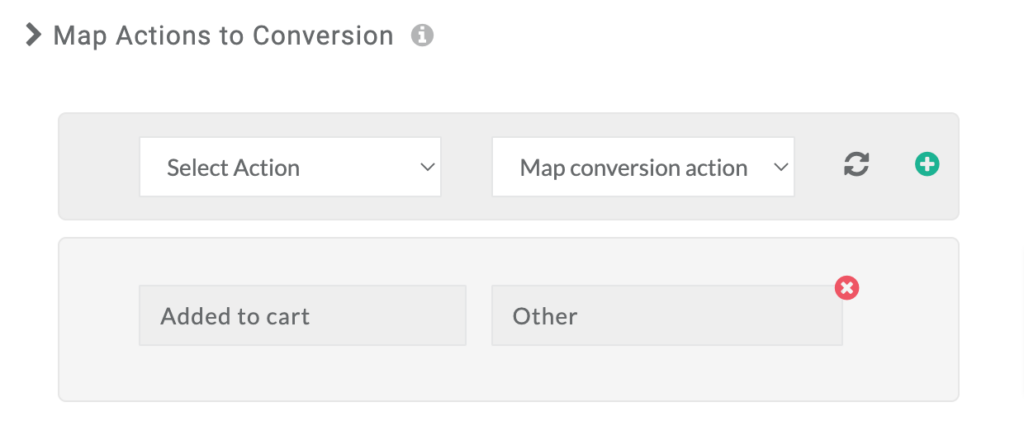
- Choose a conversion action from Google Ads and select the matching event in CustomerLabs.
- Select “+” to add it to the conversion list.
- Hit “Save Changes” to finalize.
At this point, your CustomerLabs events are mapped to Google Ads conversion actions. But we’re not done yet—now we need to sync them.
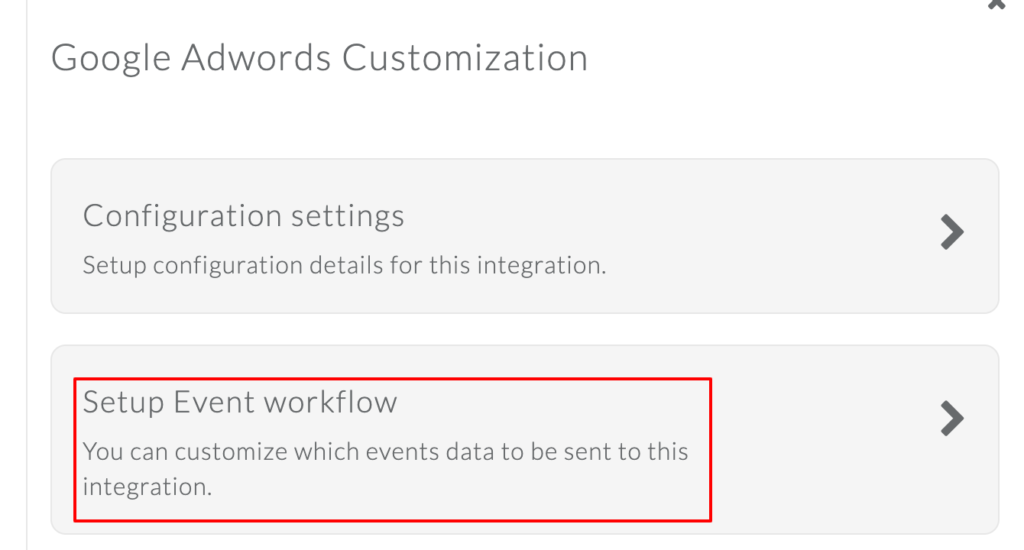
Sync Website Events with Google Ads
- Click on Setup Event Workflow
- Enable the toggle switch for the events you mapped earlier.
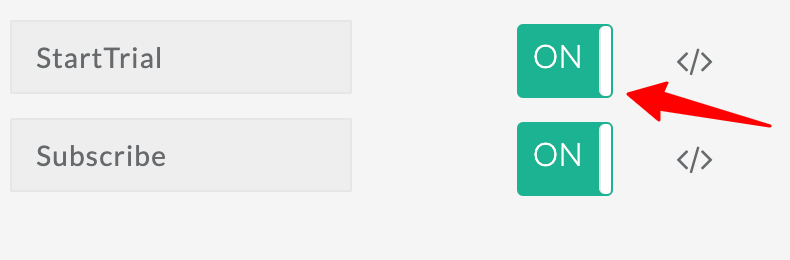
- Click “Save Changes.”
Follow the same for synchronizing the offline events; refer this document
To get your data seamlessly without any efforts, click here
For lead generation, click here
Conclusion
Google Ads’ new UI brings improved functionality but also introduces a learning curve for advertisers. Whether you’re setting up a website or offline conversions, understanding the new interface is crucial to tracking campaign performance effectively. By leveraging first-party data and integrating platforms like CustomerLabs, you can simplify conversion tracking, improve attribution accuracy, and optimize your ad performance. With the right tools and strategies, you can adapt quickly to these changes and make the most of Google Ads’ capabilities.