Tracking Shopify conversions effectively determines the performance of your ad campaigns. And if you are still relying on pixels for tracking the purchases, that is not the right strategy to go behind. Because, with pixel tracking, you can only send in the browser-side event data to ad platforms like Meta.
And privacy laws are strict enough to block the event data, which makes it more challenging and unreliable data for campaign optimization. It is wise to connect FB Conversion API on Shopify, which ensures accurate tracking even when browser-based data collection fails.
But setting up the Facebook Conversion API on Shopify can feel overwhelming. In this blog, we’ll break down the setup process, troubleshoot common issues, and explore an easier way to implement a robust FB conversion API on Shopify towards the end.
Let’s start with the setup
Prerequisites
Before setting up Facebook Conversion API on Shopify, make sure you have the following:
- Have admin access to the Shopify Store, as you will need permissions to install and configure integrations.
- Create a Facebook Business Manager Account to connect Shopify to your Meta Ads account.
- Keep the Meta Pixel installed to track browser-side events, ensuring better deduplication.
- Have full access to Facebook Events Manager to monitor and troubleshoot server-side events.
Now that you have all the necessary tools and structure in place, let’s start with the implementation process of setting up Facebook Conversion API on Shopify.
How to Set Up Facebook Conversion API on Shopify: Native Integration
Shopify provides a built-in method to set up Facebook Conversion API (Fb CAPI) eliminating the need for manual coding. Follow these steps to enable it:
Step 1: Set FB Conversion API on Shopify through Partner Integration
- Head to your facebook business manager
- Navigate to “Events Manager” (where basically all your events are managed)
- Go to settings and then click on “Data Sources” on the left side
- And scroll down until you see Conversions API
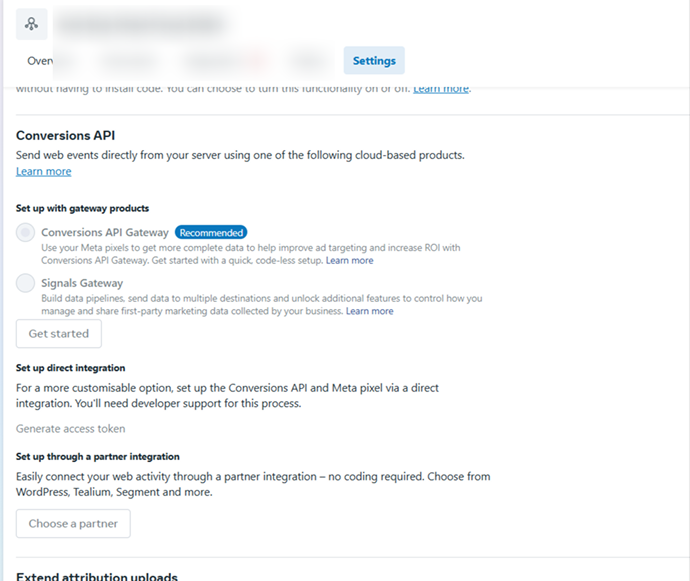
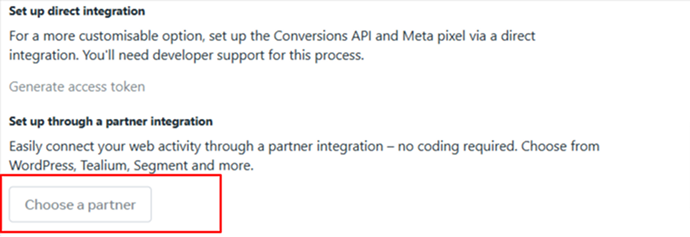
- Click on the Setup through a partner integration
- Click on Choose a Partner and select Shopify
Step 2: Install Facebook App on Shopify
- Head over to your Shopify Dashboard
- Navigate to Apps and click on Shop for apps
- You will be redirected to another page of Shopify app store
- In the search bar, type “Facebook.”
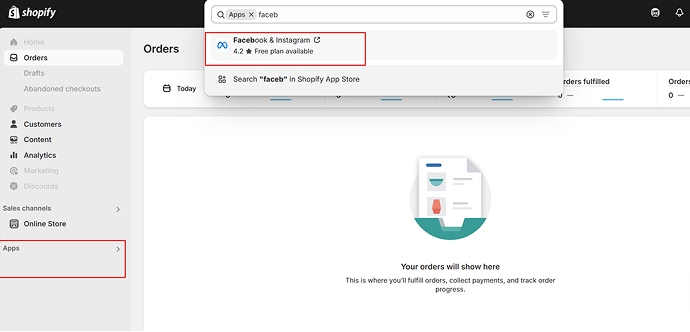
- Click on the Facebook Channel app and click on Add app
- Once the app is added, you will be redirected to a page to add Shopify and the Facebook app.
- Scroll down and click on Add sales channel
- Now the Facebook app is successfully installed
Step 3: Set Up Facebook and Shopify Integration
- On the screen, you will see “Sell your products on Facebook.”
- Under that, click on Start Setup
- Connect your Facebook account to Shopify by clicking on the “connect account” button
- Click on the Business Manager and select the Facebook Business Manager that you want to connect with.
Setup 4: Domain Verification
- Next, click on the Domain Verification. Enter your domain name and get it verified
- To verify your domain, Go to Facebook Business Manager and click on business settings
- On the left side menu bar, scroll down to Brand Safety and click on Domains
- Click on “Add” and enter your domain name, and click on “Add domain.”
- Once you do this step, your domain will get verified; if not, just refresh the page and it will reflect.
Another way to verify your domain is via DNS verification
- Click on the DNS verification
- Login to the domain registrar and navigate to the DNS section. (You will be able to see this section in the dashboard, which varies from each registrar. If you are having trouble finding it, reach out to the support.)
- Click on “Add record.” Set the type as TXT, Name as @ and TTL as Auto
- Copy the TXT code and paste it
- And hit the Save
Step 5: Connect your Facebook Page
- Click on the Facebook Page
- Choose the FB page that you want to connect and click on Connect
Step 6: Enable Data Sharing
- Click on the Data Sharing option
- Toggle on the Enable Customer Data Sharing option
- Choose Maximum data sharing to enable Facebook CAPI alongside the standard Facebook Pixel tracking.
- Standard: Basic data collection via browser events.
- Enhanced: Sends additional customer data like emails or phone numbers (if provided).
- Maximum (Recommended): Sends both browser-side (Pixel) and server-side (CAPI) events for improved tracking and deduplication.
- Click Save to confirm.
Step 7: Setup Facebook Commerce account (Recommended for Display Ads)
- Click on the Facebook Commerce account
- And connect your facebook commerce account
- If you don’t have one, create one by following the steps below
- Go to Facebook Commerce Manager.
- Click “Get Started” and select “Create a Shop.”.
- Choose where customers will check out, Your Shopify website (recommended)
- Facebook or Instagram checkout (available in select regions)
- Select the Facebook Business Page that will host your shop.
- Choose your Business Manager Account (or create one if needed).
Step 8: Finish the Setup
- Once all the steps are completed, hit accept the terms and conditions by clicking on “ Review terms”
- And then click on Finish Setup and Confirm
That’s it; you have successfully setup Facebook conversion API. Next, let’s validate and debug the setup.
Validate and Debug the Setup
Verify Setup in Facebook Events Manager
- Go to Facebook Events Manager.
- Select the Pixel you connected to Shopify.
- Use the Test Events tool to check if events like Purchase, Add to Cart, and Page View are being sent via both browser (Pixel) and server (Fb Conversion API).
Validate with Facebook Pixel Helper
- Install the Facebook Pixel Helper Chrome extension.
- Visit your Shopify store and perform key actions like adding a product to the cart or starting checkout.
- The extension should show both Pixel (browser) and Fb Conversion API(server) events firing correctly.
- If you are able to see the Event ID – only then it means Fb Conversion API on Shopify is setup successfully
- If errors appear, troubleshoot missing parameters in Facebook Events Manager.
Troubleshooting Common Facebook Conversion API Issues on Shopify
Event Deduplication Errors
You see duplicated purchases, leading to inflated conversion numbers? This is because of the event data you get from both the server-side and browser-side. To prevent this from happening:
Head over to your Events Manager and enable Automatic Event Deduplication under Pixel settings.
This ensures that Meta is correctly pairing browser and server events to prevent double counting.
Missing or Delayed Conversions
After setting up Facebook Conversion API (Fb CAPI) on Shopify, you may notice that not all purchases or other conversion events appear in Meta Events Manager, or they show up with a significant delay.
This can happen for three reasons. One, Meta might sometimes take up to 24 hours to process and display server-side events. Another reason is that Shopify may send different event names for the same action via the Pixel and Fb Conversion API.
And the third reason is that Shopify’s native integration may fail to send certain events, especially custom conversions or offline purchases. (Remember this; I will come to this later on a bigger picture.)
You can fix it on multiple levels. Before making any changes, if you just set up Fb Conversion API on Shopify, wait 24-48 hours to see if events start appearing in Meta Events Manager.
Simultaneously, check the event names:
- Go to Meta Events Manager → Select your Facebook Pixel.
- Click on “Test Events” and trigger a test purchase on your Shopify store.
If you identify any change in the event names from the browser and the server-side, update them in the Shopify settings.
Low Event Match Quality
If Facebook shows a low event match quality score, it might mean that the customer data (email, phone, etc.) are not correctly sent. To fix that,
- Go to Facebook Business Manager → Events Manager → Select your Pixel.
- Click Settings and scroll to Advanced Matching.
- Enable all available options (Email, Phone Number, etc.) to improve data tracking.
Try these steps, and you are good to go. (I’m gonna recommend an easy way of doing the setup, so watch out.)
But the major drawback that you are not aware of is the quality of the data that you send to Meta. I’d like to remind you that Shopify Fb Conversion API integration does not send in all the customer data because it can do only basic tracking.
Some of you are not even aware that it is one of the major reasons why your ROAS gets stagnant at a point. You would be compromised that its the best you can get out of the ad campaigns.
But that’s not true. Let me give you a brief on a few limitations of using direct Shopify Facebook Conversion API integration.
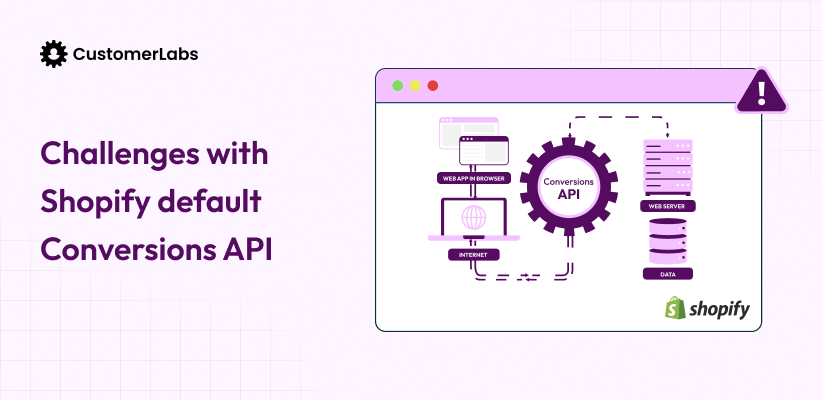
Hidden Limitations of Shopify Facebook Conversion API
Facebook CAPI and Shopify’s direct integration track only certain events, such as Purchase, PageView, InitiateCheckout and AddToCart. By this, it seems clear that apart from these standard events, any other crucial interactions of the customers won’t be tracked. How does this exactly affect your ad campaigns? Here’s how:
- With the default Shopify Facebook CAPI integration, you won’t be able to see the data that has been sent to Meta, which means no control over the data.
- Meta’s 28-day click attribution window limits tracking; crucial customer insights are missed out, which means data loss.
- It is impossible to target anonymous visitors, as it cannot be tracked by the direct Shopify Facebook Conversion API.
- Custom events cannot be tracked, hence they cannot be reported.
- All of the above add up to the low-quality data, which means lower ad performance
Know more detailed explanation on the limitations of Shopify Facebook CAPI integration
At this position, now you should be clear with the setup process (which is quite draggy) and the limitations it brings forth.
There is one solution to fix both the cons. It is not just easy, but effective at the same time.
Easiest and Effective way to Set Up Facebook Conversion API (+ Breaking all the limitations) for Shopify
Do it with a 1PD Ops platform—CustomerLabs
The setup generally will not take you more than 10 minutes, and you can do it without the help of a developer. The platform is designed exclusively for marketers, so there is no code; just toggle on and off.
And with CustomerLabs, 1PD Ops, you can
- Collect, unify and activate first-party data to understand complete user journey
- Control which data to send to Meta for ad optimization.
- Send in Custom events for better ad performance
- Track the users (unknown and anonymous) precisely without data loss
- Send both online and offline conversions data to train Meta’s algorithms
- Segment the users very minutely for ad optimization
And many more just with your own first-party data.
Book a Demo now and talk to our experts to build more customized strategies specifically for your business.