Customerlabs CDP Documentation
Google Consent For Ads Platform Without Banners
We have all seen in websites a cookie banner that pops in the top of the page and seeks our consent to enhance the browsing experience and collects our data for marketing purposes. Google has made an announcement that without implementing the google consents the companies can’t target the customers for their marketing purpose. To obtain consent from users regarding the usage of their data for marketing purposes, especially in compliance with regulations like google consent when you do not have a cookie banner or similar consent mechanism, you typically need to implement an explicit consent mechanism.
Here’s how you can approach this!
Step 1: Access Customerlabs Integration Settings
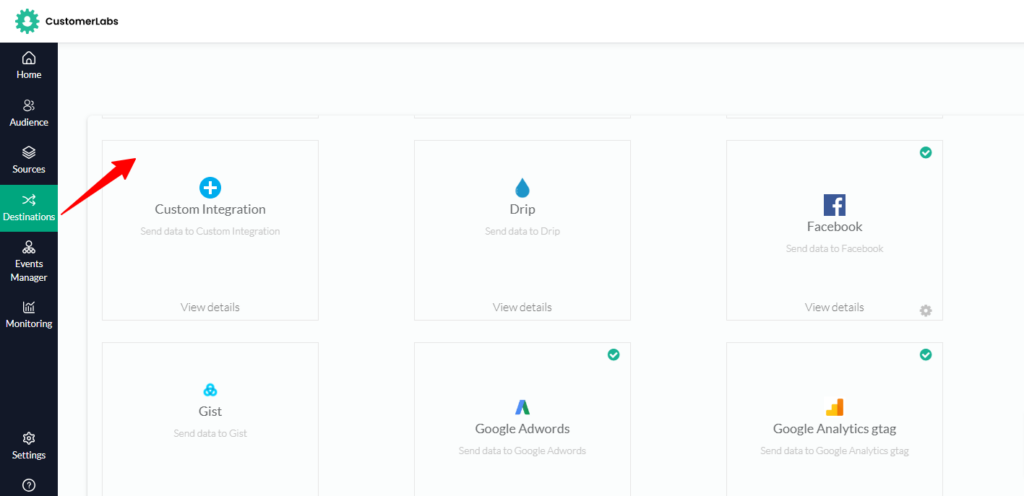
Go to CustomerLabs → Destinations → Custom Integration

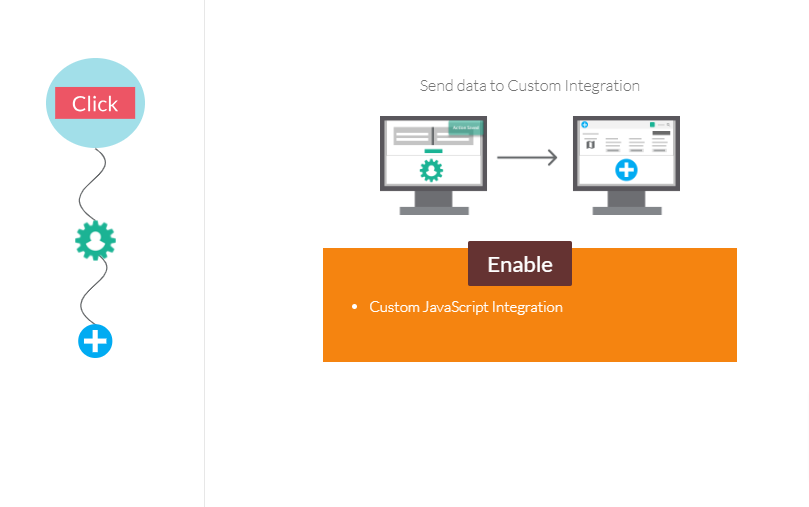
Step 2: Enable Custom Integration
Enable the javascript integration as given in the image below

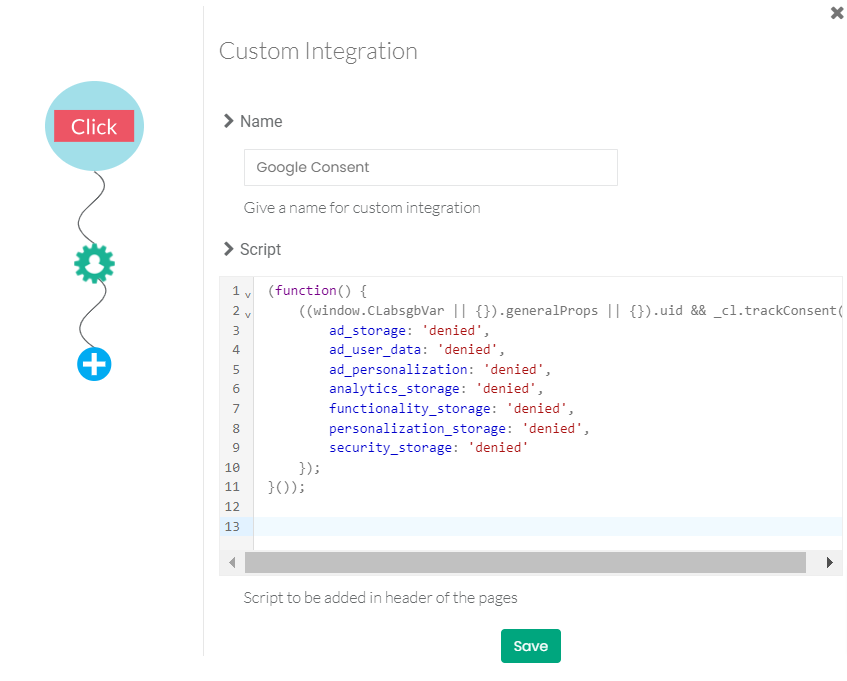
Step 3: Labels And Insert Custom Integration Code:
Name your custom integration code as “Google Consent” and paste the provided code snippet into the designated text box, As given in the image below and the code is attached below for your reference

Copy this code and paste in the script field
(function() {
((window.CLabsgbVar || {}).generalProps || {}).uid && _cl.trackConsent({
ad_storage: 'denied',
ad_user_data: 'denied',
ad_personalization: 'denied',
analytics_storage: 'denied',
functionality_storage: 'denied',
personalization_storage: 'denied',
security_storage: 'denied'
});
}());
These are the following consent mode parameters which are mandatory to obtain or deny the consent from the users as per the requirements. The consent should be denied by default Here is an explanation for the consents types which you are going to provide. The “ad_storage”enables storage such as cookies related to advertising, The “ad_user_data”sets consent for sending user data related to advertising to Google. The “ad_personalization”sets consent for personalized advertising, the “analytics_storage” enables storage such as cookies related to analytics e.g. visit duration. The “functionality_storage”enables storage that supports the functionality of the website or app e.g. language settings. The “personalization_storage”enables storage related to personalization e.g. video recommendations. The “security_storage”enables storage related to security such as authentication functionality, fraud prevention, and other user protection.
Step 4: Save the Custom Integration Code
After pasting the code in the text box then save the custom integration configuration (Google Consent). It ensures that the code runs on your website.
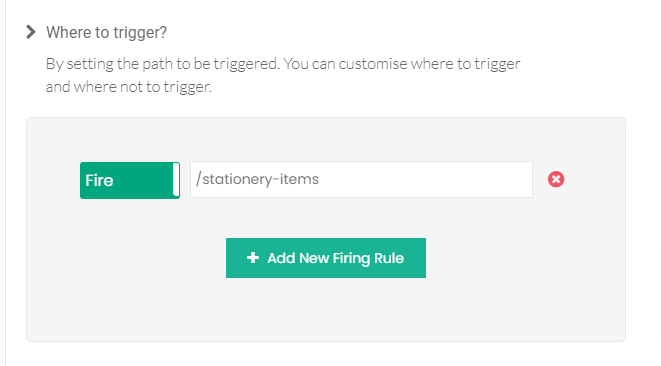
Step 5: Setup the trigger path
Here we will be setting up the trigger path where we will be listing the URLs where you want to deny consent access.
For Example:
https://example.com/privacypolicy
https://example.com/termsofuse
You can list your Website URL which you would like to trigger for the not to deny consent access, and with the help of add new firing rule you can add the multiple URL where you would like to deny consent access.

Step 6: To test the consent cookie on your website
To verify the cookies consent on your website here are the steps to be followed,
6.1 Load your website in a web browser.
6.2 Right-click and choose the inspect element option.
6.3 Then Select cookies from the application section.

6.4 Select the page URL which you would like to view the consent access.
6.6. Search for your cookie name as “User Consent”
6.7 At the bottom of the page you will notice the cookies consent permission has been denied.

Using the above approach in the absence of cookie banners, the marketing team respects the users privacy and can effectively manage the user data for insightful marketing purposes.
You want to explore? Need a hand – happy to help, always!


