Customerlabs CDP Documentation
Audiences created in CustomerLabs can be directly synced with TikTok by creating a website custom audience in TikTok Ads Manager.
These audiences will be synced under the CLabs pixel if you have chosen it while integrating TikTok (Or) If you haven’t chosen the CLabs pixel, these audiences will be synced under the Default pixel chosen while integrating (Not applicable for List sync)
Event Sync (Website custom audience)
By syncing the segment created in CustomerLabs with TikTok through the event sync option, a new custom website audience is created, and data is sent to TikTok through an event.
Here are the steps to sync the audience with TikTok:
1. Make sure you have integrated TikTok with CustomerLabs by configuring the settings in Destinations → TikTok → Configuration Settings in CustomerLabs.
2. Now, View the segment created in CustomerLabs that you want to sync with TikTok or create a new segment if you haven’t created one yet.
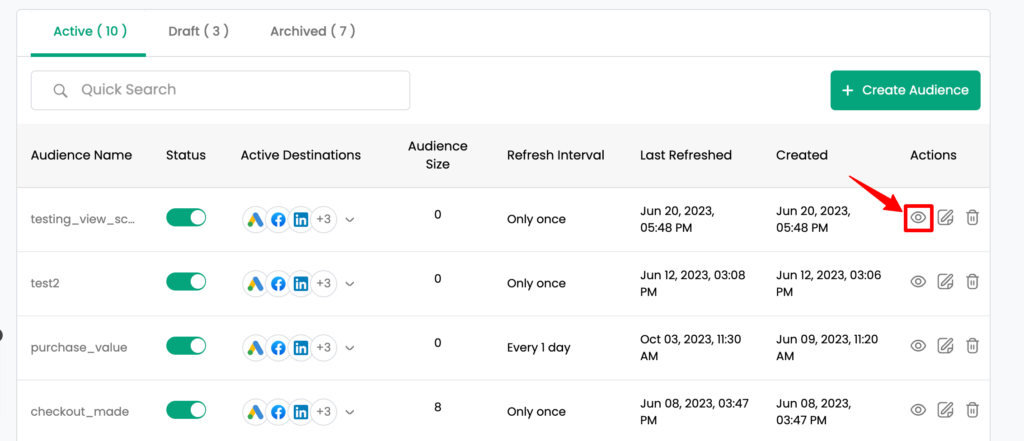
3. Navigate to “Event Sync” tab.
Note: You will have to wait for 30-40 minutes after creating the segment to let it populate before you could enable the sync.
4. Click on “Settings” under TikTok
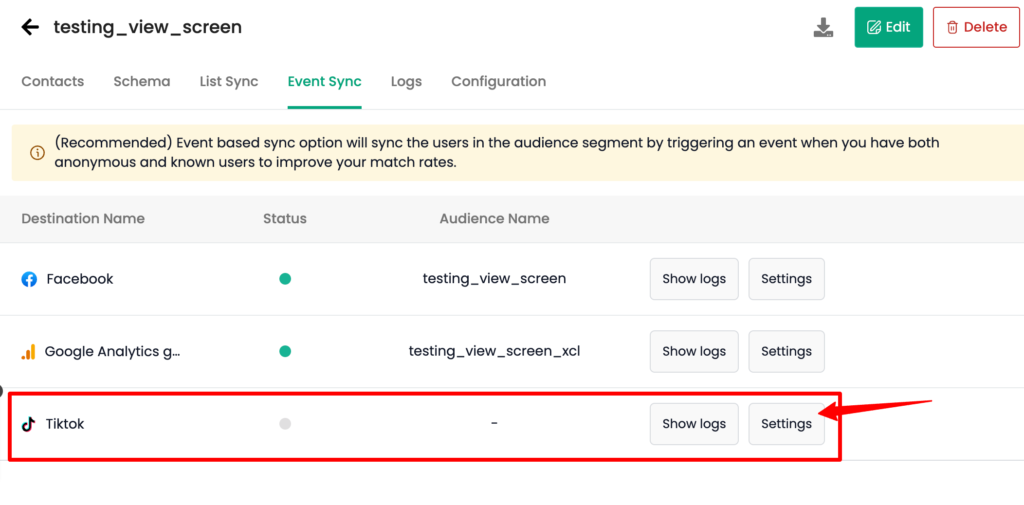
5. You have to create a custom audience by entering the required details.
Event name option is to sync the audience with TikTok under this event name. This will enable frequent refreshing of the audience with TikTok through this event which keeps the audience regularly updated.
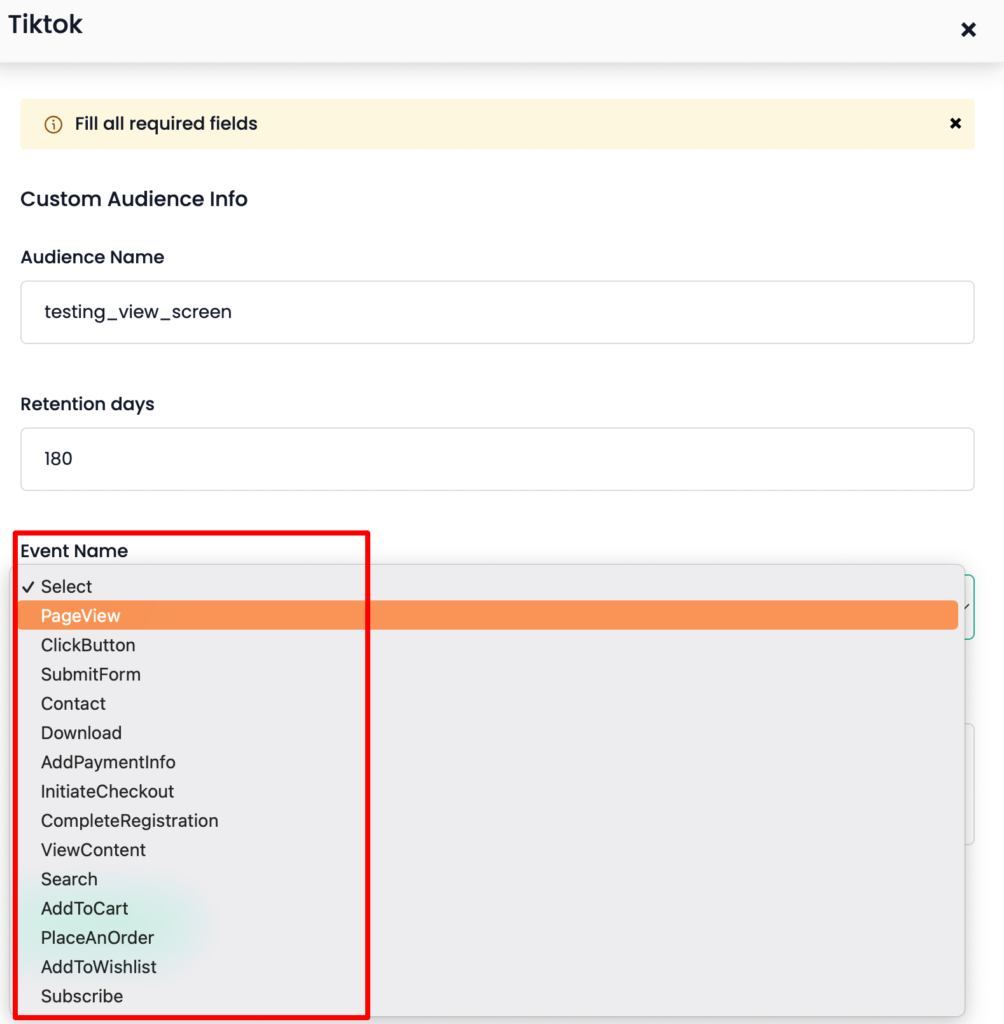
6. Choose the event name, enter the description as needed, and click Create audience
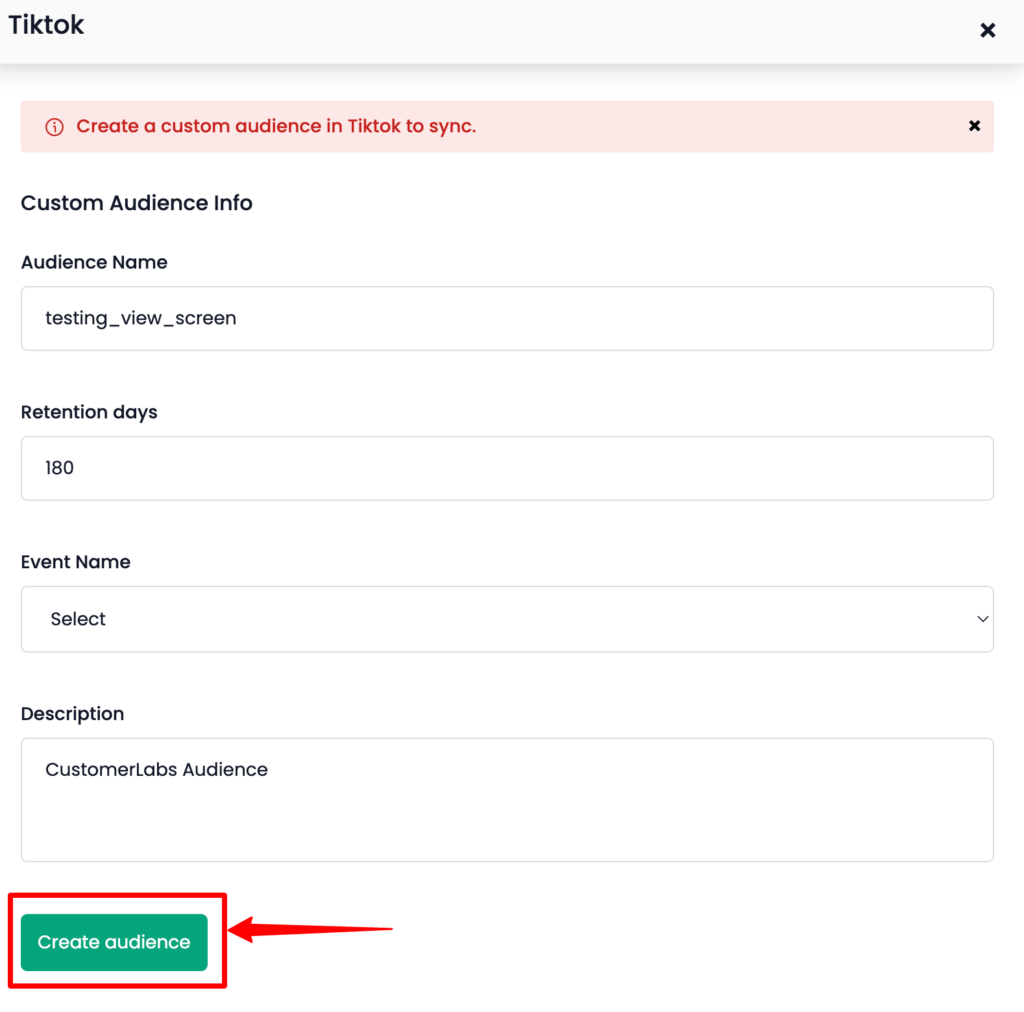
7. After creating the audience, you can see in which pixel the audience is created in TikTok.
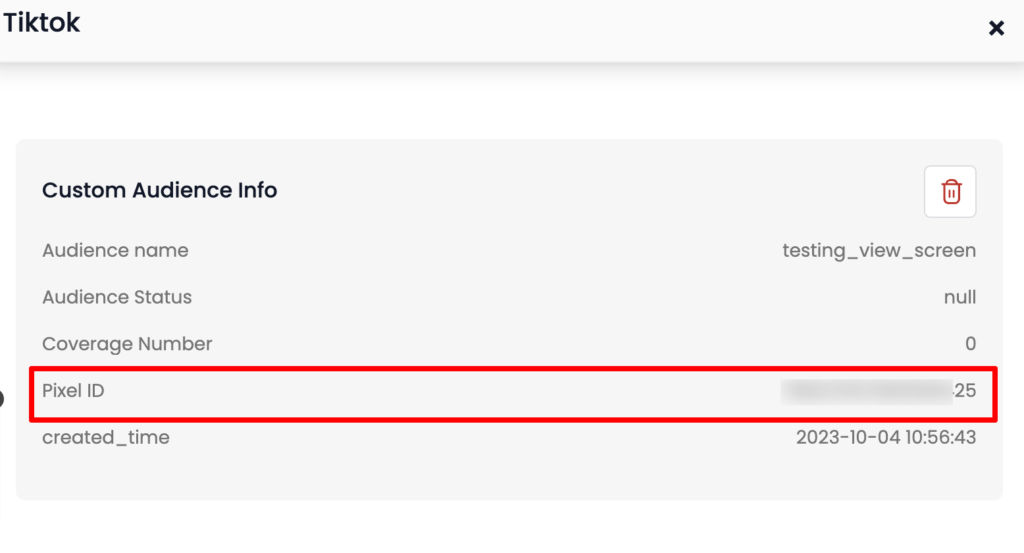
The custom website audience will be created in TikTok Ads Manager → Assets → Audiences.

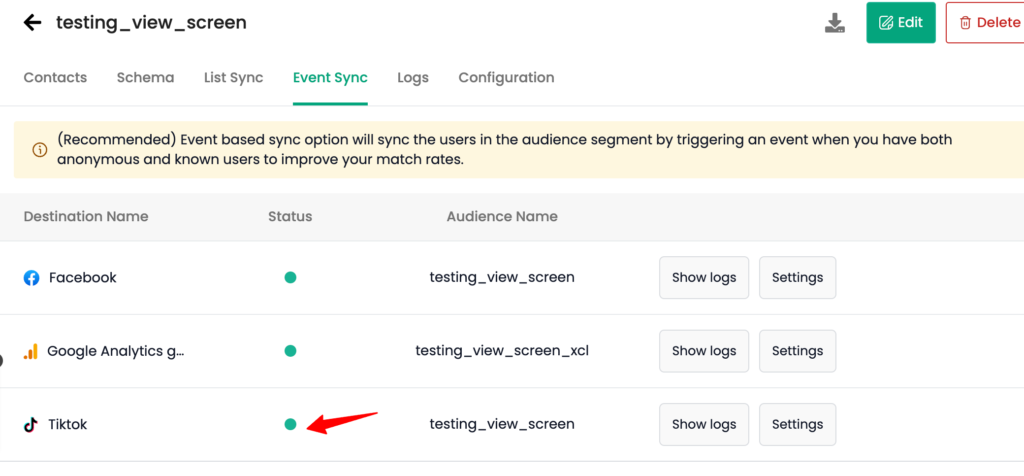
8. You can see the green indicator under Status column as a confirmation for the sync.
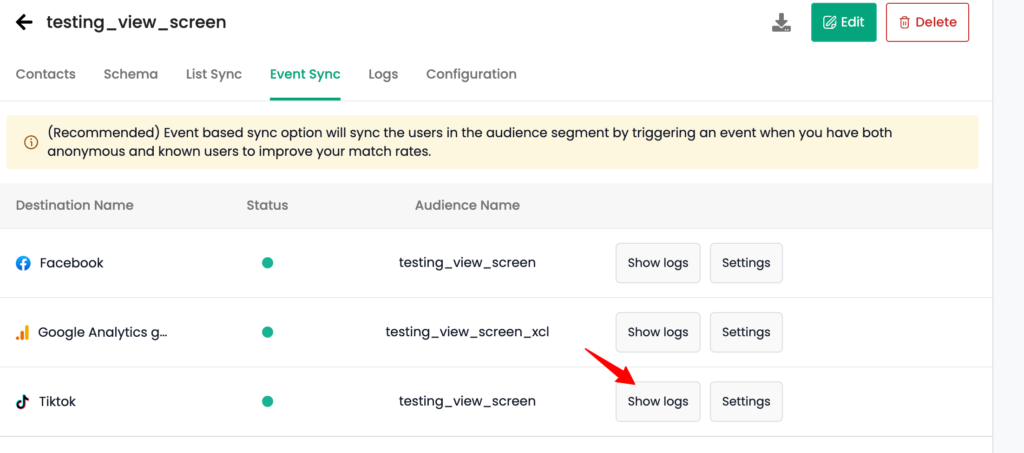
9. You can check the logs for audience creation & deletion for TikTok by going to “Event Sync” tab → TikTok → Show Logs.
Deleting an audience
You can delete the custom audience created on TikTok by following the steps below:
1. Go to the Events Sync tab of the segment you want to delete → TikTok → Settings
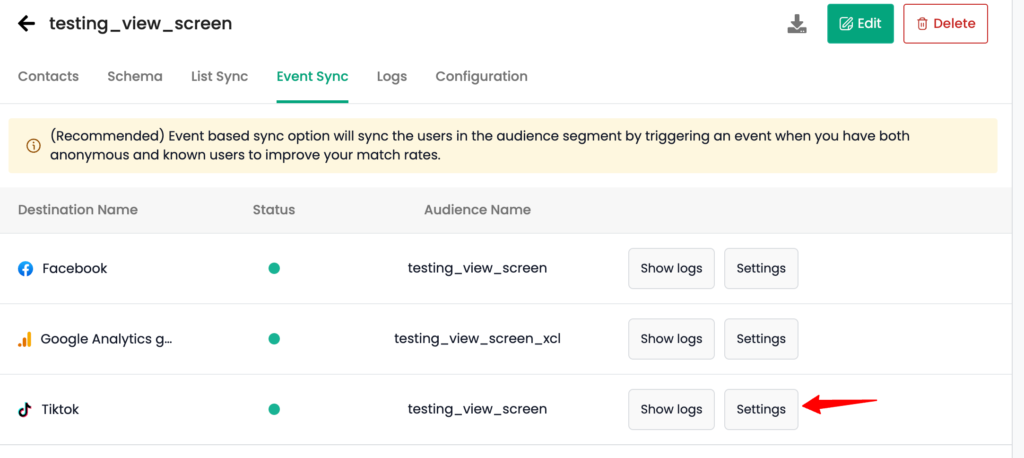
2. Click on the Delete icon in the top right corner of the custom audience.
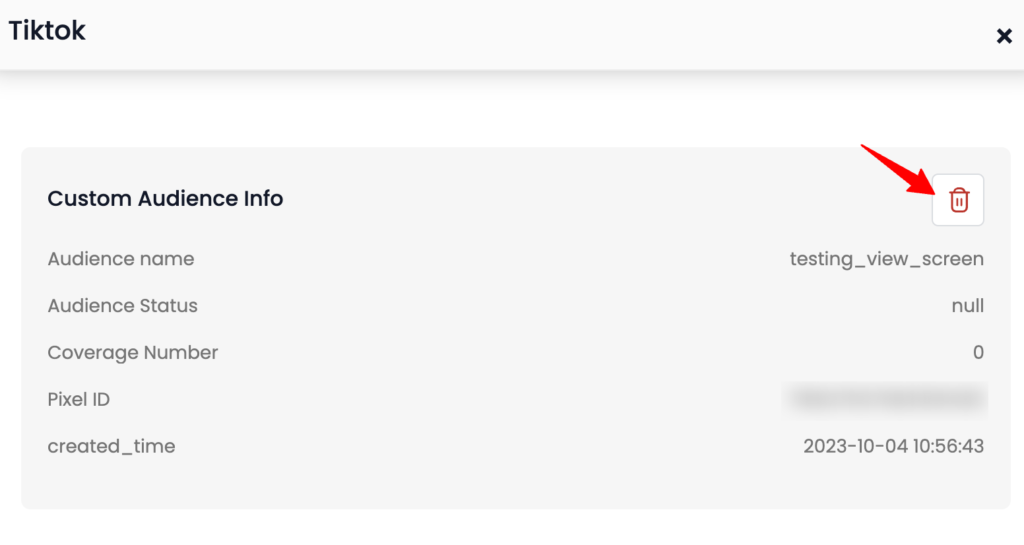
3. Enter the name of the custom audience you want to delete.
4. Click Delete.
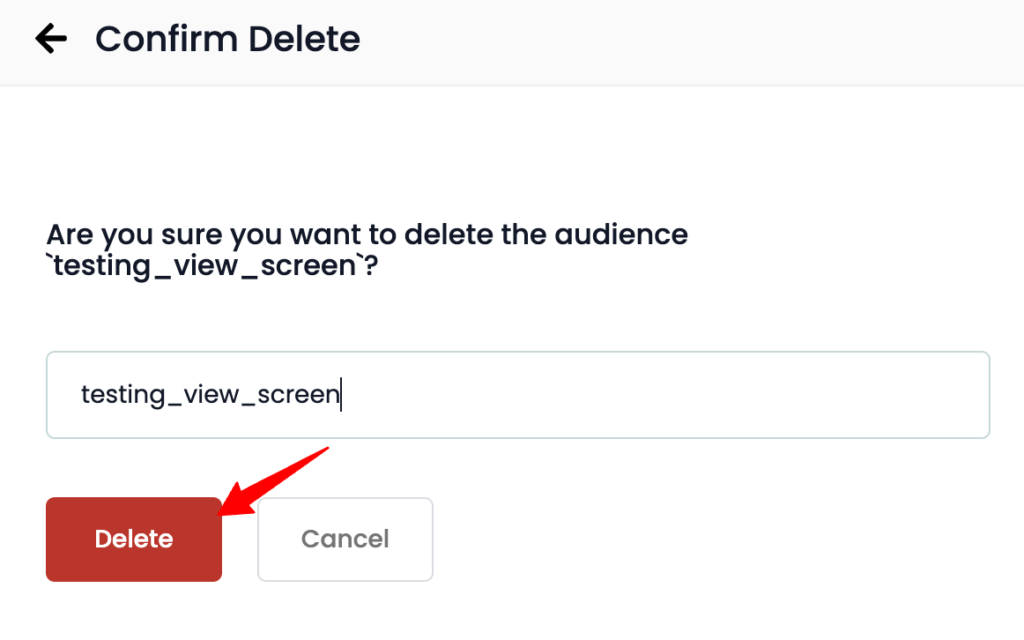
The custom audience will be permanently from TikTok.
List sync (Customer file)
It is recommended to sync the audience as a customer file (List sync) with TikTok when you have user details like email id, phone number, etc.
By syncing the audience created in CustomerLabs as a list, a new custom audience (Type: Customer file) is created or an existing audience is updated in TikTok Ads Manager based on the criteria given.
Follow the steps to sync the audience as a customer list with Tiktok
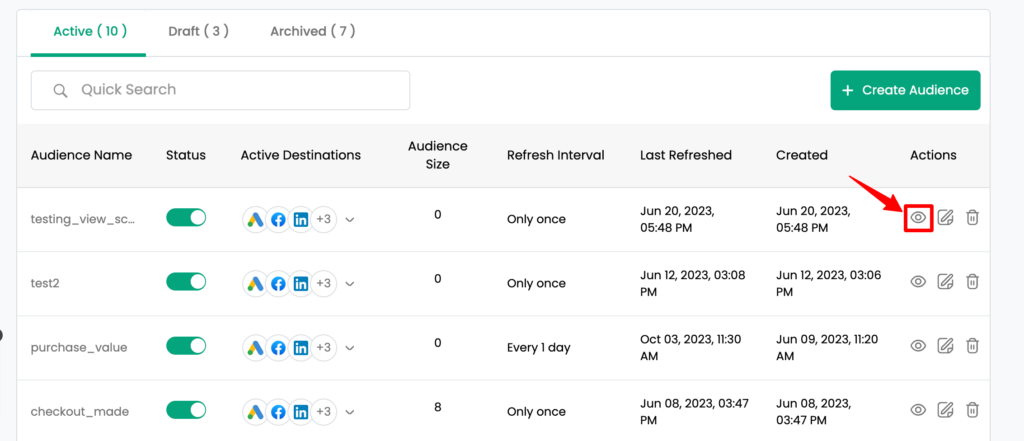
1. Click on “View” to view the segment that you want to sync with TikTok.
2. Navigate to the “Schema” tab and configure the required segment schema for TikTok i.e. email, phone, or both. (Note: To sync the data with TikTok you need to add “identify_by_email” and/or “identify_by_phone” schema).
You might be wondering, What is Schema?
The schema represents the user data that is stored in the system for instance email, phone, location, etc, and you need to map those schemas with the destination schema to sync the data.
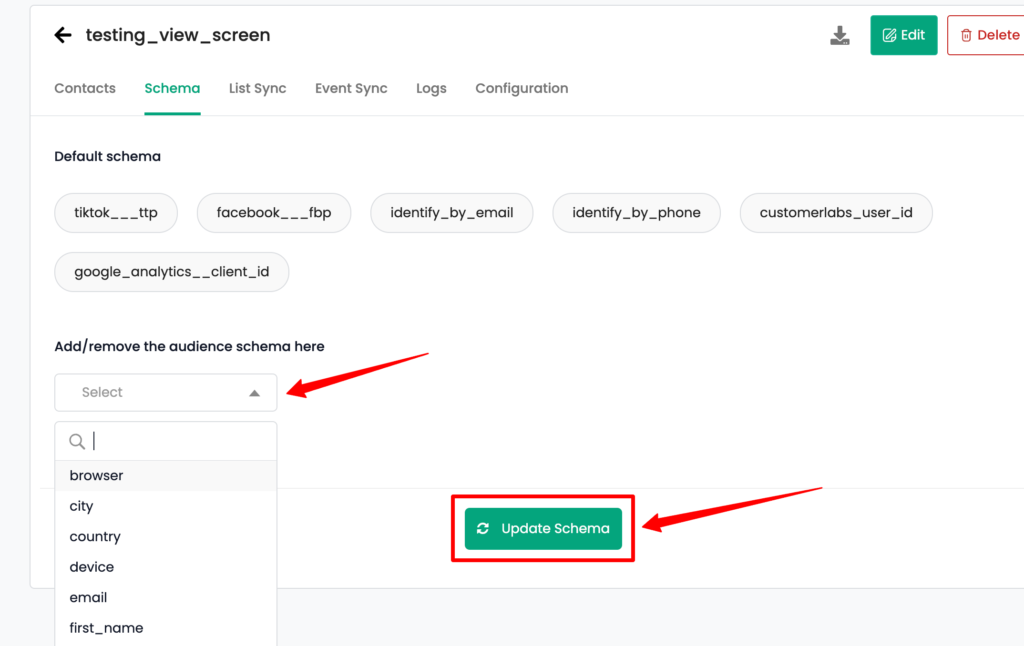
3. Once the schema has been added click on “Update schema“.
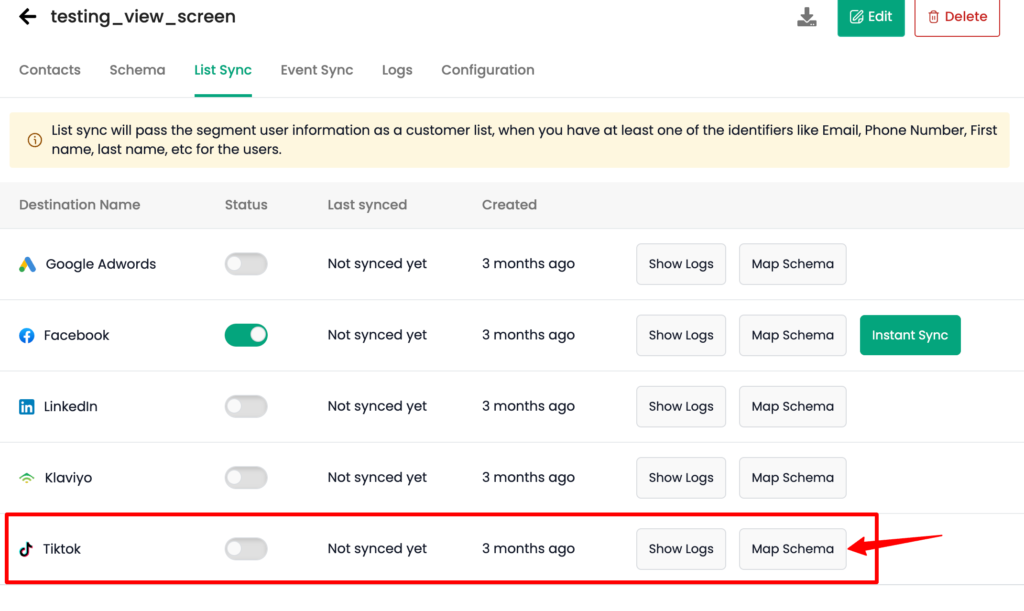
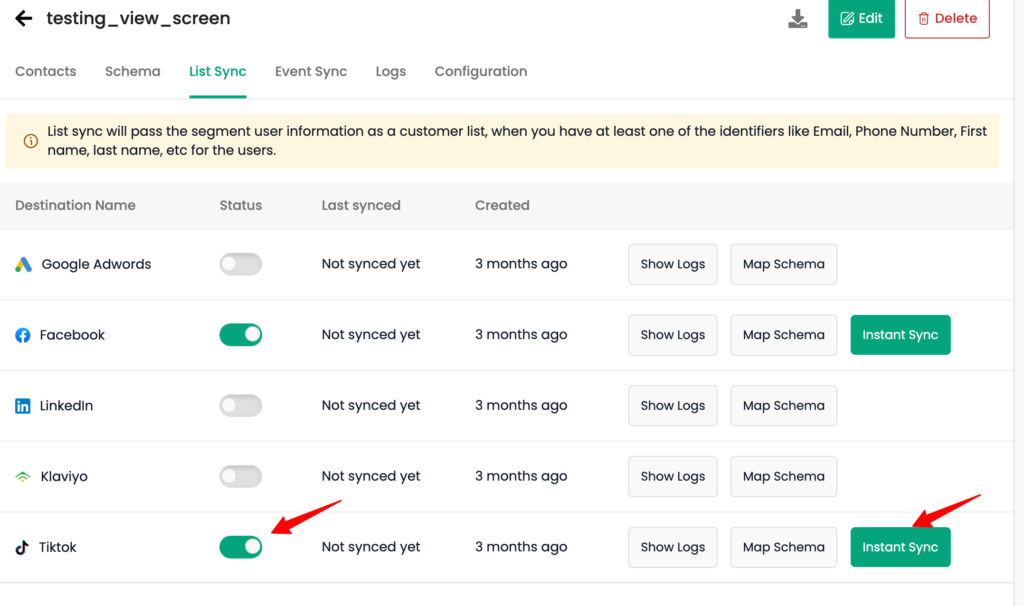
4. Now, go to the “List sync” tab and click on “Map schema” under TikTok in order to map the segment schema with the destination schema.
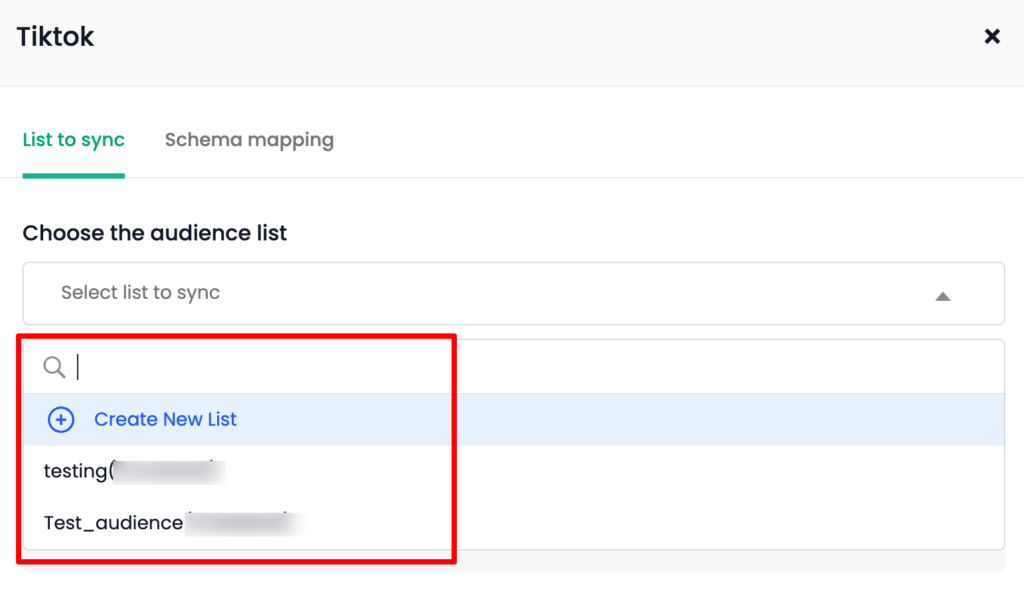
5. Choose the audience list that has already been created or create a new list.
Creating a new list
6.1. Scenario 1: Single schema, Calculate type: Email or Phone
TikTok identifies the user’s data using only two schemas email and phone. With a single-type schema, you can either select Calculate type as “Email” or “Phone number” based on the user’s data you have and map that schema with TikTok schema to sync the data.
Let’s say you select Calculate type as “Email”, then you must map the email with the TikTok schema so that TikTok will identify the users with email only.
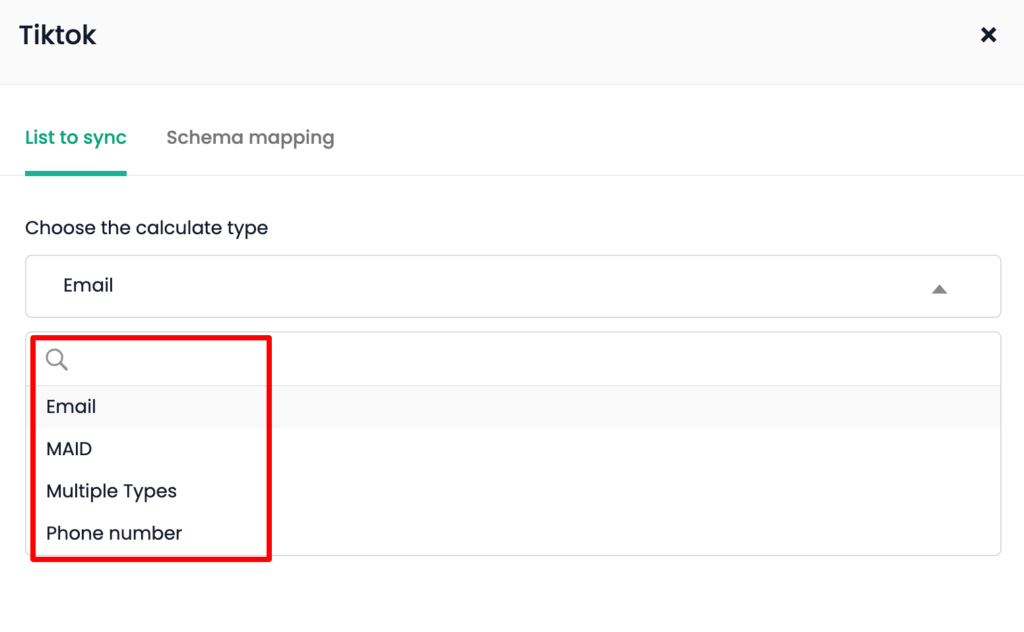
Now, enter a name for the new list and click on “Save List & Schema”
Once the audience list is created, “Custom audience Info” will be displayed.
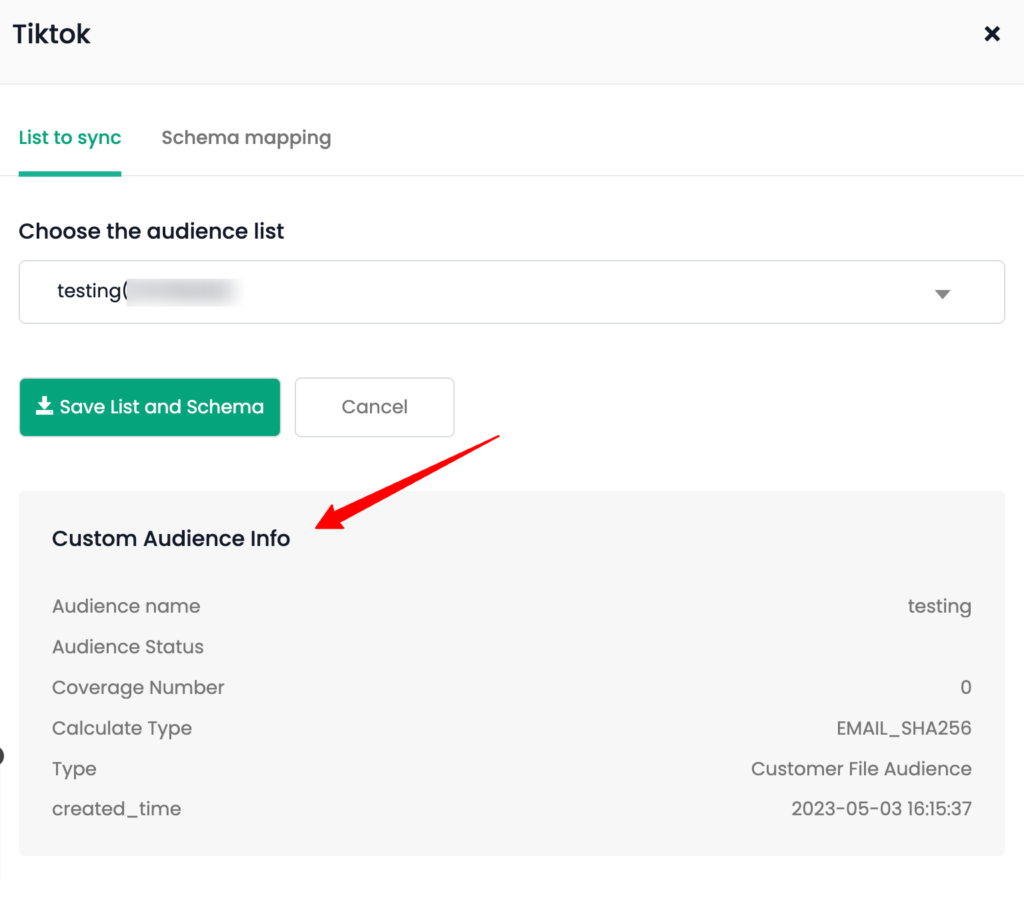
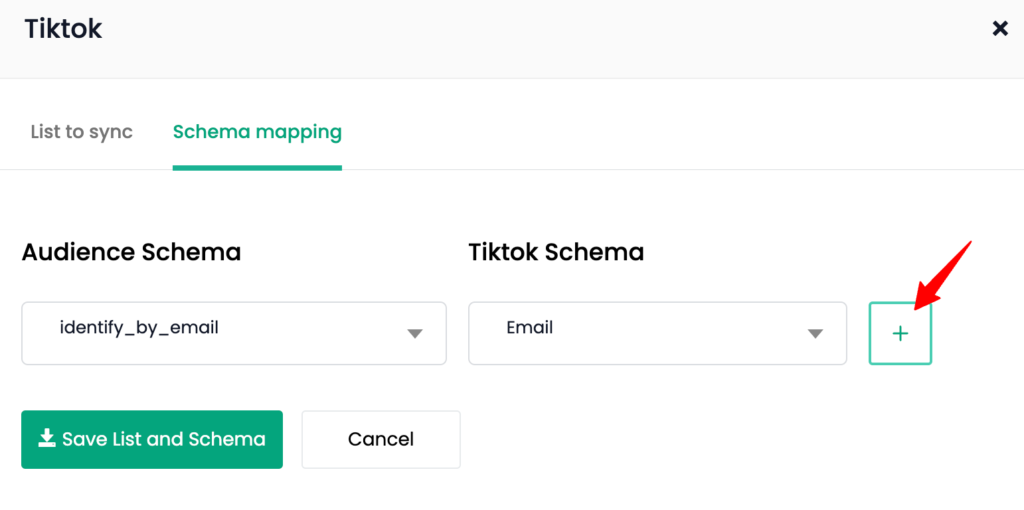
Now, go to Schema mapping tab to map the segment schema “identify_by_email” with TikTok schema “Email” by clicking on + button.
Once this is done, “Save List and Schema”
6.2. Scenario 2: Multiple types, Calculate type: Multiple types
If the user’s data consists of both email and phone number then you can choose Calculate type as “Multiple types” to map at least two schemas Email, Phone number with the TikTok schema. Mapping two schemas will help TikTok identify and match a user based on either of the available identifier (i.e. email or phone).
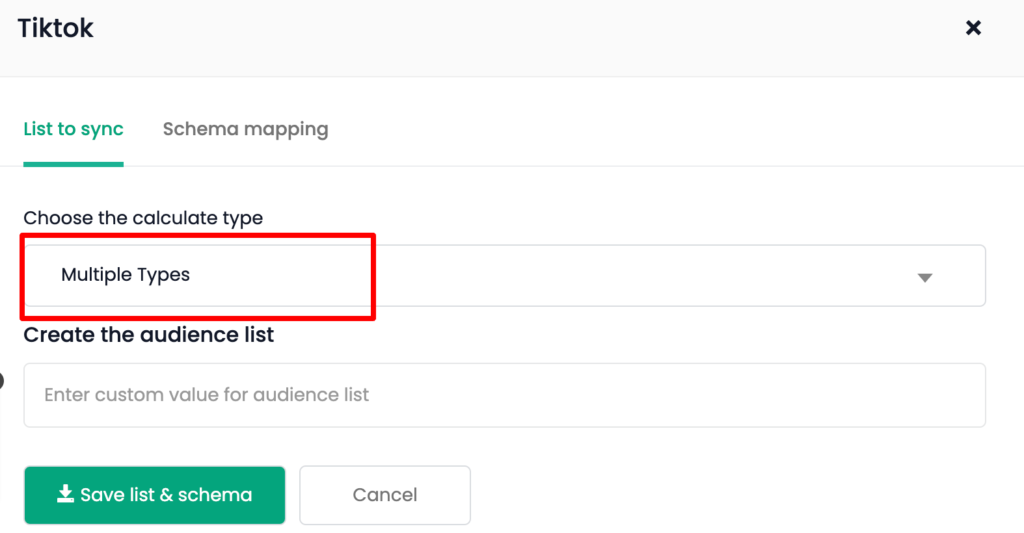
If you select Calculate type as multiple types and map only one schema, say email, then TikTok will only identify the user with only email.
Note: For multiple schema types, it is recommended to map both phone number and email to match the users better.
Now, enter a name for the new list and click on “Save List & Schema”
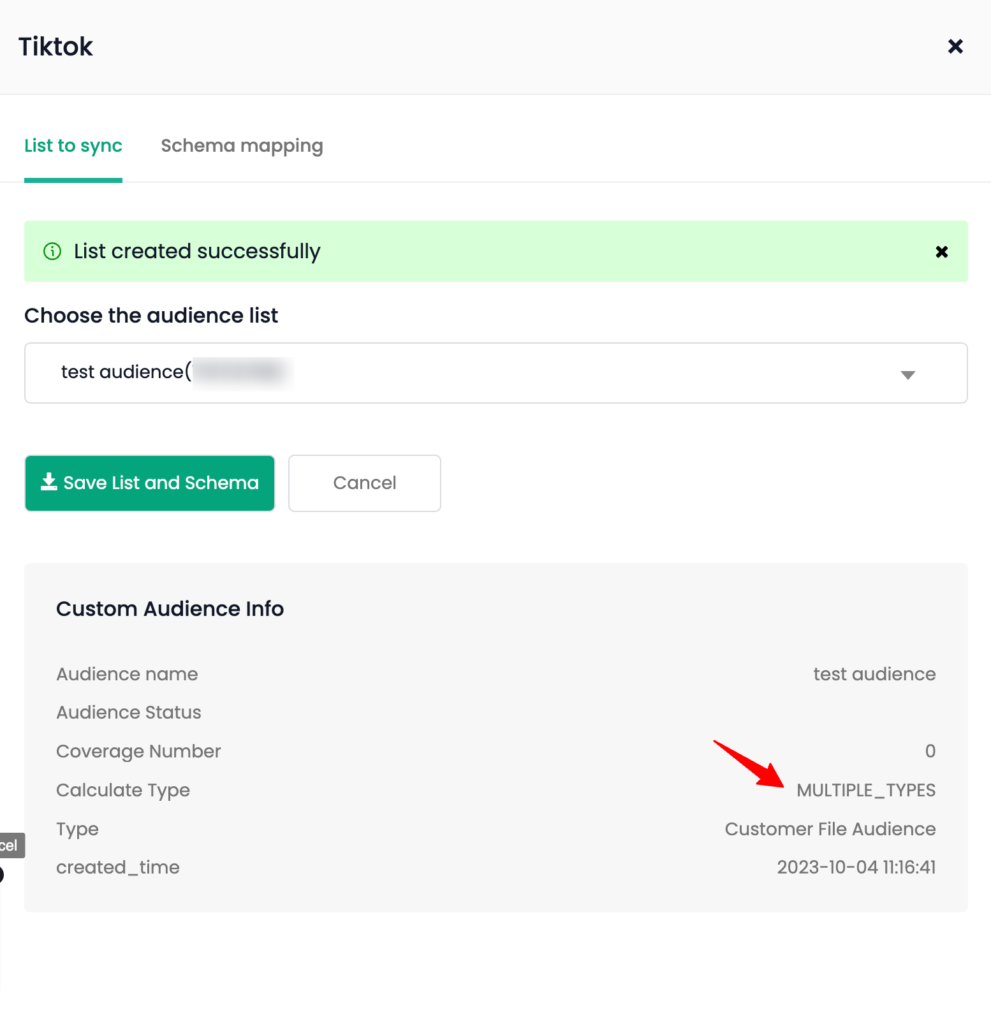
Once the audience list is created, “Custom audience Info” will be displayed.
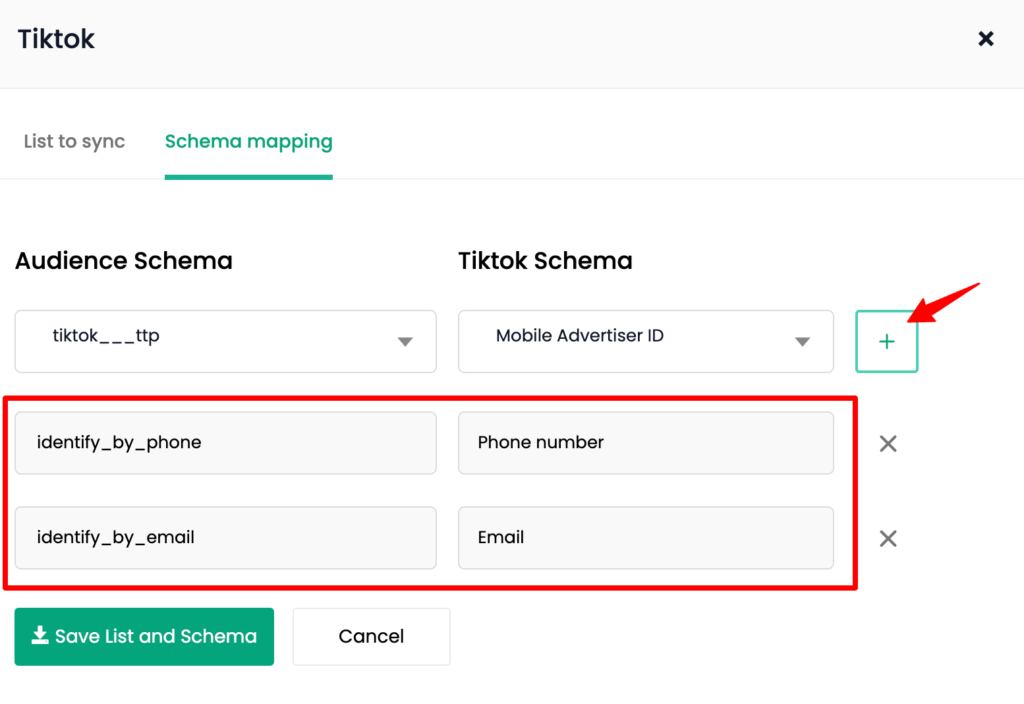
Now, go to Schema mapping tab to map the schema “identify_by_email” and “identify_by_phone” with TikTok schema “Email” and “Phone number” respectively by clicking on + button.
Once this is done, “Save List and Schema”
Updating an existing list
7. While updating an existing list, make sure you use the correct calculate type and map the schema accordingly as explained in Step 6.
8. Now turn on the toggle under “Status” for TikTok. Click “Instant Sync” to sync the list now.
(Note: Once you sync, you have to wait for 30 minutes to use Instant Sync again).
Check if the audience has been created/synced
You can check whether the list has been created/synced with TikTok after 10-15 minutes if you have enabled “Instant Sync” or after the refresh interval days set for the segment
1. Go to TikTok Ads Manager → Assets → Audiences → Check if the audience has been created under the same name as given in CustomerLabs or if the existing list has been updated


