Customerlabs CDP Documentation
The introduction of First-Party(1P) Domain Tracking has empowered businesses to efficiently include domains and subdomains to counter adblockers on websites, ensuring retention of server-side cookie data.
Let’s get started!
Subscribe to the 1P Domain Tracking
For Growth Account
1. Login to CustomerLabs account.
2. For Growth Account, go to Settings → 1P Domain Tracking → Click on ‘Add-on’ to subscribe for 1P domain tracking
3. The 1P Domain tracking subscription can be added via a toggle.
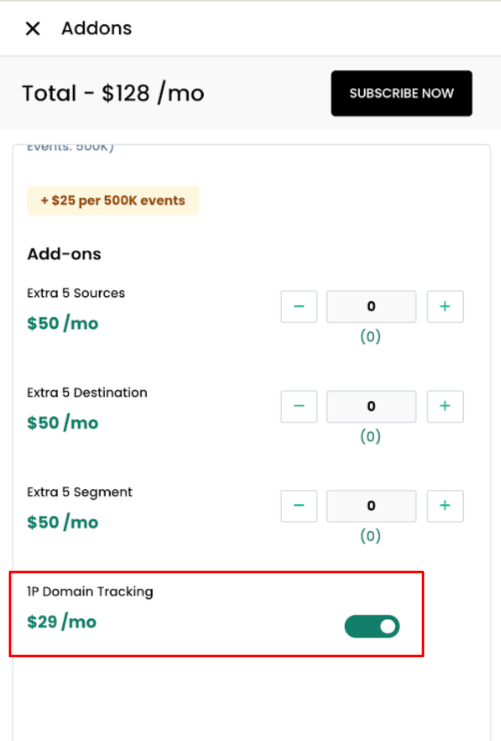
4. After subscribing you will have 1P domain tracking enabled for your account. You can set this up following the setup procedure given below
For Agency Account
1. For Agency Accounts, go to Account Console → Agency Settings → Click on ‘Add-on’ to subscribe for 1P domain tracking for your sub-accounts.
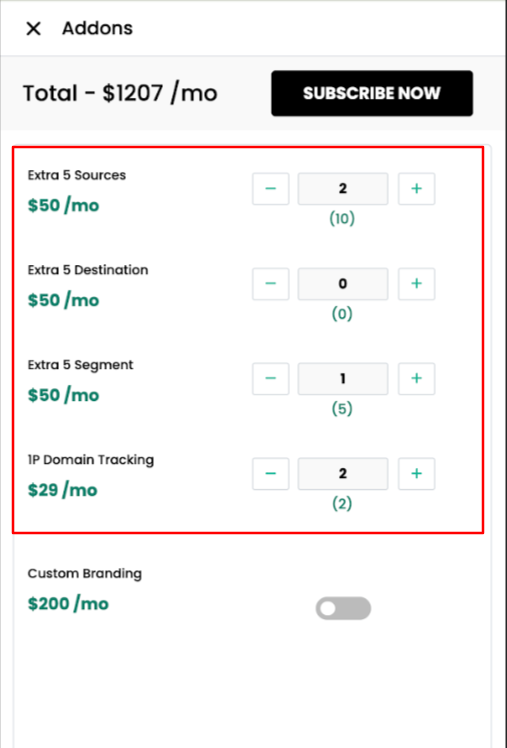
2. 1P domain tracking for your sub-accounts can be enabled at the agency level and is based on the number of Add-ons you add to your Agency account.
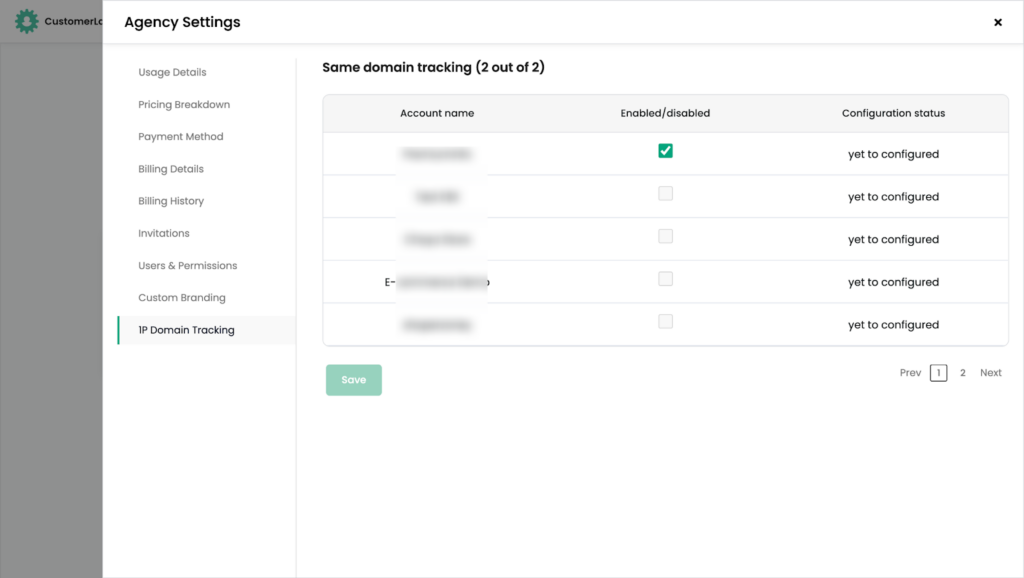
3. After subscription, 1P domain tracking can be enabled manually for the subaccounts under the Agency Settings
4. After enabling 1P domain tracking, you can go to the specific sub-account to set up 1P domain tracking following the procedure given below.
1P domain tracking Setup
1. Go to the account for which you’ve subscribed to 1P domain tracking.
2. Got to Settings → 1P domain tracking → Click on “+ Add domain”
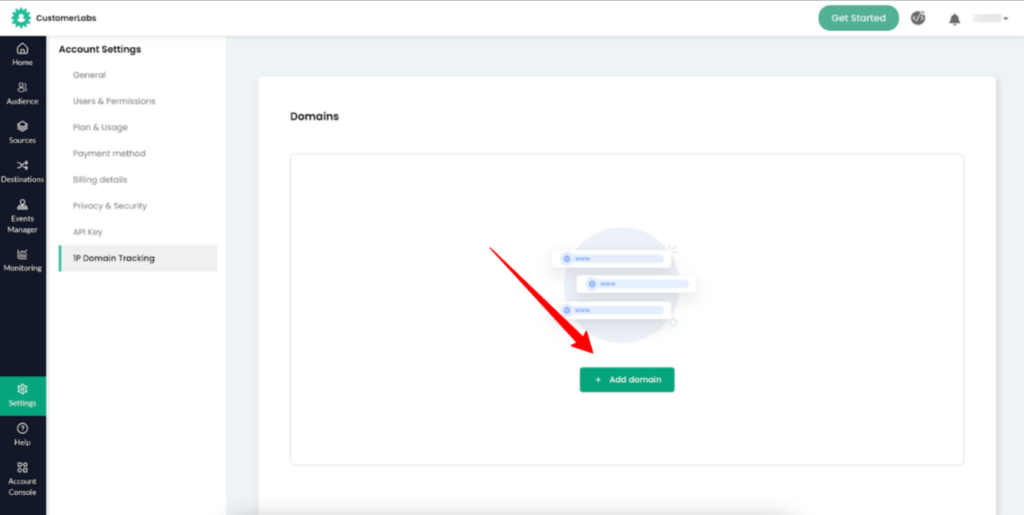
3. Add a Naked Domain by giving a domain name with no HTTP/HTTPS/www → Click “Next”
Depending on where you’ve hosted the domain, you have two different setup procedures to follow.
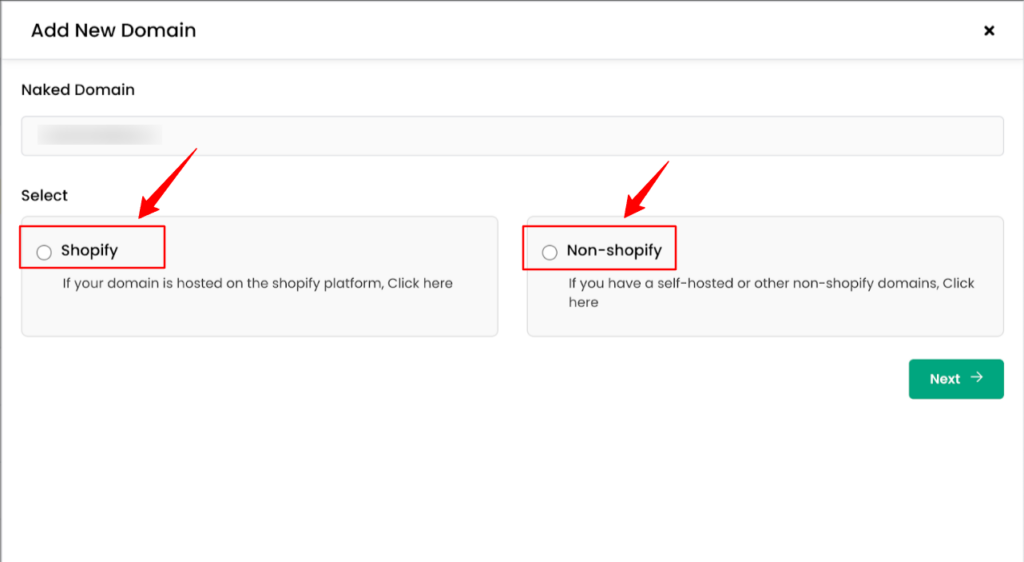
Shopify Setup
If your website/domain is hosted in a Shopify platform, follow the steps below.
1. After the naked domain is added, the subdomain is auto-populated with other details as given below.
2. Verify CNAME and SSL certificates in your respective domain provider.
3. After verification of CNAME and SSL Certificate. In CustomerLabs, Click “Verify DNS” to verify the domain.
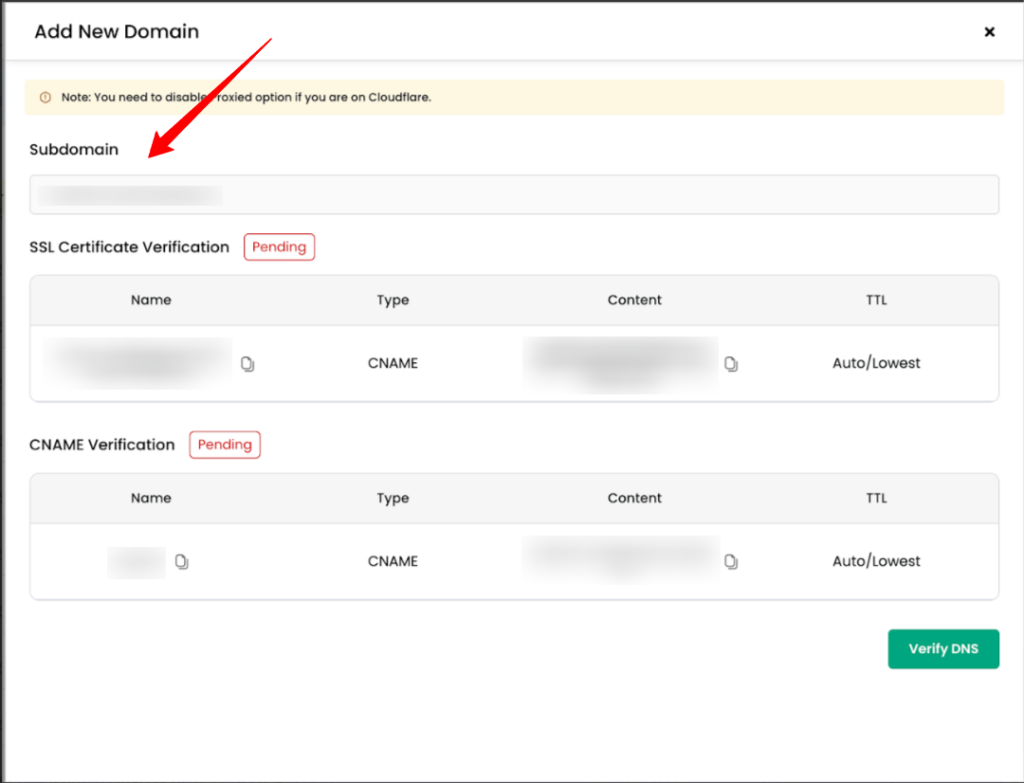
4. After DNS verification, you have to reinstall the tracking script and other tracking codes for your Shopify platform. Go back to the home screen.
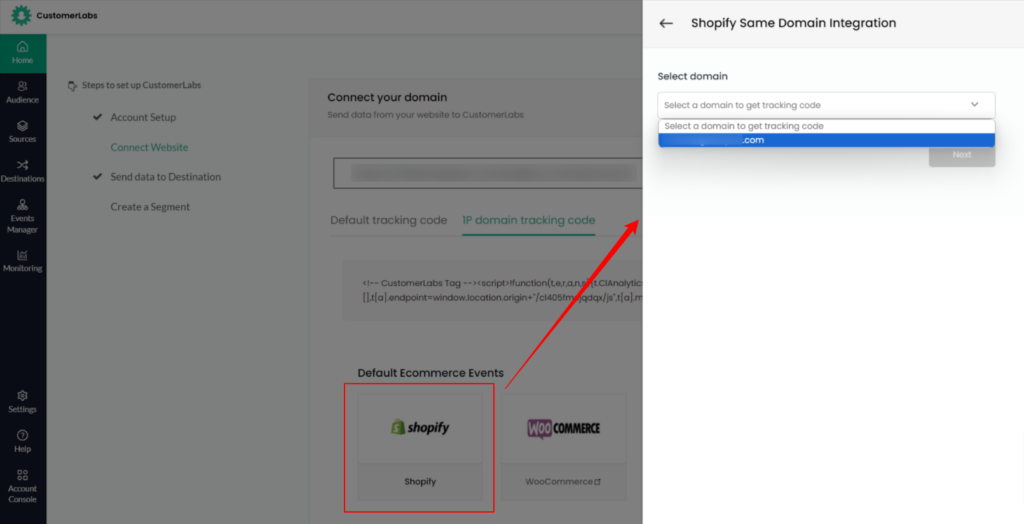
5. Click on the “1P Domain tracking code” tab, and click on the Shopify card available below.
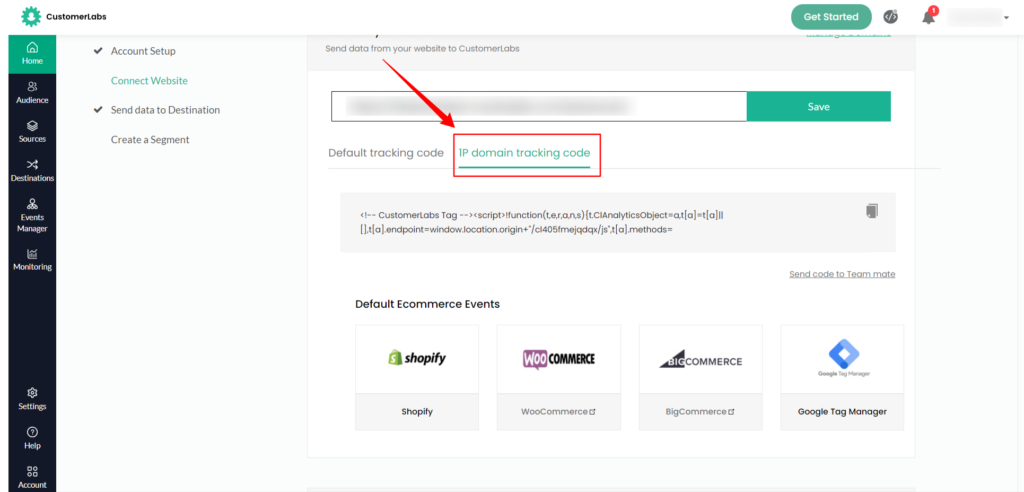
6. Select the domain from the drop-down → Click “Next”
(Note: Only verified domains will be available in the dropdown)
7. Choose the Shopify setup option (with or without post-purchase functionality) and follow the regular Shopify Integration procedure by copying the tracking scripts from this section
Non-Shopify Setup
If your website/domain is self-hosted, or in WordPress, that is not on Shopify, follow the steps given below.
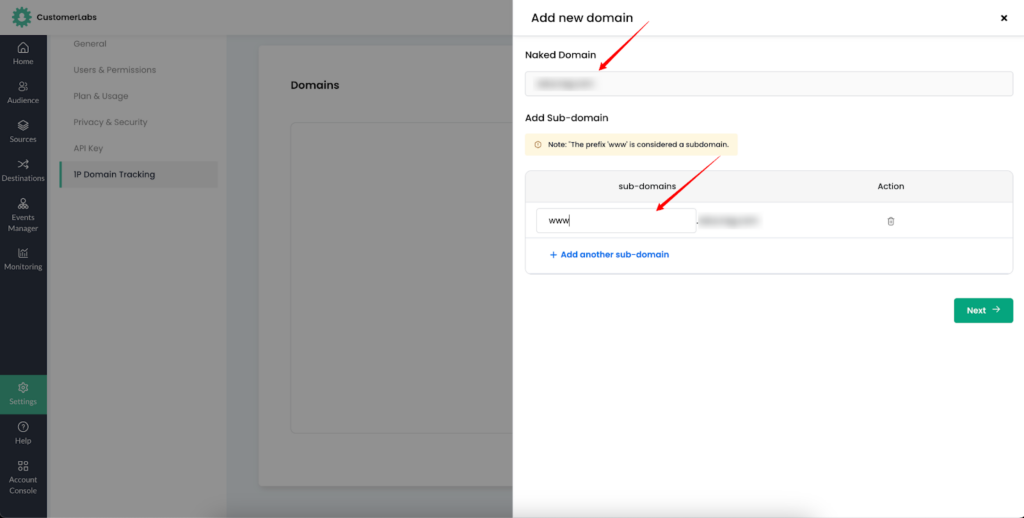
1. After adding the naked domain, you can add the required Sub-Domains (Note: The ‘www’ prefix is also a valid sub-domain) → Click “Next”
This CDN can either be managed by
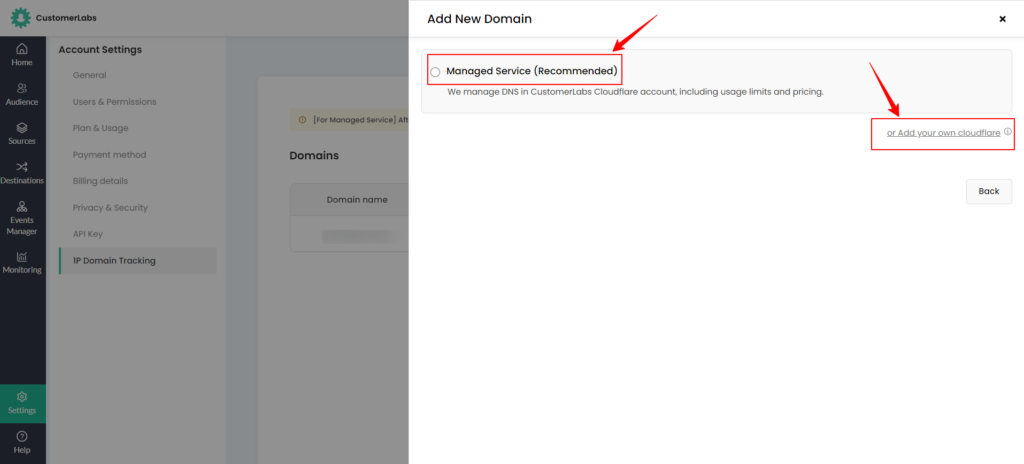
[Recommended] Managed Service – By CustomerLabs
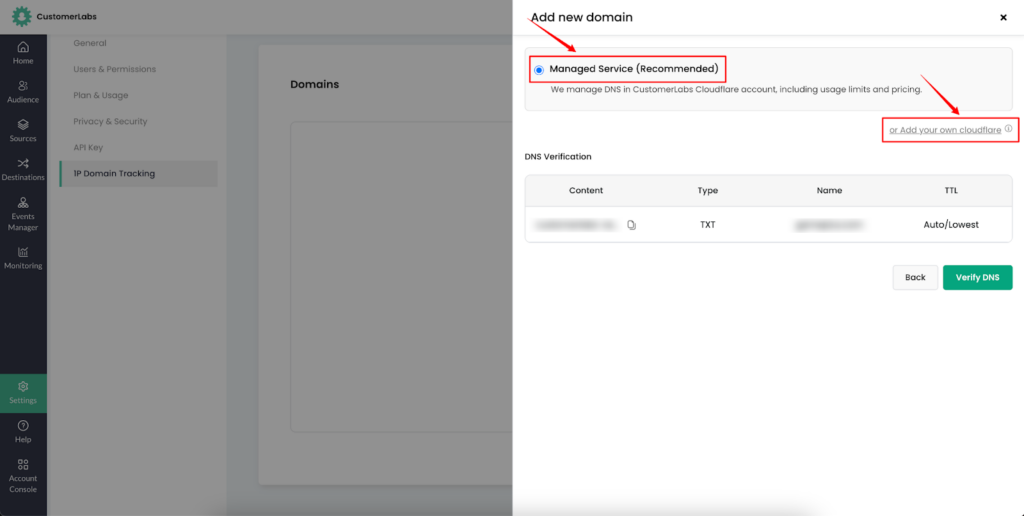
If you choose to go with Managed Service, you have to verify that you’re the owner of the domain, before proceeding with the migration process of your DNS provider to our Cloudflare. (Note: Verification has to be done in 7 days)
1. After verifying the ownership of the domain, Click “Verify DNS” to verify the domain in CustomerLabs.
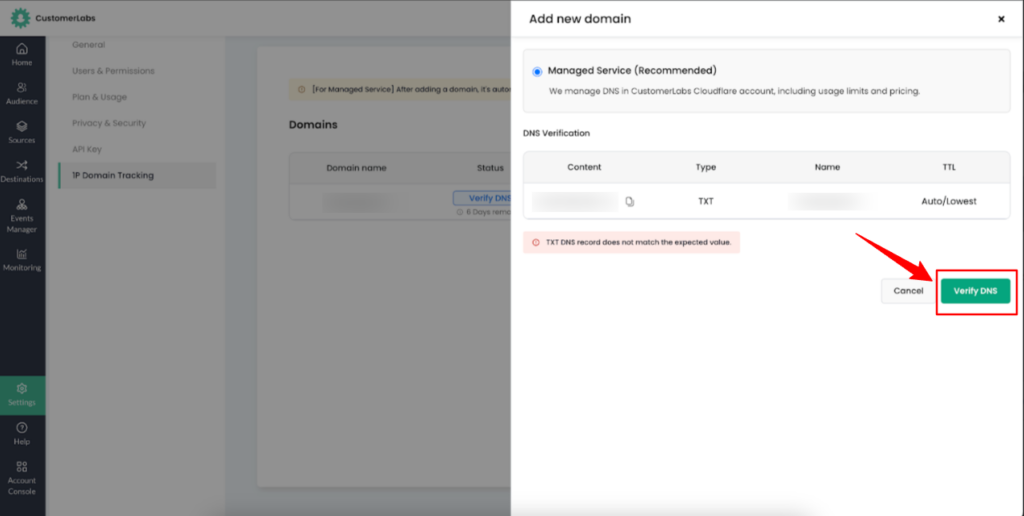
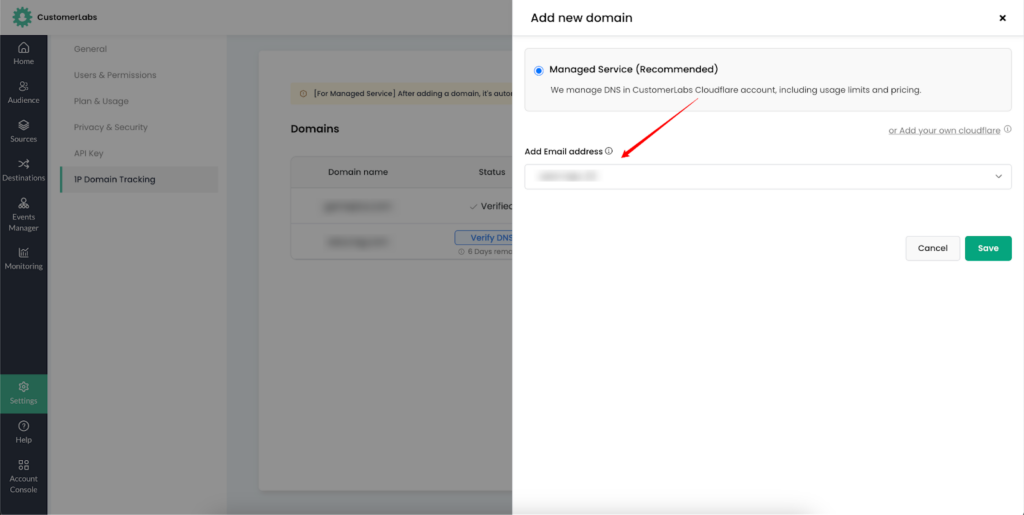
2. Once DNS verification is done, you will be prompted to enter the email address for providing access to the Cloudflare account
Note: You can only choose the admin users’ email address from the drop-down
3. Click “Save”
4. You will be sent an invite from [email protected] to access your Cloudflare account (If you don’t receive an email within 24 hours, please contact [email protected]).
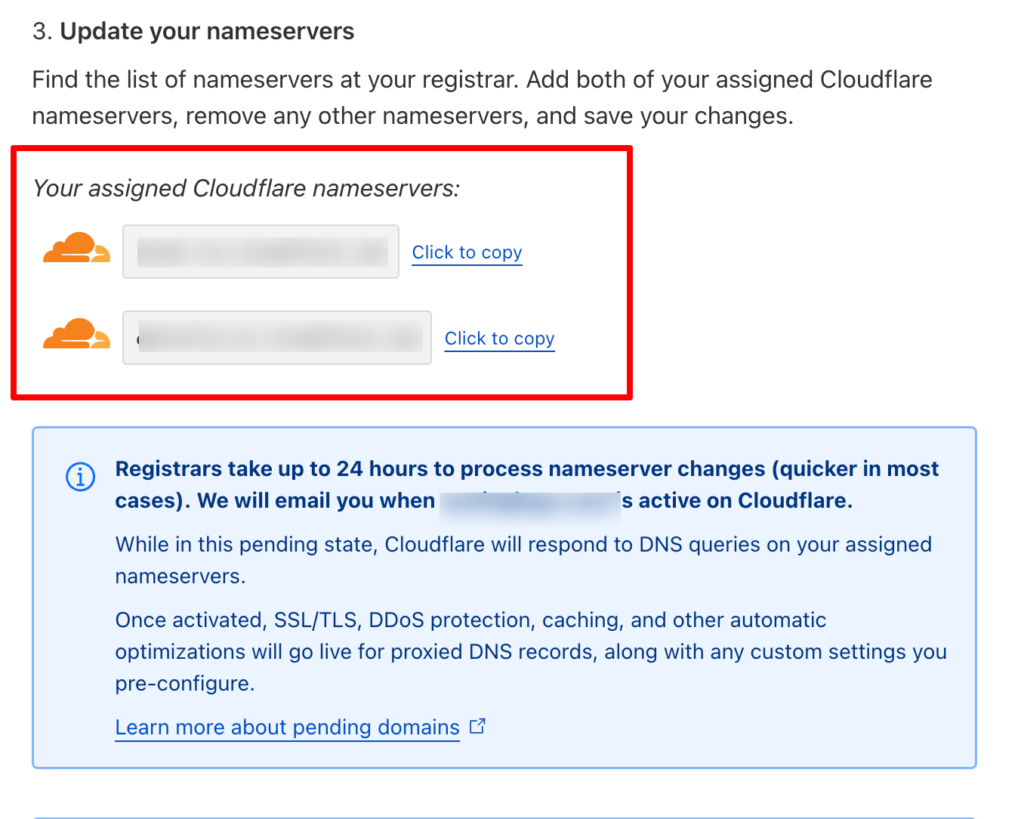
5. After accepting the invite to the Cloudflare account, you have to map the nameservers assigned
6. After mapping the nameservers, go back to the 1P domain Tracking dashboard in CustomerLabs. Click on “Verify now” against the domain you’ve recently added.
7. Now, reinstall the tracking script given under “1P domain tracking code” tab on the Home page

Adding your own CloudFlare Account
(Important point to Note: If you are using your Cloudflare account, you should manage the pricing and rate limits. If you’re on the Free worker plan, we recommend upgrading to a paid plan capable of handling data requests from CustomerLabs to ensure uninterrupted data tracking.)
1. You can add your own Cloudflare account by clicking on “Add your own cloudflare” hyperlink
2. You will be asked to enter your Cloudflare account ID and API token to proceed further.
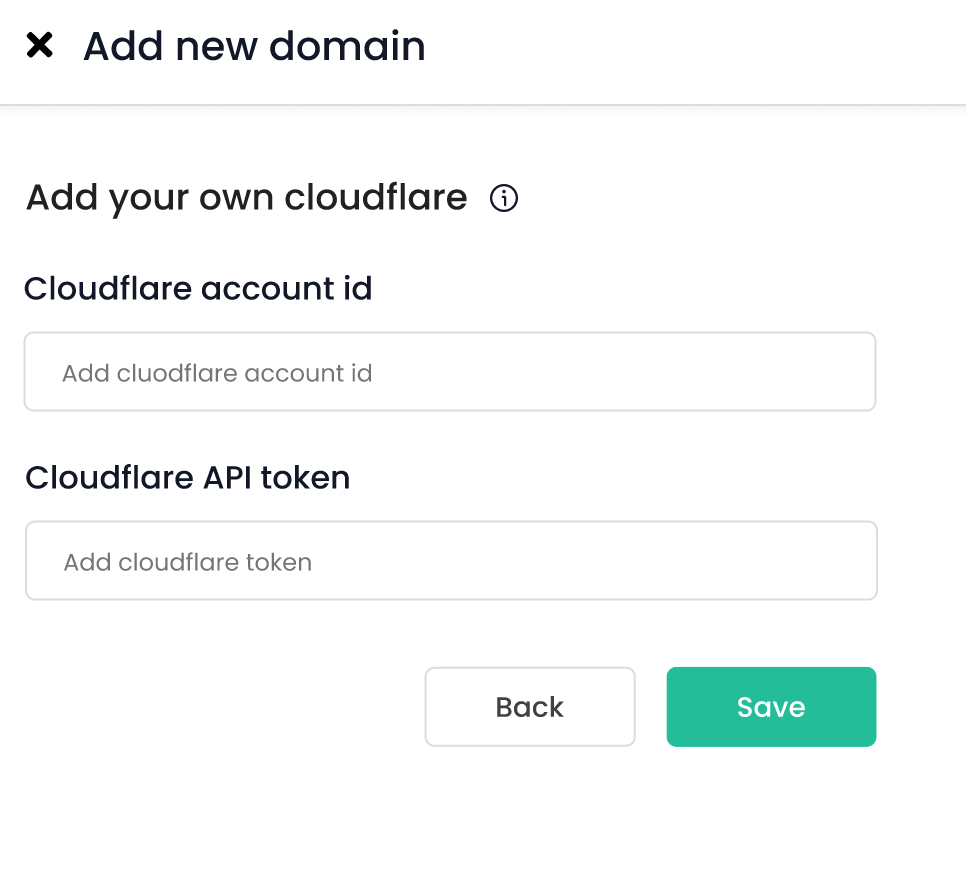
3. Go to your Cloudflare account → Websites → Choose the domain → Overview → Account ID. Copy this Account ID
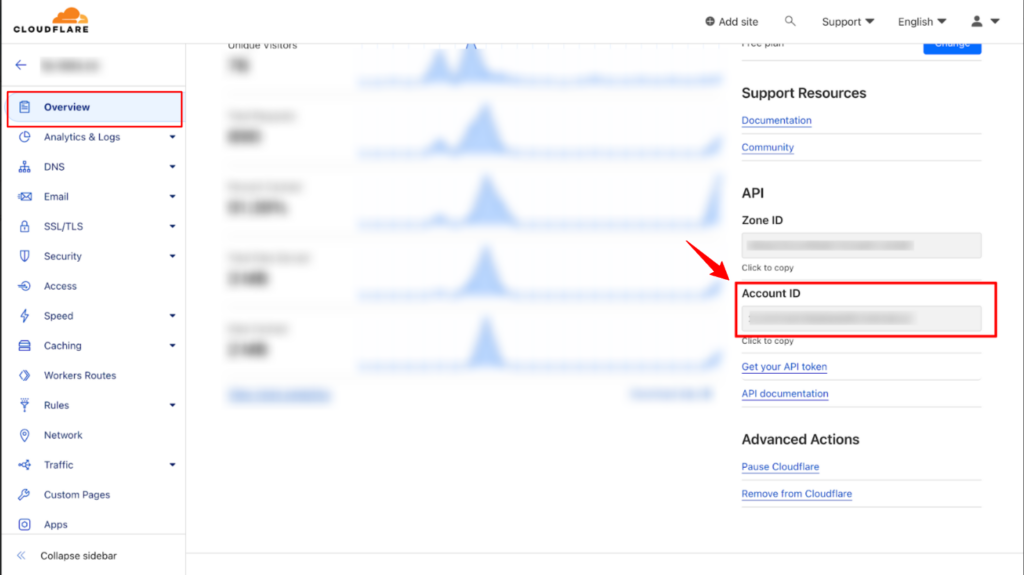
4. Paste the Account ID in the Cloudflare account ID text box in CustomerLabs
5. Generate a new API token within your Cloudflare dashboard and paste it into the Cloudflare API token text box. Check the instructions for generating a new API token in your Cloudflare account.
CustomerLabs ensures that your Cloudflare integration remains current by utilizing the API token you’ve supplied.

6. Click ‘Save’ and you’ll be redirected to the 1P domain tracking dashboard
7. After integrating your Cloudflare account, you have to reinstall the tracking script for 1P domain tracking. Go back to the home screen.
8. Click ‘1P domain Tracking Code’ tab, and copy the code and reinstall this on your website

Verification
DNS Verification
You can see the “Verified” status in 1P domain tracking dashboard in CustomerLabs to check if the records have been verified.
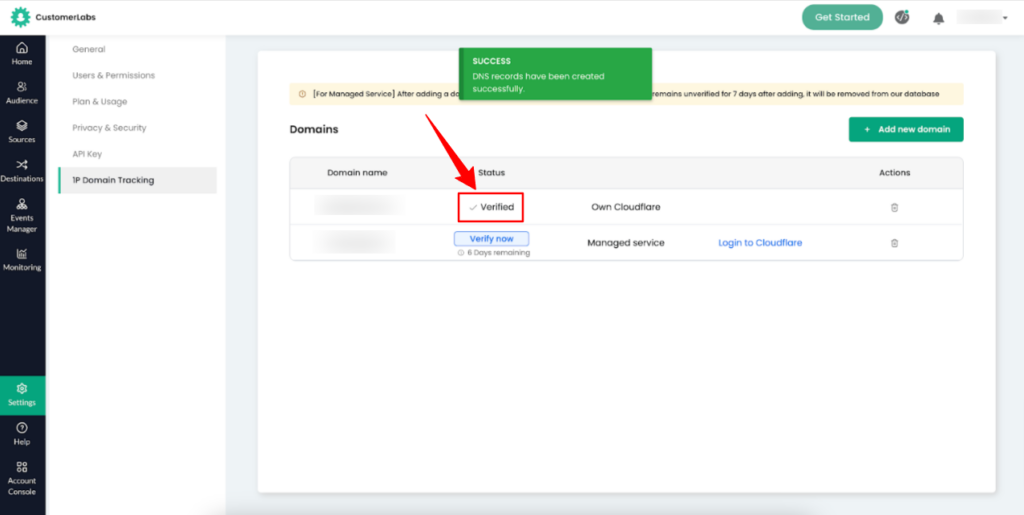
1P domain installation verification
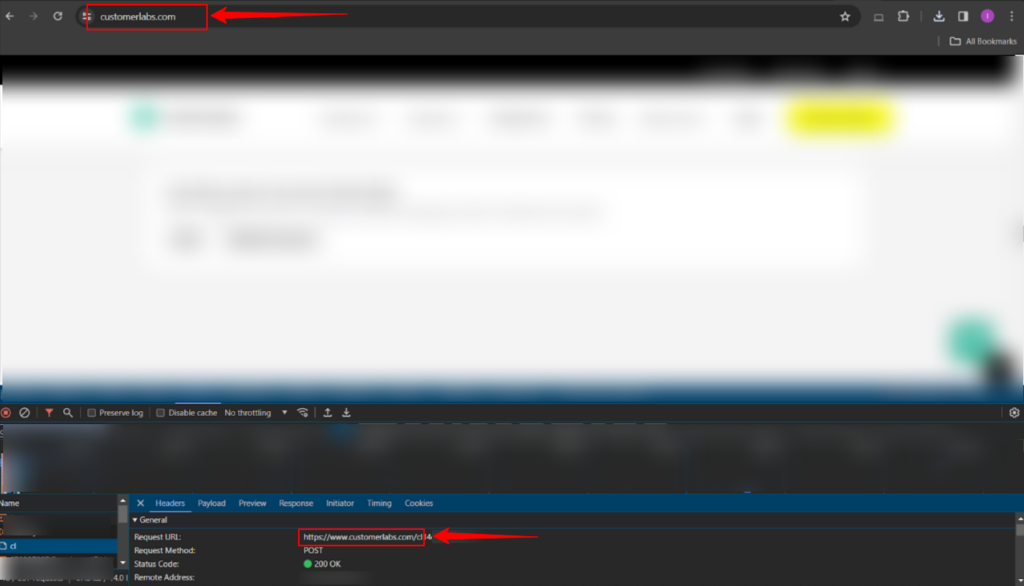
Before installing 1P domain tracking, the cookie would be set from a different domain (io.v2.customerlabs.co) for the domain URL (example.com) as shown in the image below
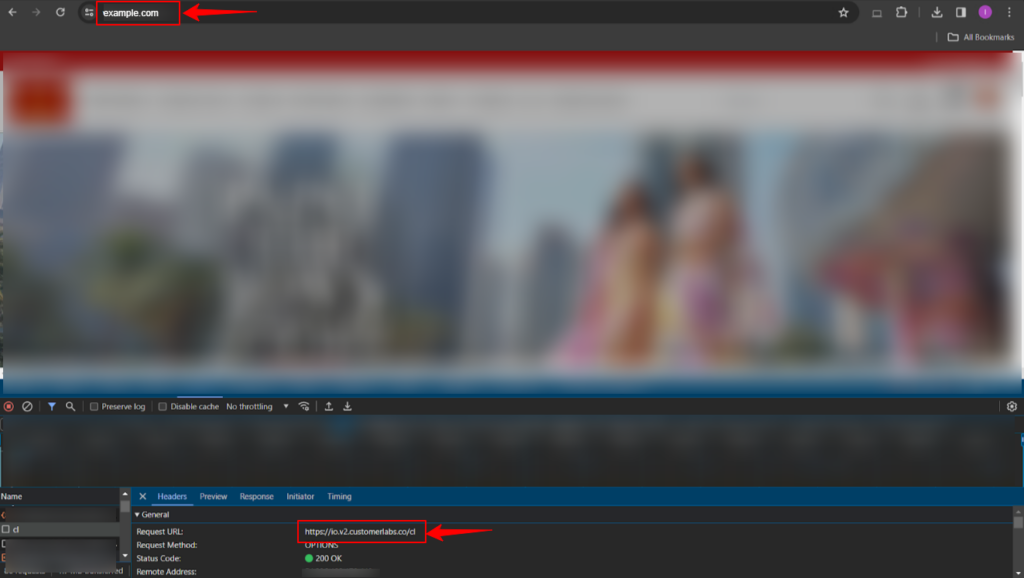
After installing 1P domain tracking, the cookie would be set from the same domain (www.customerlabs.com) for the domain (customerlabs.com)
