Optimizing the campaigns for purchase is good but measuring the campaigns is equally important.
When we say, how should we measure? Is it the number of purchases, cost per acquisition or ROAS as as usual? How do we go one step deeper to measure which campaign or audience or creative is driving high-value customers, new customers, repeat customers etc?
This measurement and analysis helps to optimize the campaigns better and align to the goal.
Our customers nail their performance marketing with multiple optimization strategies
You can optimize the campaigns with industry’s best event match quality score for custom conversion events and also create multiple reports to drive insights on which campaign gives you more new purchases, repeat purchases, high AOV orders etc.

Here’s a step-by-step guide on how to configure the new customer purchase and repeat customer purchase events
The “new customer purchase” and “repeat purchase” events can be configured in two scenarios:
- Based on Shopify tags
- Based on the data dump
Scenario 1: Based on the Shopify tags:
If you have been using Shopify tags to identify the pattern of new and repeat customers in your Shopify account’s order section, here are the steps to configure the new and repeat customer events with CustomerLabs and ensure that tags are assigned in a nomenclature format across all the orders like “new customer” “repeat customer” “returning customer” “first order” and before configuring the new and repeat Customer events, please refer to this documentation to integrate Shopify with CustomerLabs.
Step 1:
Similarly, follow the above-given steps for creating the workflow for new customers & repeat customer events.
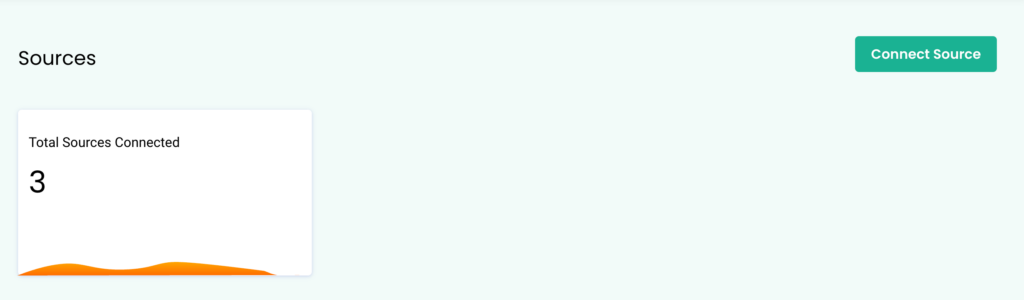
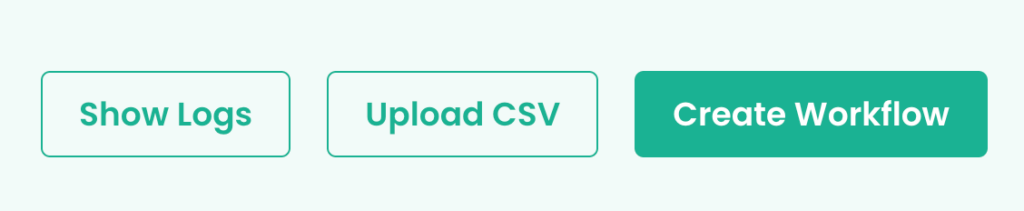
SignIn CustomerLabs→ Navigate to Source→Create the workflow
New customer event
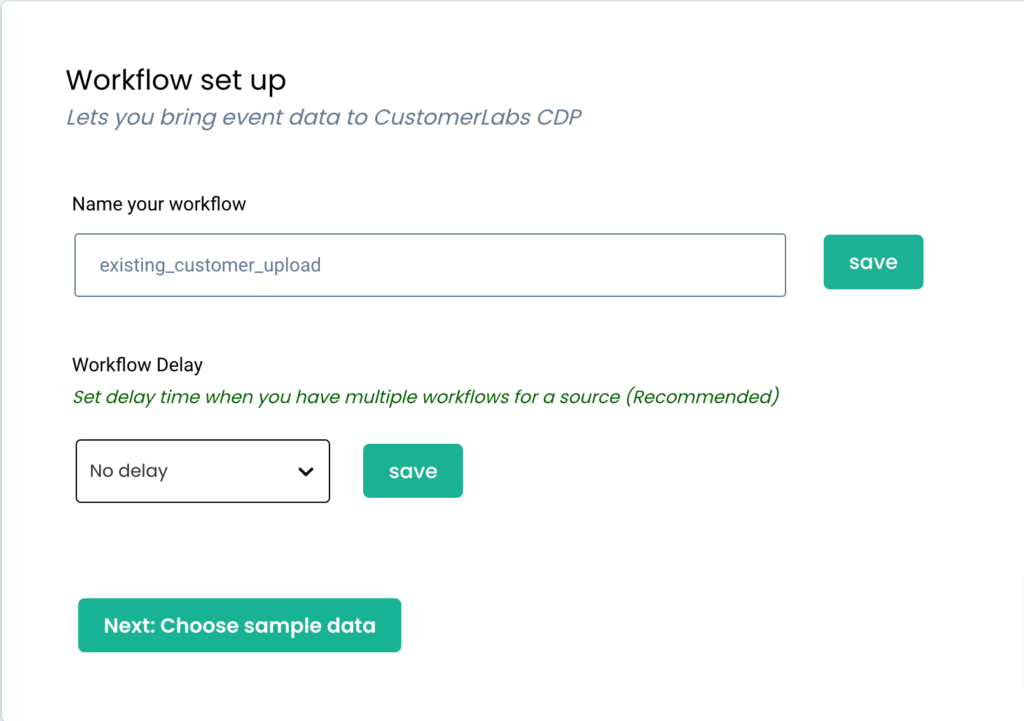
1. Naming your workflow
As shown in the image below, you can name your workflow name as a new customer purchase.

2. Data Selection
After naming your workflow, the next step is to select the sample data for your workflow to process the events

3. Filtering the Incoming data
As mentioned above, if you use tags to identify new and repeat customers.
Let’s take an example where the tag “first-visit” is used to identify new customer data.
To filter the condition based on the tags:
- In the field input, select “tags” as the input.
- In the condition, choose “text contains” and enter “first-order”
This means that if the data processed contains the tag “first-visit,” the workflow will proceed; otherwise, the workflow filter condition will fail and the data won’t be processed inside the workflow.

4. Event Configuration
Event configuration is the final and most important step of the workflow setup. Below is a detailed explanation of the various fields provided.
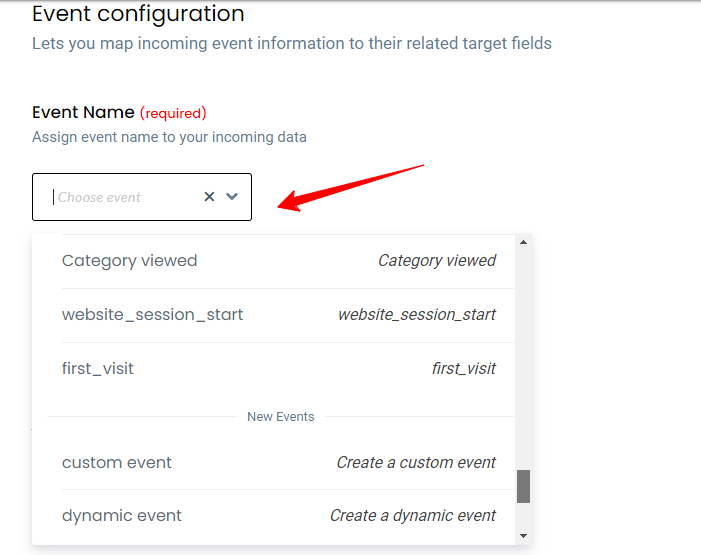
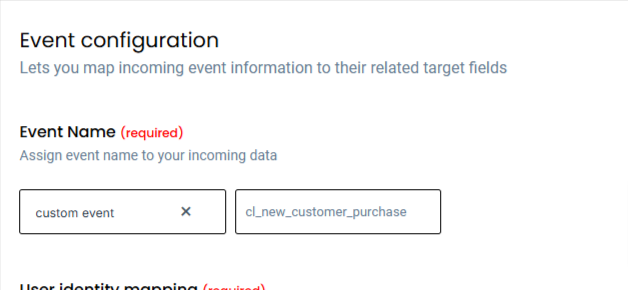
4.1. Event name
Assign the event name by selecting from the drop-down as shown below choosing the custom event and naming it cl_new_customer_purchase
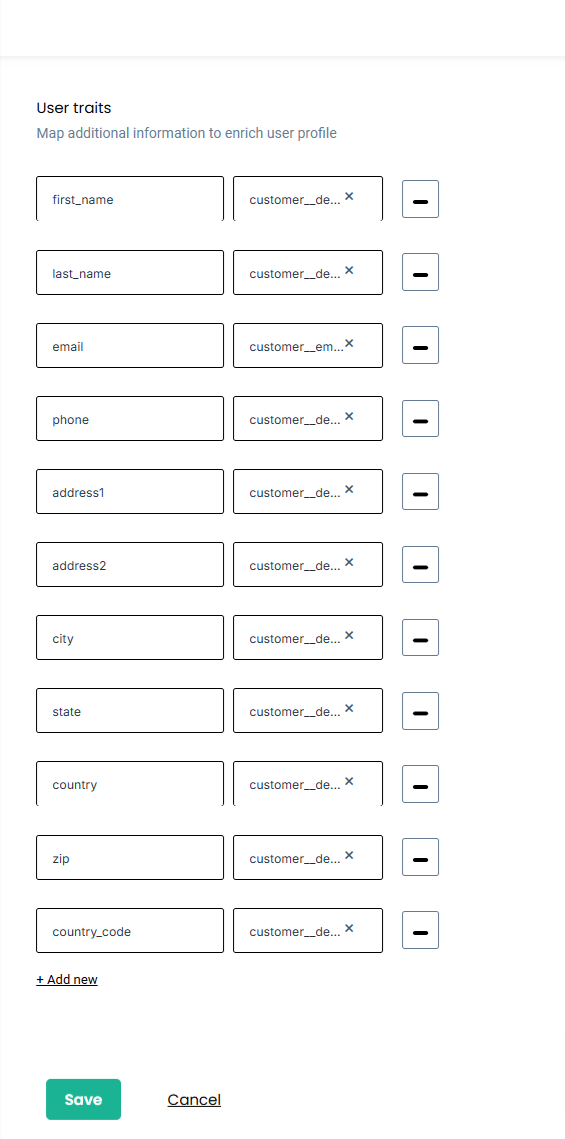
User traits:
All user/contact/individual-related information can be added under user traits.
To send the user traits to the destination, you must map the user details under this section. This mapping process will allow you to send this valuable user information to the intended destination.
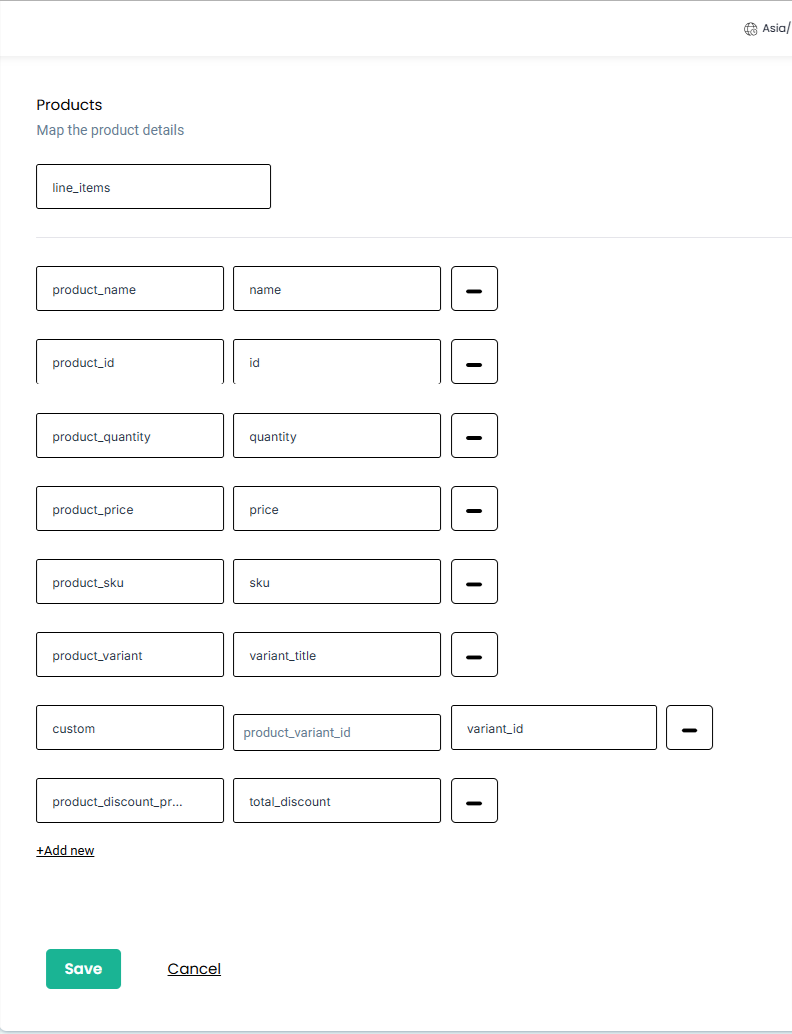
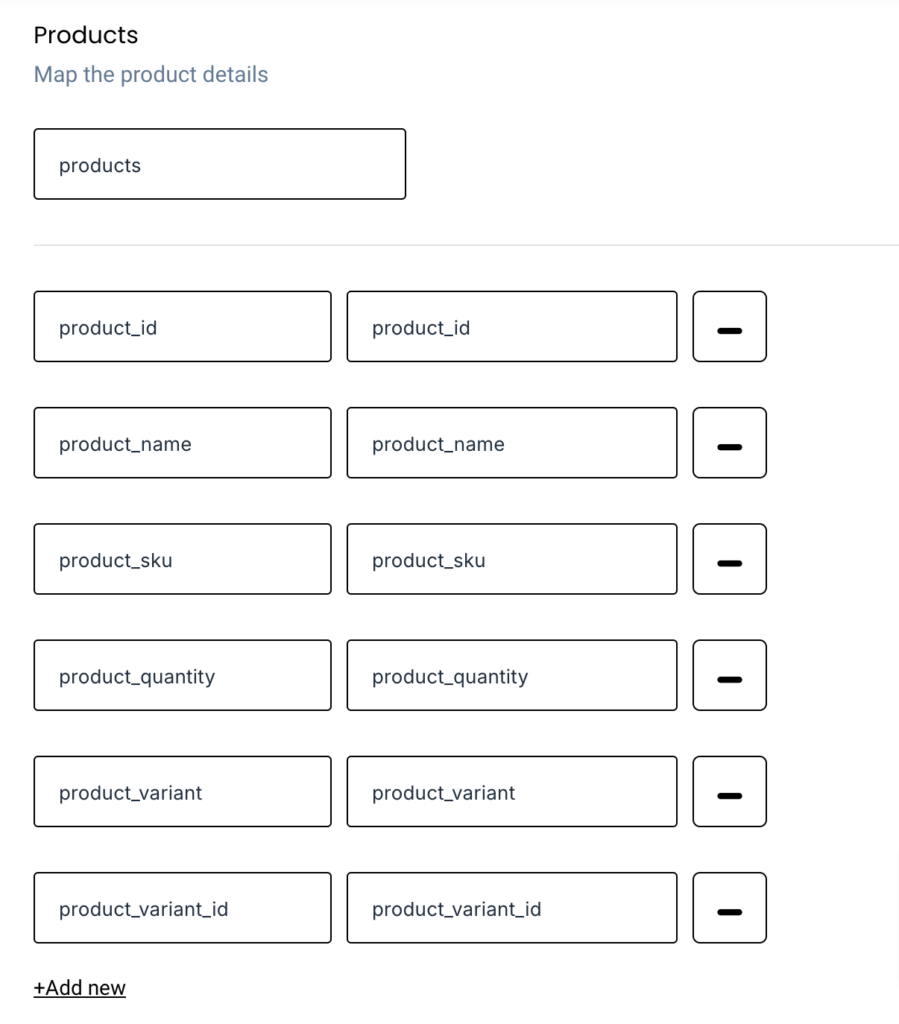
Product details:
Product attributes can be added for events related to E-commerce/other business categories such as Product viewed, Product clicked, Purchases, etc. Details such as product sku, product ID, product variant, and product size can be added under product details and choose line_items from the dropdown.
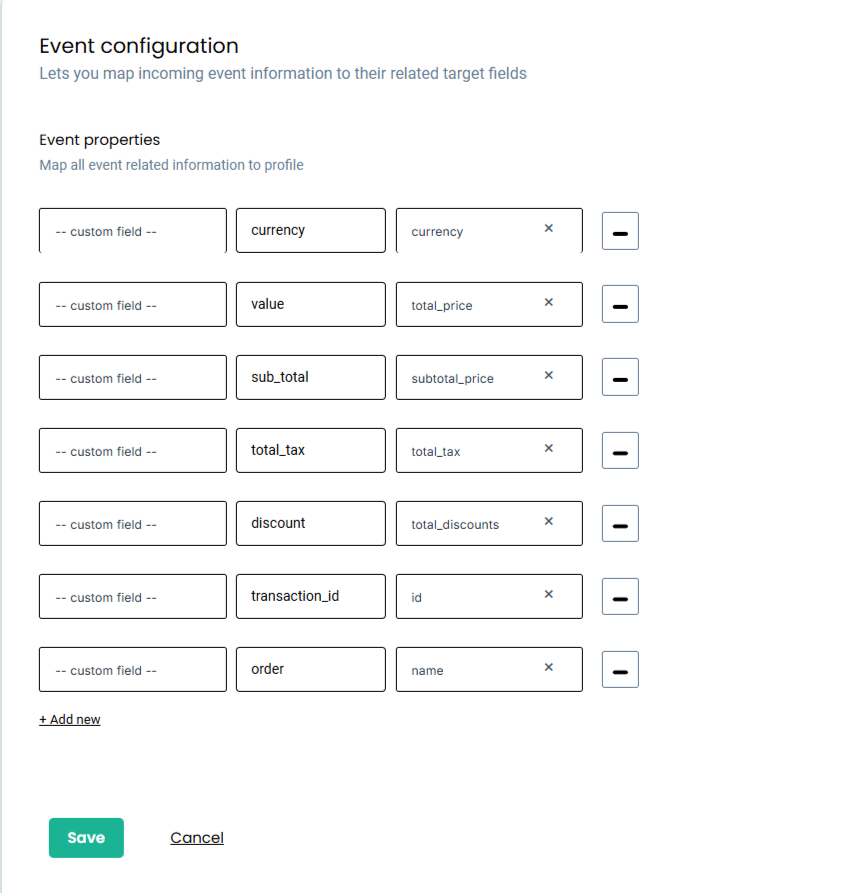
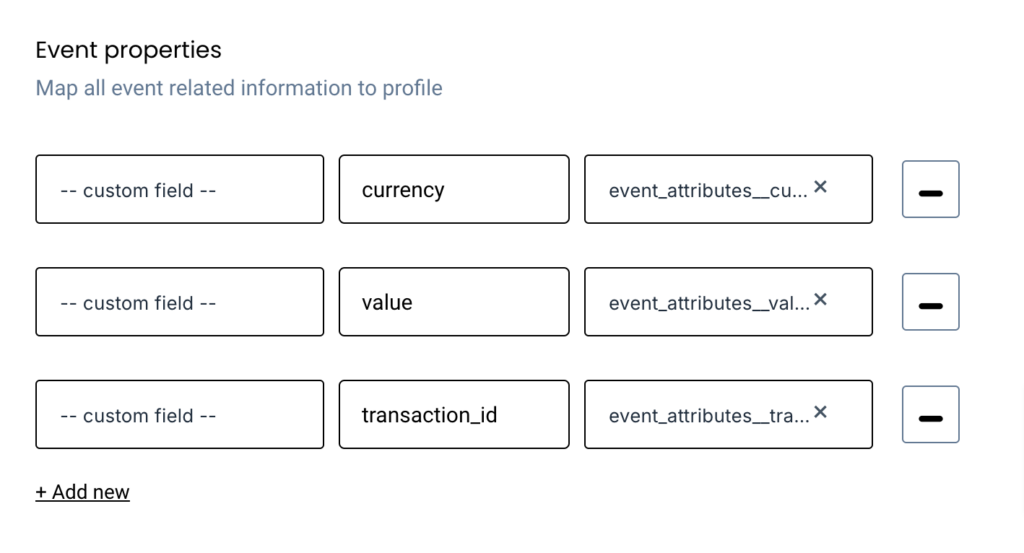
Event Properties:
Additional information pertaining to the event can be added under event properties. The Mandate fields are: value, currency, transaction id and order id. The transaction ID can be mapped to the transaction number or order id.
5. Testing the workflow
Once the workflow is configured, make a test purchase or wait until the purchase order is received.
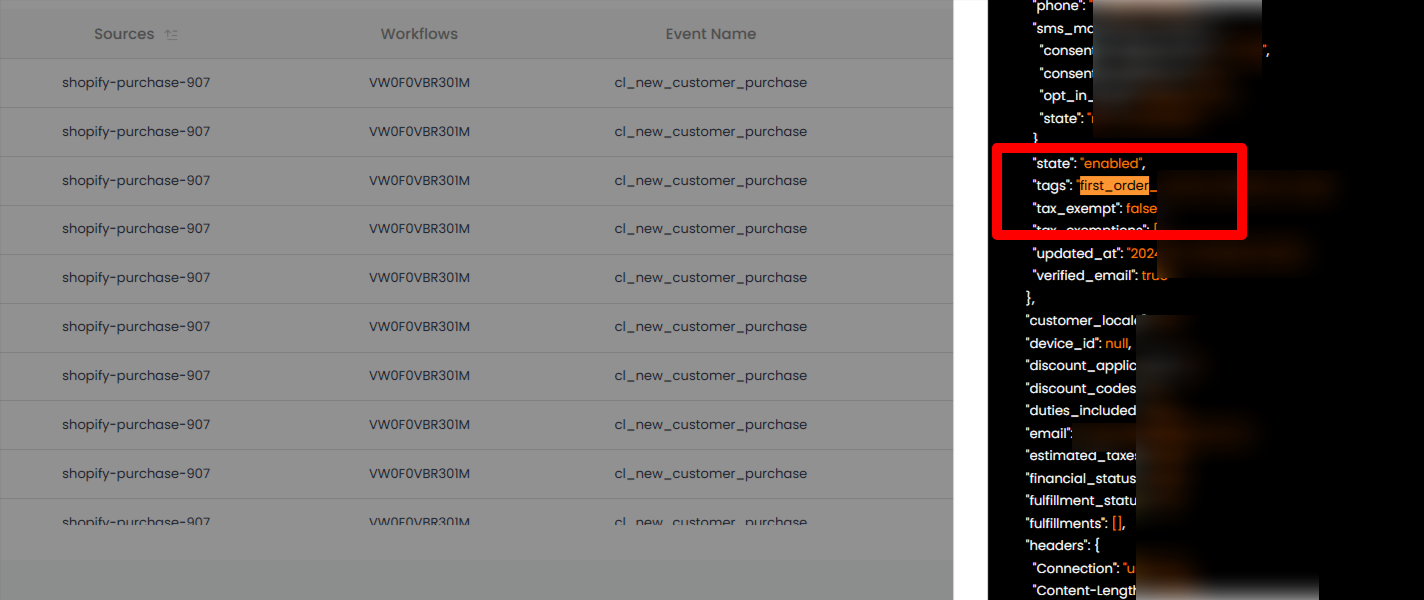
- Go to the monitoring section navigate to logs and select the workflow you have configured.
- If the order contains the “first-ordert” tag, the workflow will process successfully, as shown in the screenshot below.
Similarly to configure the workflow for the repeat customer, follow the steps given below
Repeat customer
1. Naming your workflow
As shown in the image below, you can name your workflow name as a repeat customer purchase.
2. Data Selection
After naming your workflow, the next step is to select the sample data for your workflow to process the events
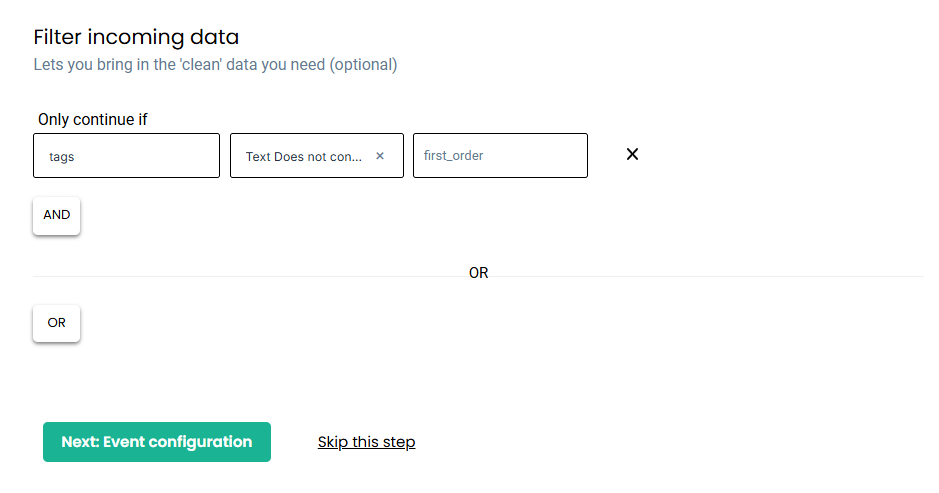
3. Filtering the Incoming data
As mentioned above, if you use tags to identify new and repeat customers.
Let’s take an example where the tag “first-order” is used to identify new customer data here filtering the repeat customer as a person who does not contain the tag first_order
To filter the condition based on the tags:
- In the field input, select “tags” as the input.
- In the condition, choose “text does not contain” and enter “first-order”
This means that if the data processed does not contain the tag “first-order,” the workflow will proceed; otherwise, the workflow filter condition will fail and the data won’t be processed inside the workflow
4. Event Configuration
Event configuration is the final and most important step of the workflow setup. Below is a detailed explanation of the various fields provided.

4.1. Event name
Assign the event name by selecting from the drop-down as shown below choosing the custom event and naming it cl_repeat_customer_purchase
User traits:
All user/contact/individual-related information can be added under user traits.
To send the user traits to the destination, you must map the user details under this section. This mapping process will allow you to send this valuable user information to the intended destination.
Product details:
Product attributes can be added for events related to E-commerce/other business categories such as Product viewed, Product clicked, Purchases, etc. Details such as product sku, product ID, product variant, and product size can be added under product details and choose line_items from the dropdown.
Event Properties:
Additional information pertaining to the event can be added under event properties. The Mandate fields are: value, currency, transaction id and order id. The transaction ID can be mapped to transaction number or order id.
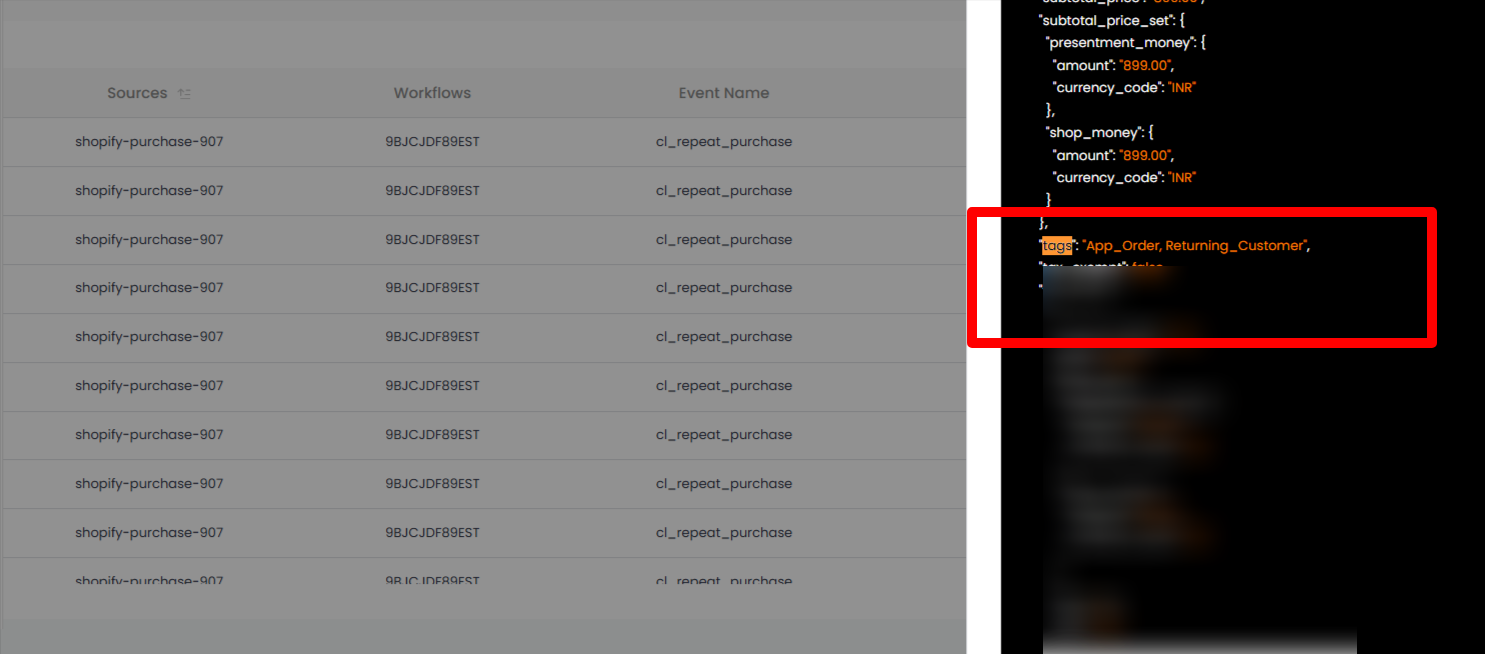
5. Testing the workflow
Once the workflow is configured, make a test purchase or wait until the purchase order is received.
- Go to the monitoring section navigate to logs and select the workflow you have configured.
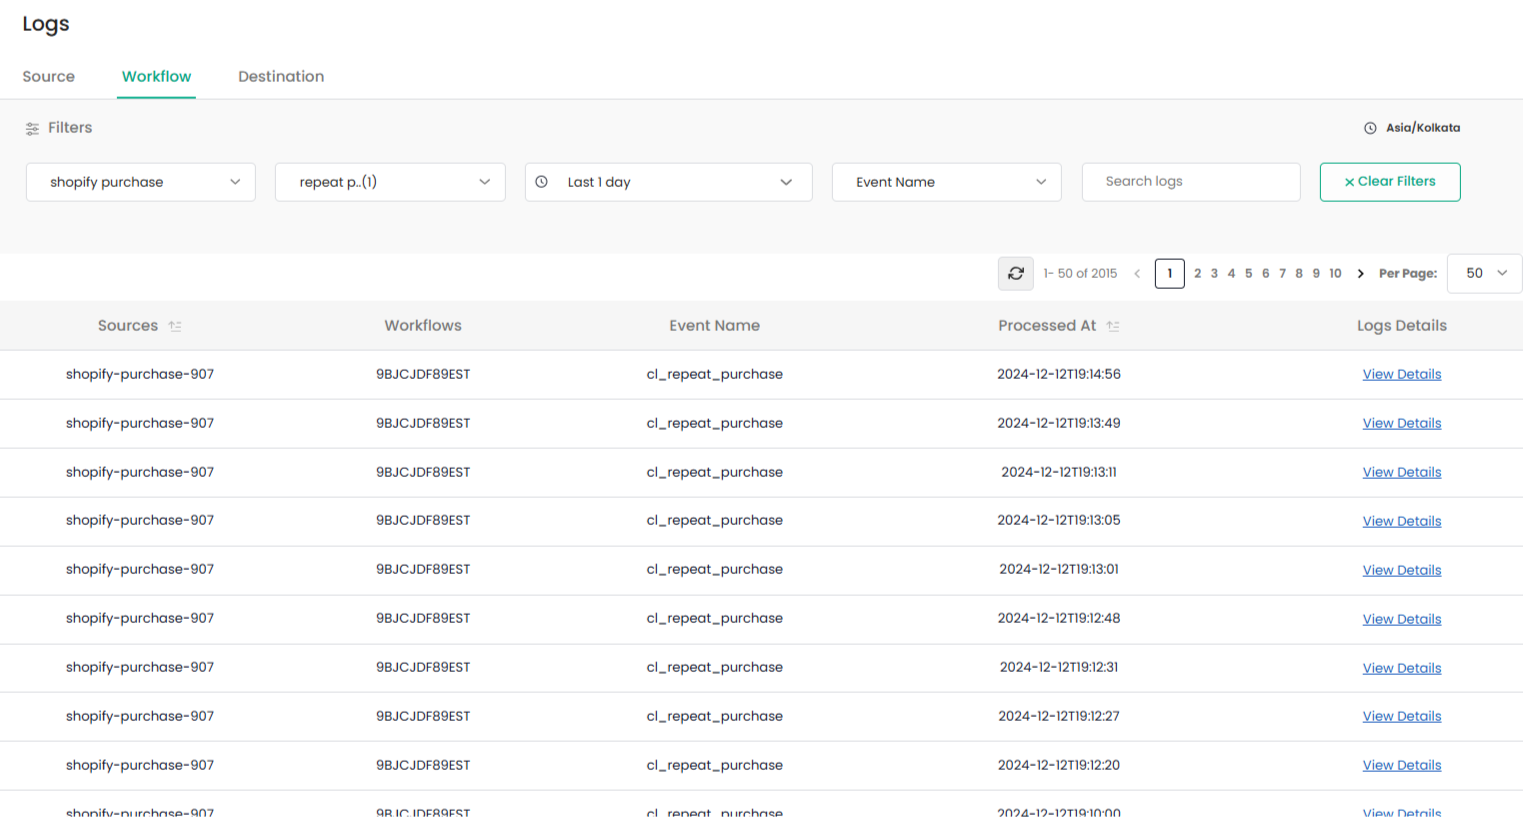
- If the order does not contains the “first-ordert” tag, the workflow will process successfully, as shown in the screenshot below.
Scenario 2: Based on the data dump
Step 1: CSV Upload and Workflow Creation in CustomerLabs
Download the CSV file with your existing customer data from Shopify or WooCommerce.
It is recommended to check the data quality of the downloaded file and make sure to have Email, Phone Number (with Country Code) eg format: +18781989189, First Name(Optional), Last Name(Optional), Address(Optional), Country(Optional), State(Optional), Zip(Optional).
In this document we’ll showcase how to upload only the customer data, but not their previous purchases or products.
1.1: Upload the CSV in CustomerLabs,
Go to Sources -> Connect Source -> CSV Upload
1.2: Create a workflow
Click Create a workflow.
Name the workflow as existing_customer_upload
1.3: Choose sample data from the data selection step
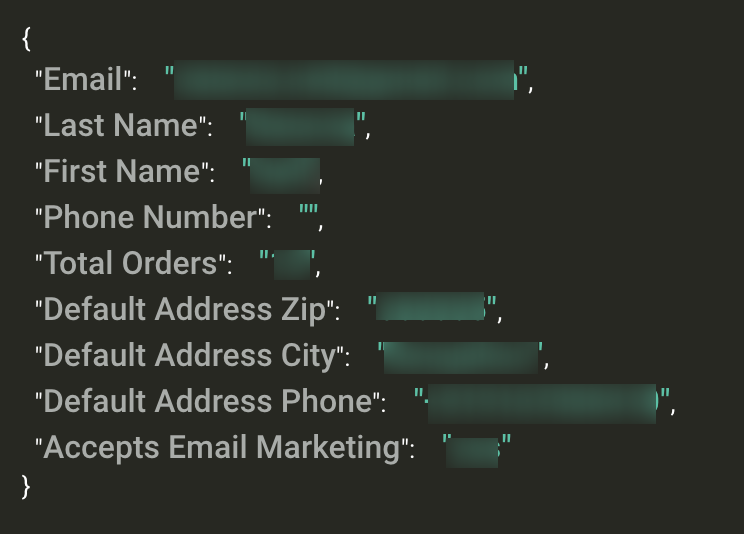
Note: While selecting the sample, ensure the data contains no parameters with null values as given in the image
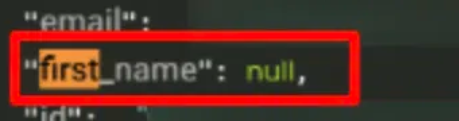
The Customer Labs will not process parameters with null values. This is because null values are not considered valid data by the destination. If the sample data consists of any field with a null value, it will not be pushed to the destination.
1.4: Skip the filter incoming data option
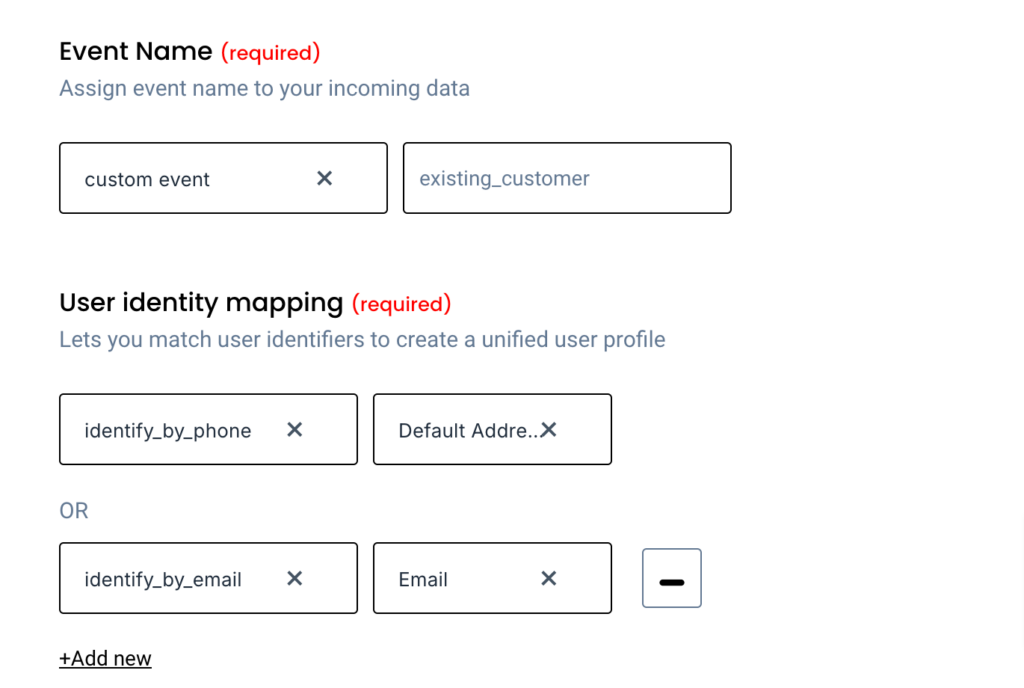
1.5: Custom Event Configuration
Choose Event Name as custom event and on the right side give an event name as existing_customer_upload as given in the screenshot below
Important: Map identify_by_email and identify_by_phone according to the keys which hold the values. Based on this information the profiles get unified.
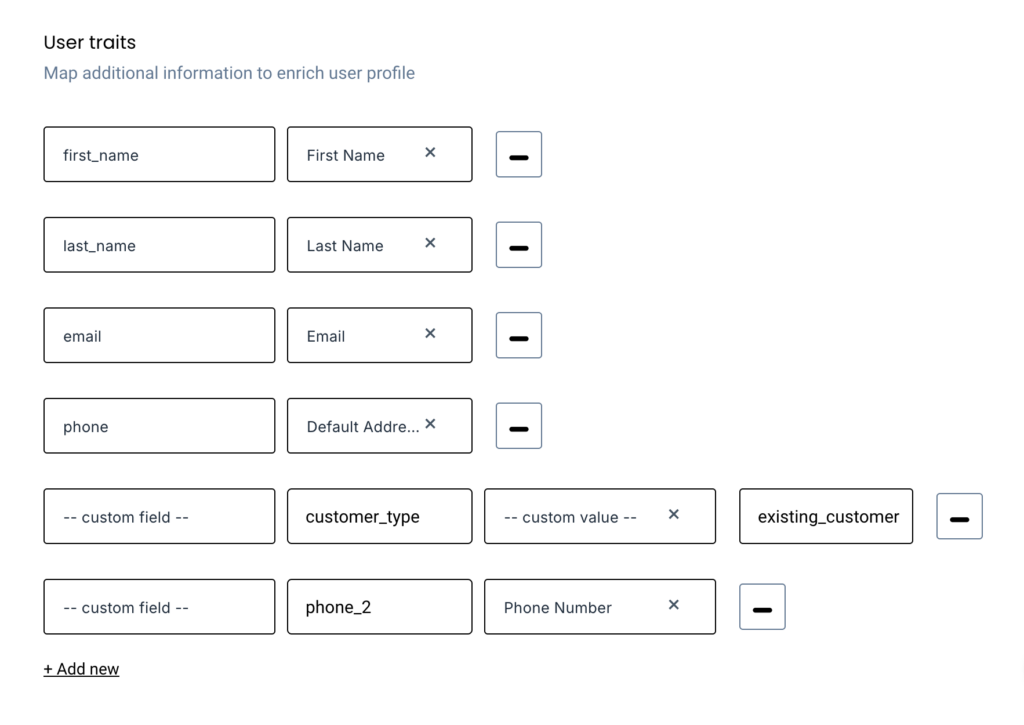
1.6: Map User Traits
It’s Important to Map customer_type as existing_customer
1.7: Click Save
Save the Workflow, to proceed further.
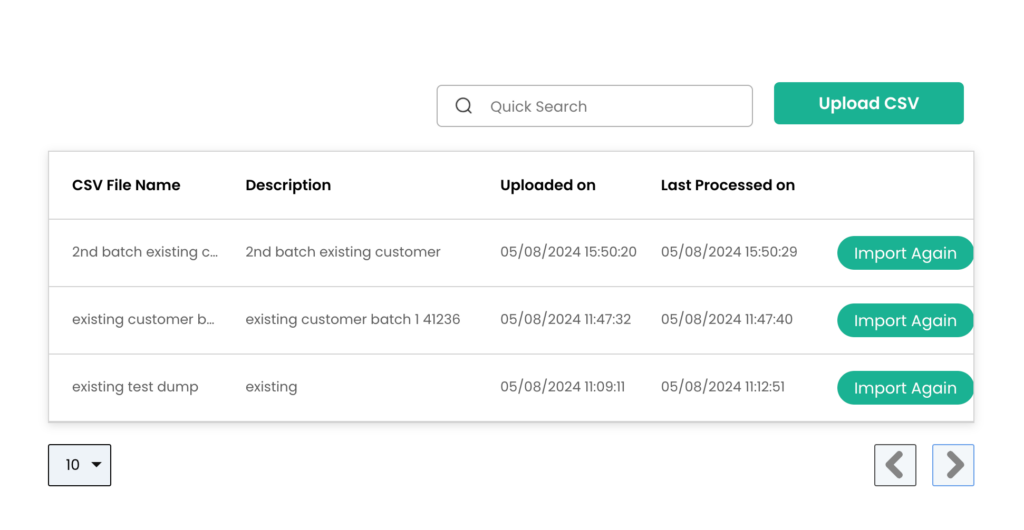
Step 2: CSV File Selection and Data Import
Go to Sources
Click upload CSV for the workflow you have created.

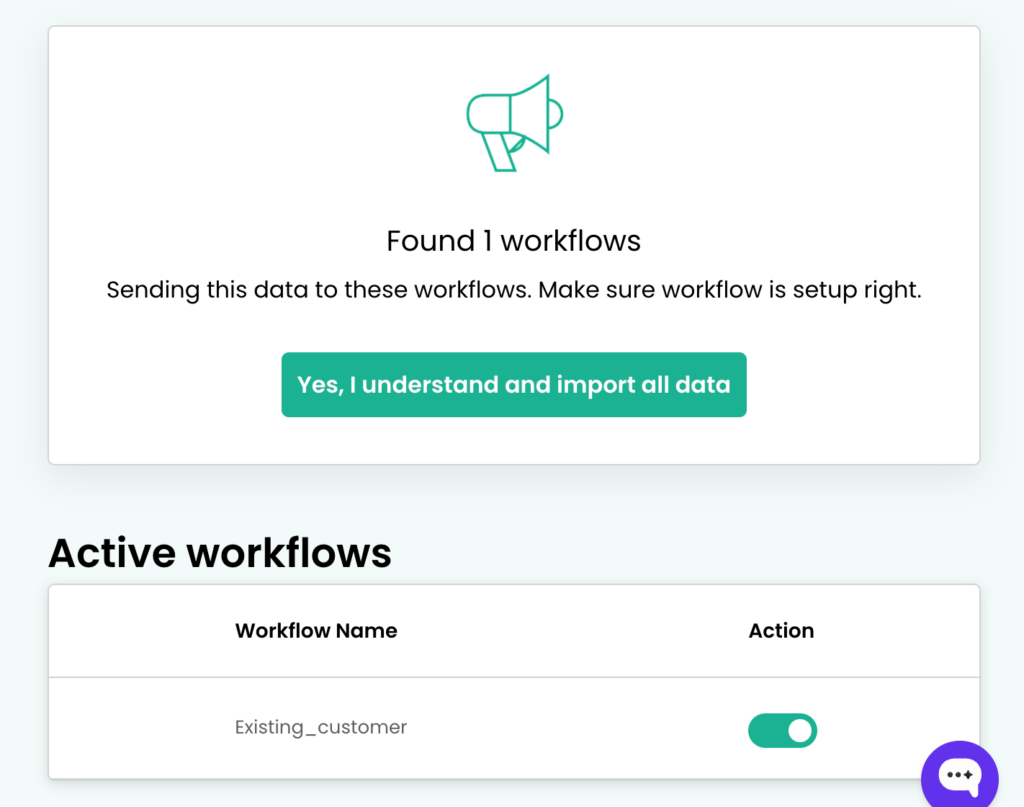
2.1 Choose the CSV file you’d like to import and click on the import button.
2.2.Click on ‘Yes, I understand and Import all data’.
Important:
- Check the Right Workflow is active.
- Check you’ve chosen the right CSV file.
- Depending on the file size and number of rows it may take a few mins to hours for processing and uploading all the data.
Step 3: Verify existing customers event count in events manager
Go to Events manager
Check for the event existing_customers and see if it matches the number of rows. Each row should have one event

Step 4: Validate User Profile Field Mapping
Go to Audiences -> Contacts-> Find a user profile to check if all the fields are mapped properly.

Step 5: Create New & Repeat Purchase Custom Source
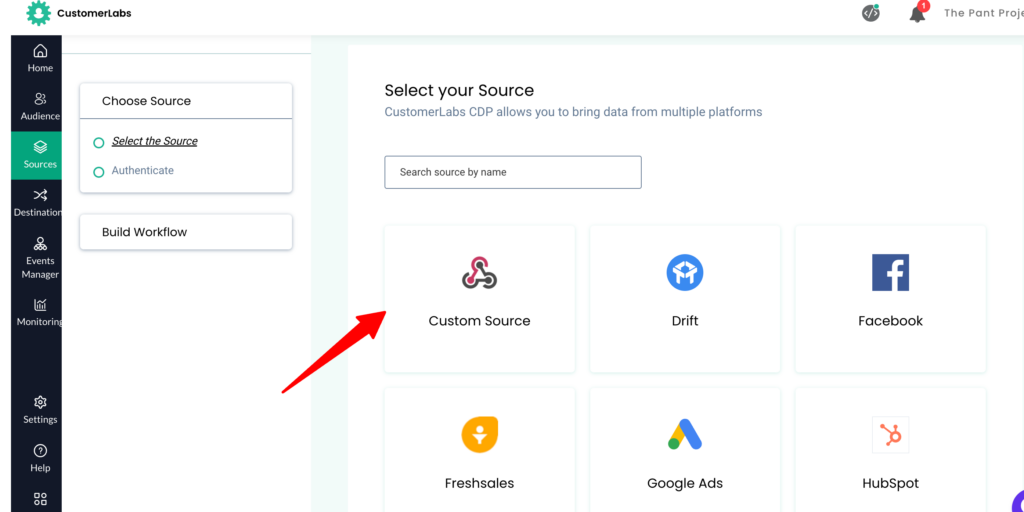
Go to Sources
Create a new custom source, name the source as ‘new and repeat purchase’ – Copy the URL.
Step 6:Configure Webhooks and Set Up Event Workflow
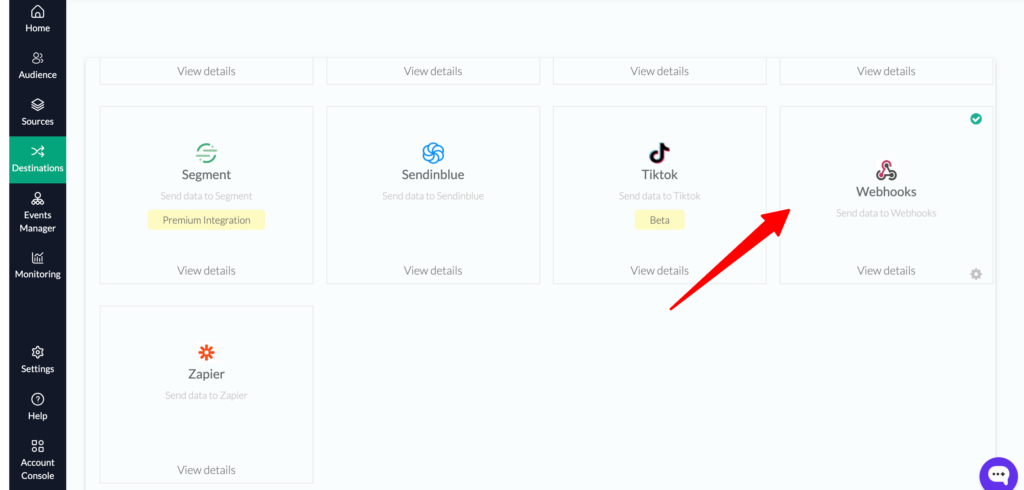
Go to Destinations
Subscribe for webhooks
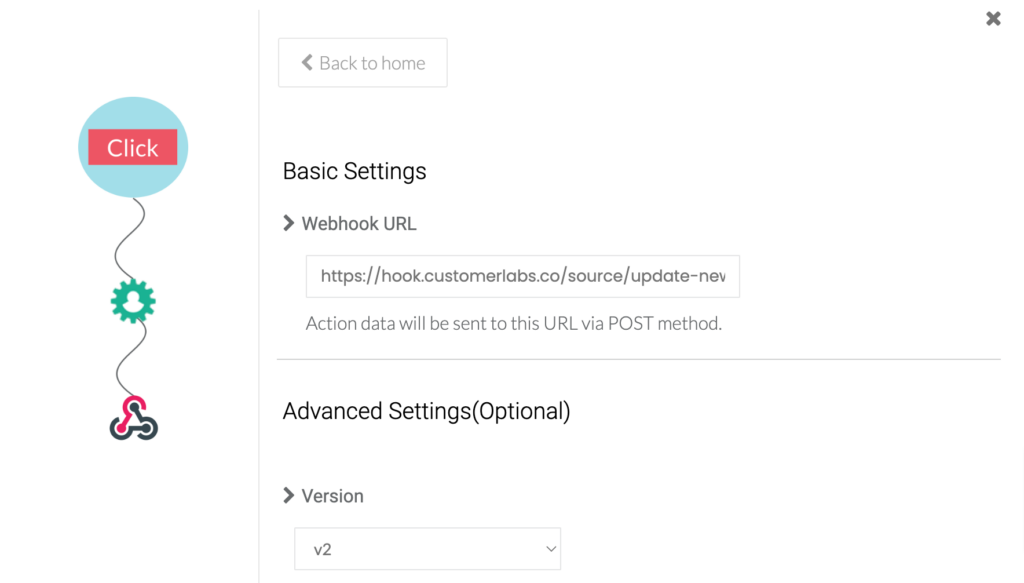
6.1 Paste the URL copied from the source and click save.
6.2: Choose the purchase event, in this case we named the event as ‘cl_purchase’.
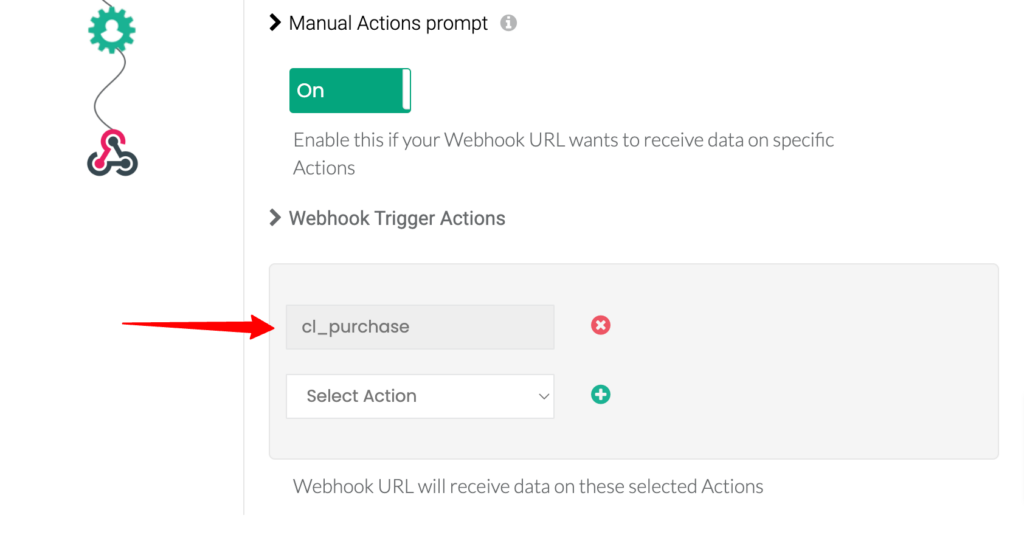
6.3: Click on the Setup Event Workflow.

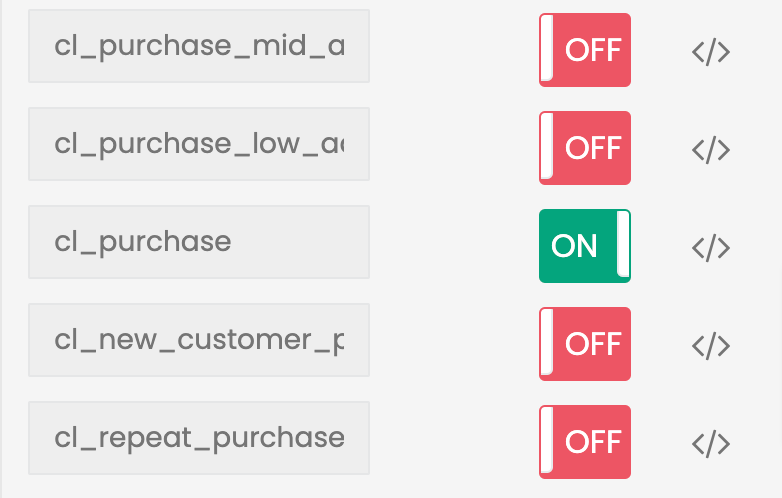
6.4: Go to the event which you have chosen, switch it on and click on the </> icon.
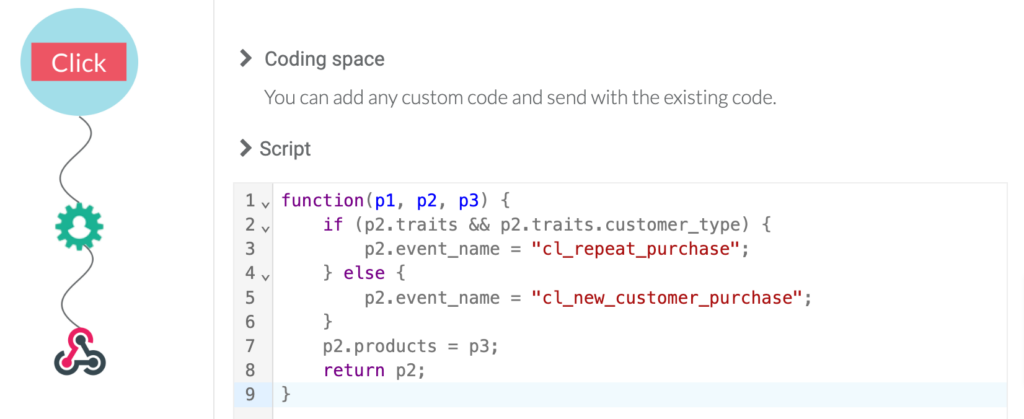
6.5: Code Configuration
Go to cl_purchase, click the </> icon, and paste the following code given below
function(p1, p2, p3) {
    if (p2.traits && p2.traits.customer_type) {
        p2.event_name = "cl_repeat_purchase";
    } else {
        p2.event_name = "cl_new_customer_purchase";
    }
    p2.products = p3;
    return p2;
}
And click on ‘save changes’.
Step 7: Monitor Logs and Configure Workflow for New & Repeat Purchase Source
Go to Sources
Click on the ‘new and repeat purchase’ source
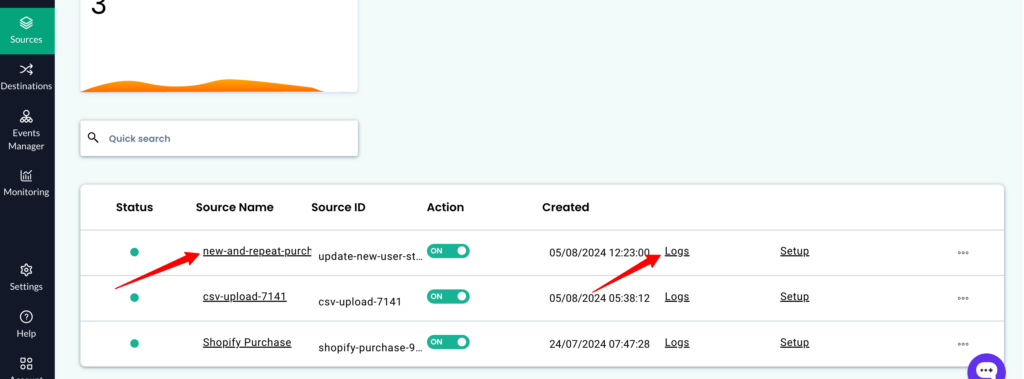
7.1: Check for Logs
If there are no Logs, wait till some purchase happens.

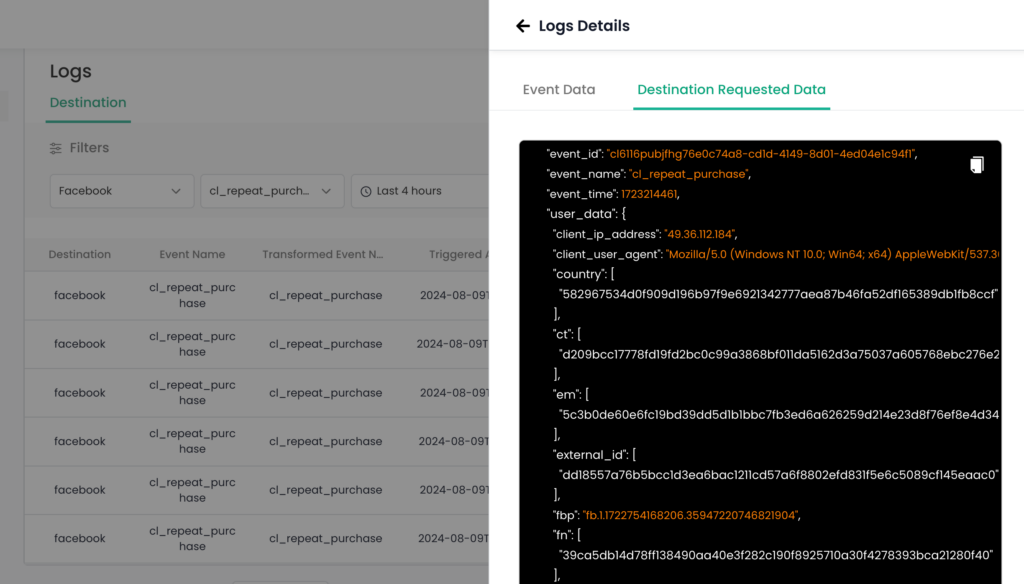
7.2: View Details in Logs
Once you start seeing the logs.
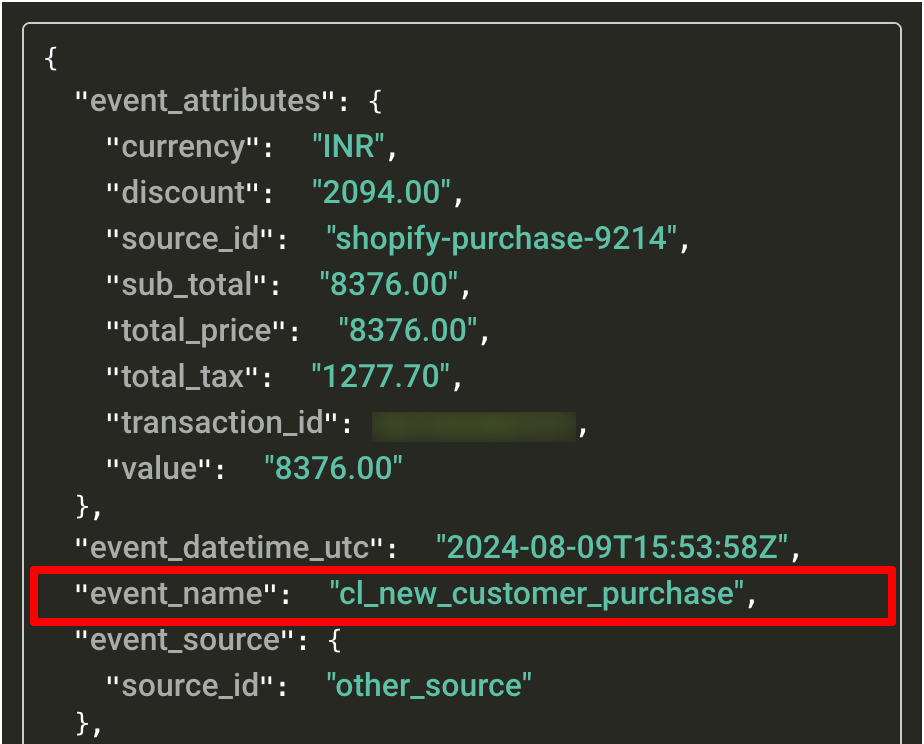
Click ‘View Details’ and you will see event_name: “cl_new_customer_purchase” or event_name: “cl_repeat_purchase”
7.2: Create workflow
Create a Workflow inside the ‘new and repeat purchase’ source.
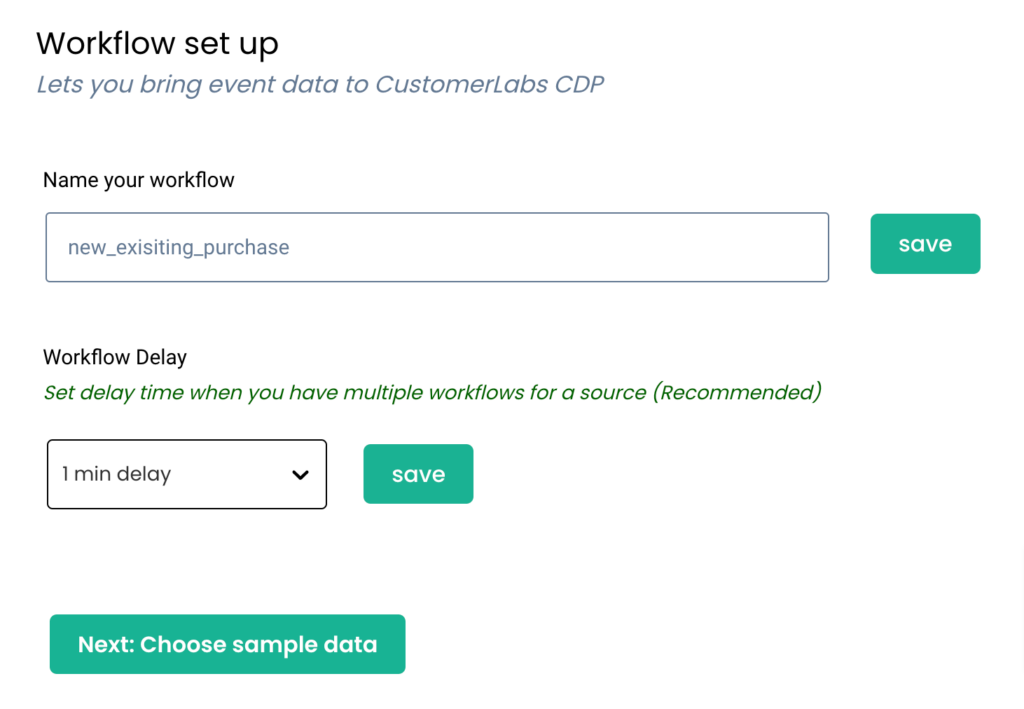
Name the workflow as “new_exisiting_purchase” and set delay to 1 min.
And click ‘Save’.
7.3: Choose the most recent data from the Data Selection.
7.4: Filter Incoming Data
This step is mandatory to avoid the loop.The data will be processed only if the name does not contain cl_purchase. Click Next.

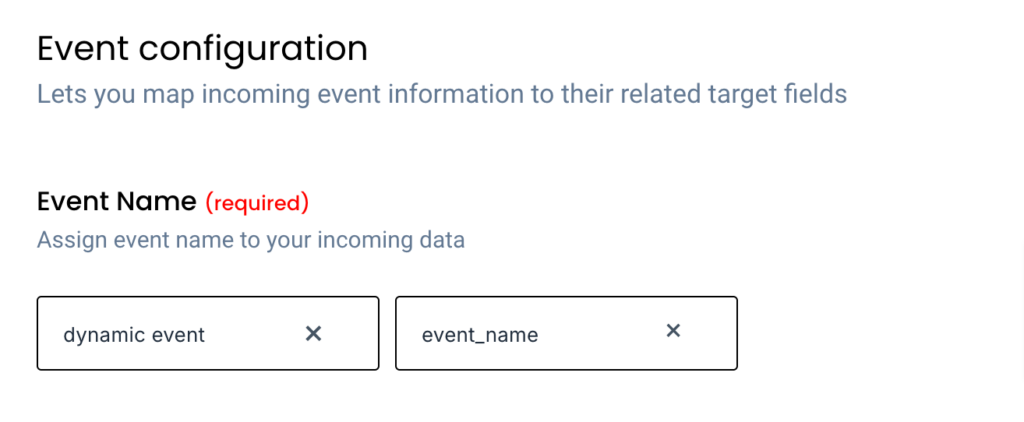
7.5: Dynamic Event Configuration
In the event name choose dynamic_event on the left side and choose event_name from the drop down.
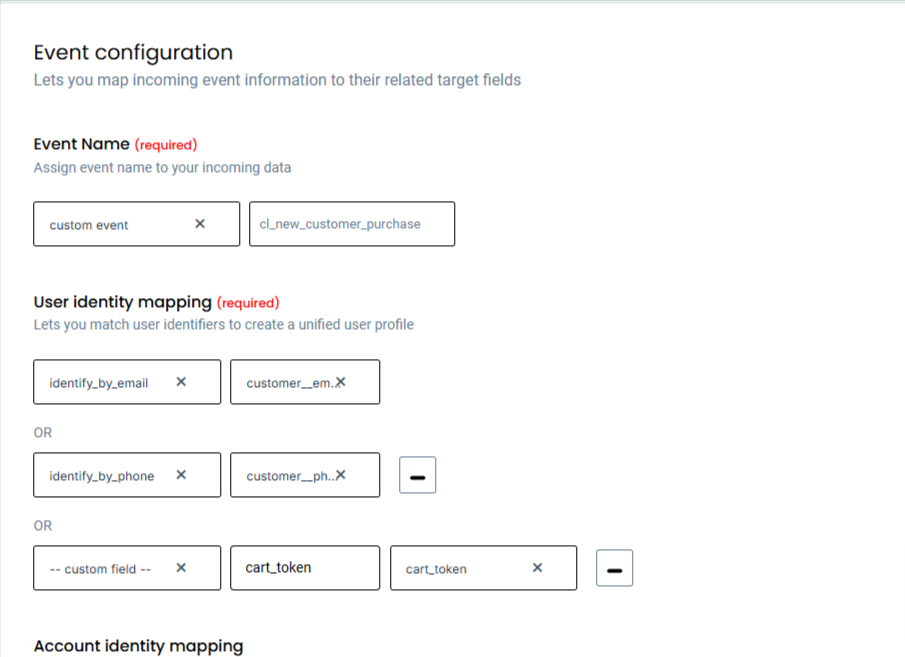
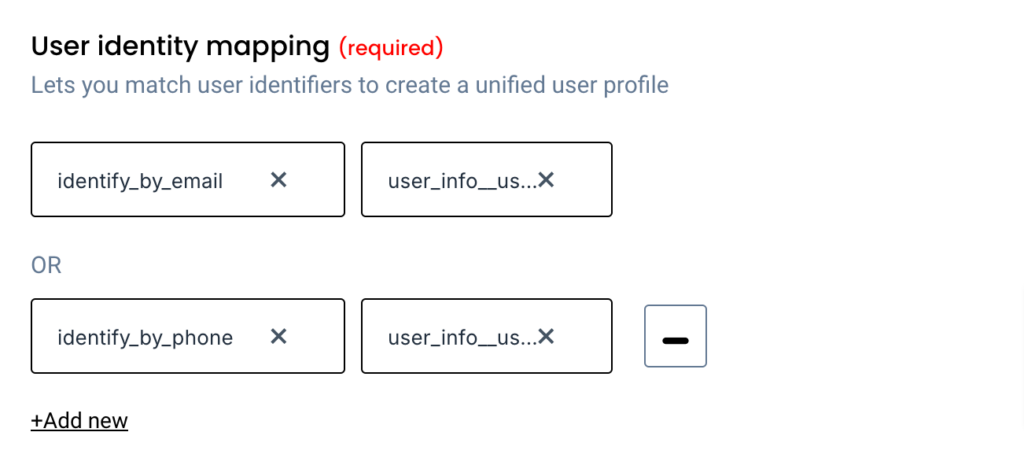
7.6: User identity Mapping:
It is Important to map the following,
Choose identify_by_email and on the right side you’ll find email from the payload data.
Choose identify_by_phone and on the right side you’ll find the phone number from the payload data.
7.7: Click User Traits
It is highly important to map customer_type as custom_value and enter existing_customer as given below.

7.8: Map Event Properties
It is mandatory to map currency, value, transaction_id.
Other values are optional and can be mapped as preferred.
7.9: Map Product and values as shown below
7.10: Save Workflow
Step 8: Validate cl_new_customer_purchase and cl_repeat_purchase in Events Manager
Go to Events Manager and check if cl_new_customer_purchase and cl_repeat_purchase are populating.
Step 9: Go to Destinations
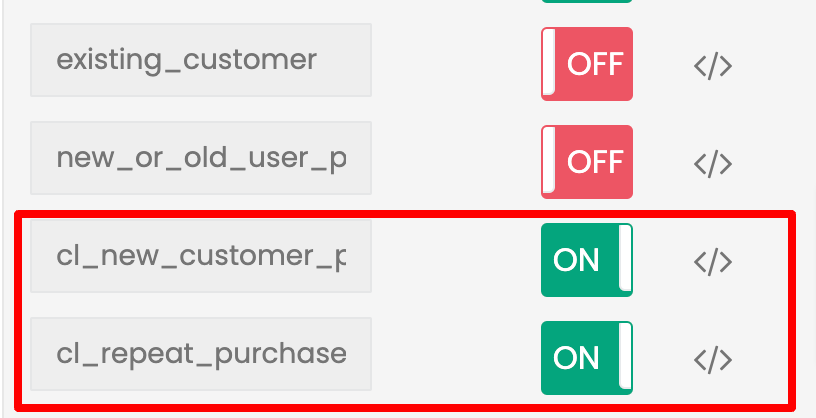
Go to Destinations -> Facebook – > Setup Event Workflow.
Toggle on the cl_new_customer_purchase and cl_repeat_purchase under ‘Set Up Event Workflow’ Menu as shown in the image.
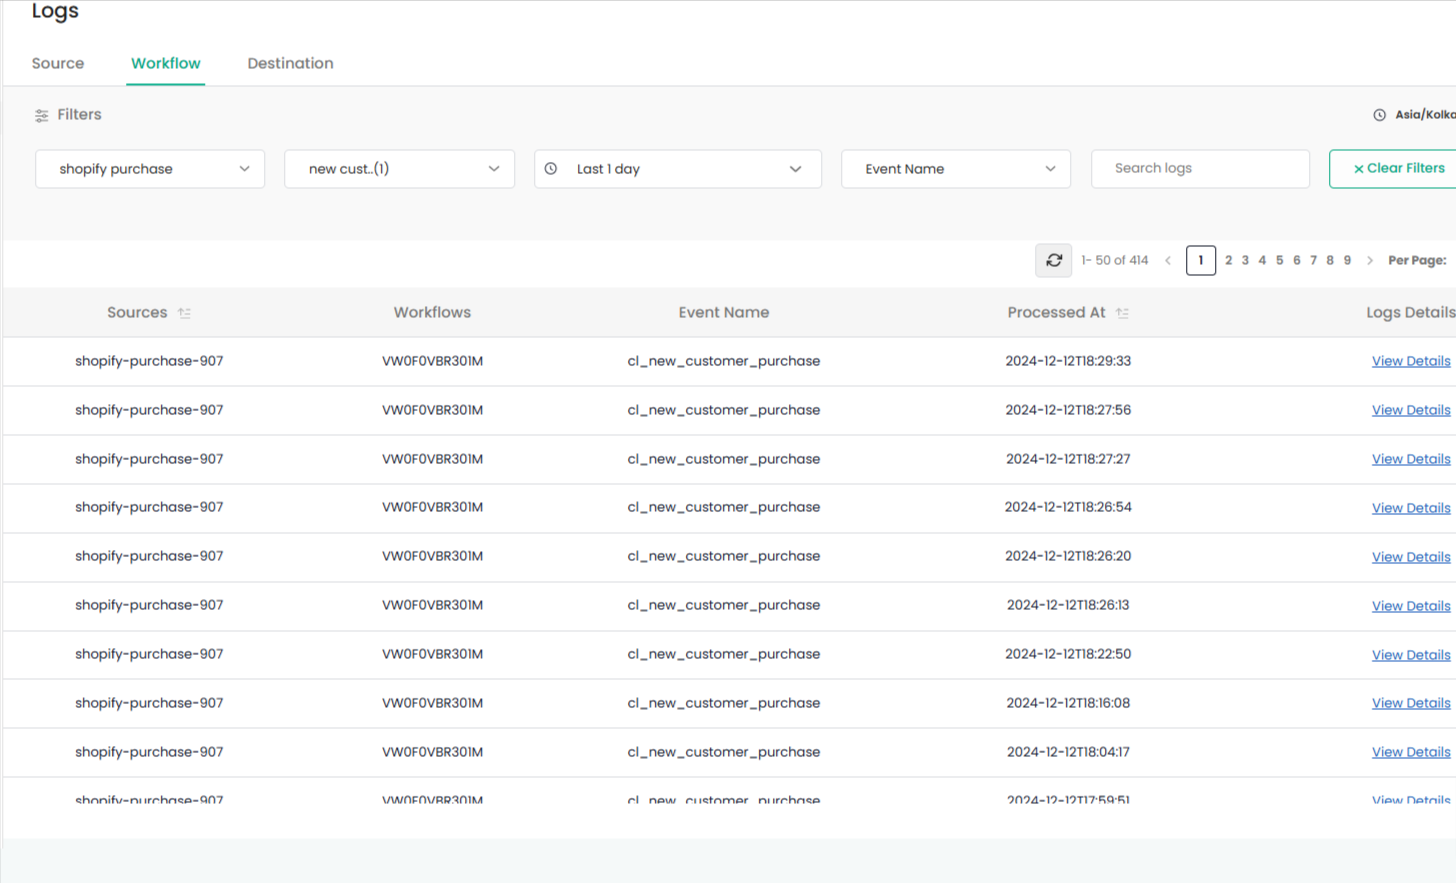
Step 10: Logs Monitoring
Go to Monitoring
Choose destination as Facebook, event name as cl_new_customer_purchase and time range as needed. You’ll find the events that’s being passed to Facebook.
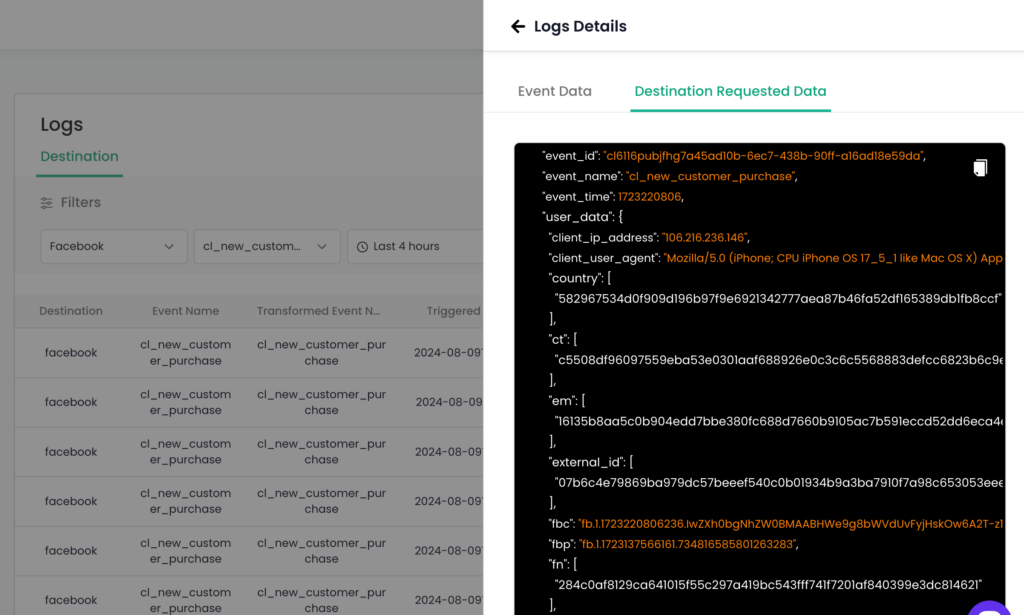
Similarly, follow the above steps to track the cl_repeat_purchase customers. The logs screenshots are attached for reference.